Master Table Saw Use: Expert Tips for Even Cuts
Mastering the art of the table saw allows you to unlock the full potential of this versatile tool and elevate your woodworking skills. Are you ready to become an expert in making clean, precise cuts? Safety is paramount when operating a table saw, and the right blade selection can make all the difference. In this blog post, we’ll explore the different types of table saws, essential safety measures, blade selection and setup, useful accessories, mastering basic cuts, advanced techniques, and the importance of dust collection and cleanliness. Get ready to embark on a journey to become a table saw master and make every cut count!
Short Summary
- Select the right type of table saw for your project and use appropriate blades, accessories, and safety measures.
- Master basic cutting techniques such as rip cuts, crosscuts & miter cuts to progress to more advanced woodworking projects.
- Ensure proper maintenance & dust collection systems are in place for a safe workspace with optimal performance.
Selecting the Right Table Saw

Choosing the right table saw for your needs is a critical first step in mastering the craft. There are four main types of table saws: benchtop, jobsite, contractor, and cabinet. Each type has its unique features and limitations, which will impact the accuracy, power, and portability of your cuts. Understanding the differences between these table saws will help you make an informed decision and set the foundation for success in your woodworking projects.
An essential aspect of using a table saw is selecting the appropriate blade and setting it up correctly. There are three main types of blades: ripping blades for cutting with the grain, crosscut blades for cutting against the grain, and dado blades for making dadoes and rabbets. Proper blade installation and alignment are crucial for achieving the precision and accuracy you desire in your cuts.
Benchtop Table Saws
Benchtop table saws are lightweight and portable, making them an ideal choice for smaller projects and limited workspaces. However, due to their compact size and less powerful motors, benchtop saws lack the accuracy and cutting capacity of their larger counterparts. Typically equipped with a rip fence, on/off switch, table inserts, and extensions, these saws are still capable of making precise cuts with the right setup.
An outfeed support, such as a roller stand or workbench, can provide additional support for longer boards and improve cutting accuracy.
Jobsite Table Saws
Jobsite table saws are a step up from benchtop models in terms of power and cutting capacity. They are more robust and feature a more extensive work surface, making them suitable for larger projects. However, jobsite saws still lack the precision and accuracy of contractor and cabinet table saws.
When using a jobsite table saw, it is essential to apply consistent forward, downward, and inward pressure to the workpiece to minimize the risk of kickback. Utilizing a push stick and ensuring the end of the board is not hanging off the table are critical safety measures to follow.
Contractor Table Saws
Contractor, or hybrid table saws offer more accuracy and power than jobsite models, making them an excellent choice for serious woodworkers. These saws are heavier and less portable, but their larger cutting capacity and open base design provide a more stable cutting platform.
Some contractor saws even feature a rack and pinion telescoping fence system for easy adjustment and a portable design for improved mobility. When using a contractor table saw, ensure the fence is securely locked in place and provide adequate support for the workpiece to maintain stability and make precise cuts.
Cabinet Table Saws
Cabinet table saws are the pinnacle of precision and power in the world of table saws. These saws feature a closed base, more powerful motors, superior-quality fences, and the ability to execute any type of cut. However, they come with a hefty price tag and may require a more significant power source, such as a 220V outlet.
Safety features, such as a closed base for dust containment, a riving knife to prevent kickback, and a blade guard for user protection, make cabinet table saws a top choice for experienced woodworkers seeking the best in cutting performance.
Essential Safety Measures

Operating a table saw requires the utmost attention to safety. According to the National Consumers League, 40,000 individuals require medical attention each year due to table saw-related accidents, resulting in 10 amputations daily. This makes table saws one of the most hazardous tools in a workshop. To mitigate these risks, it is crucial to adhere to essential safety measures, such as wearing personal protective equipment (PPE), properly maintaining and inspecting the saw, and following safe operating procedures.
Table saw accessories can also play a vital role in enhancing safety and accuracy. Miter gauges, rip fences, featherboards, and outfeed tables provide additional support and guidance for making precise cuts while minimizing the risk of injury. Understanding and utilizing these accessories is an essential part of becoming a table saw expert and safely completing your woodworking projects.
Personal Protective Equipment (PPE)
Personal protective equipment (PPE) is crucial for ensuring your safety when operating a table saw. Goggles protect your eyes from flying particles, while ear protection safeguards your hearing from the loud noise generated by the saw.
Although gloves may seem like a logical choice for protecting your hands, they can impede your grip and increase the risk of the saw slipping. Therefore, it is recommended not to wear gloves while using a table saw. Instead, focus on maintaining a secure grip on the workpiece and utilizing safety accessories such as push sticks.
Proper Maintenance and Inspection
Ensuring your table saw is in optimal working condition is a critical aspect of safe operation. Regular maintenance, such as cleaning, lubrication, and alignment, helps to prevent issues that could lead to accidents. Inspection should include checking the condition of the blade guard, anti-kickback pawl teeth, elevation miter gears and threaded shaft, tilt worm gear, and sector gear.
Proper maintenance and inspection not only contribute to safe operation, but also extend the life of your table saw and guarantee the best possible cutting results.
Safe Operating Procedures
Following safe operating procedures is crucial when using a table saw. Keep your hands away from the blade and utilize push sticks when necessary to manipulate the workpiece. Never attempt a freehand cut without any support, as this can lead to inaccurate cuts and potential injuries.
Additionally, ensuring the workpiece is flush with the table and has a straight, even edge against the fence will help to maintain stability and precision during the cut. Adhering to these procedures will minimize the risk of accidents and allow you to make the most of your table saw.
Blade Selection and Setup
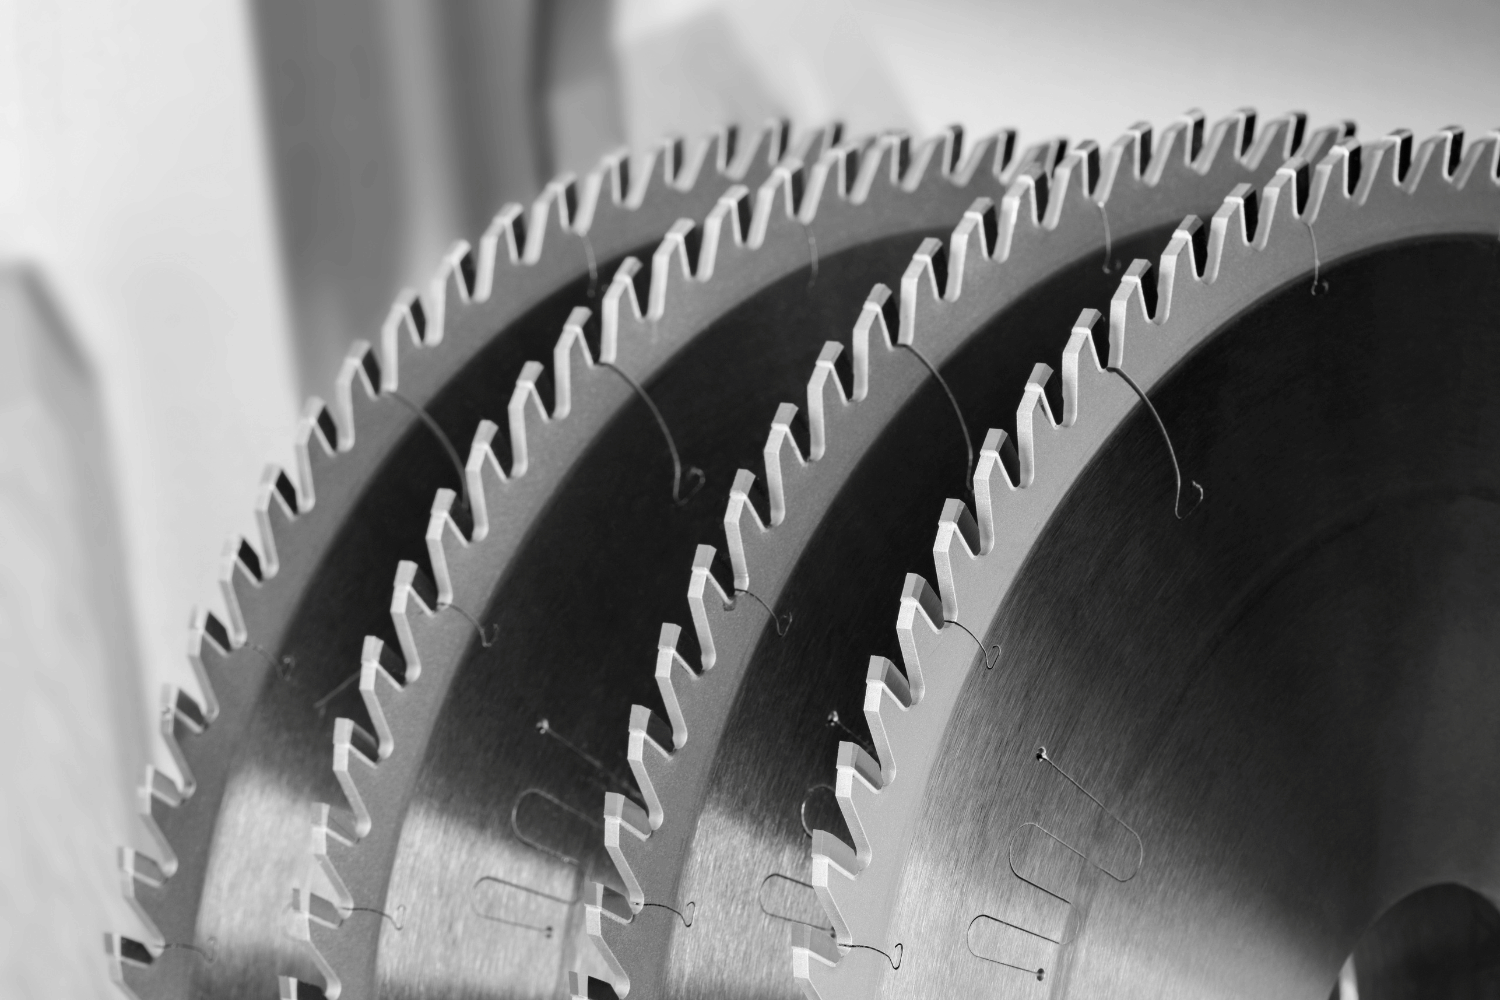
Selecting the appropriate blade for your table saw is integral to achieving clean, precise cuts. Ripping blades are designed to cut with the grain, crosscut blades for cutting against the grain, and dado blades for creating dadoes and rabbets. Each blade type serves a specific purpose and is essential for executing various woodworking tasks. Ensuring the blade is installed and aligned correctly will also contribute to the accuracy and quality of your cuts.
Understanding the different types of blades and their applications is the first step towards mastering the art of table saw use. Proper blade installation and alignment, as well as regular maintenance checks, are crucial for maintaining the precision and efficiency of your table saw. With the right blade selection and setup, you can transform your table saw into a versatile and powerful woodworking tool.
Ripping Blades
Ripping blades are specifically designed to cut through wood with or along the grain. They feature fewer teeth than crosscut blades, a wide gullet, and an aggressively positive angle hook, resulting in a smooth and efficient cut.
When using a ripping blade, it is essential to wear the appropriate personal protective equipment (PPE) and adhere to safe operating procedures to minimize the risk of injury. With the right ripping blade and technique, you can achieve clean, precise cuts with minimal tear-out.
Crosscut Blades
Crosscut blades are designed to produce a smooth cut across the grain of the wood without splintering or tearing. These blades typically have more teeth than rip blades and feature an ATB or Hi-ATB tooth pattern, making them suitable for cutting all types of wood, including plywood, chipboard, hardwood, and softwood.
Utilizing a crosscut blade will ensure a smooth, clean cut, free of splintering or tear-out, and enhance the overall quality of your woodworking projects.
Dado Blades
Dado blades are circular saw blades designed to cut grooves and joints in wood. They consist of two outer scoring blades and multiple chipper blades in between. Dado blades are especially useful for creating dado and rabbet joints, which are commonly used in woodworking projects such as cabinetry and shelving.
While some table saws may not be compatible with dado blades due to safety regulations, alternative methods such as using a full-size, flat-ground rip blade (not thin kerf) can be employed to achieve similar results with multiple passes.
Blade Installation and Alignment
Proper blade installation and alignment are crucial for achieving accurate and precise cuts with your table saw. Begin by setting the blade at a 90-degree angle and aligning it parallel to the saw’s miter slot. Making any necessary adjustments will ensure the blade is set accurately for straight cuts.
To install a blade, ensure the saw is unplugged and secure the blade to the arbor. Regularly verifying the alignment of the blade with an accurate combination square or adjustable square will help maintain the precision of your cuts and guarantee the best possible results.
Table Saw Accessories
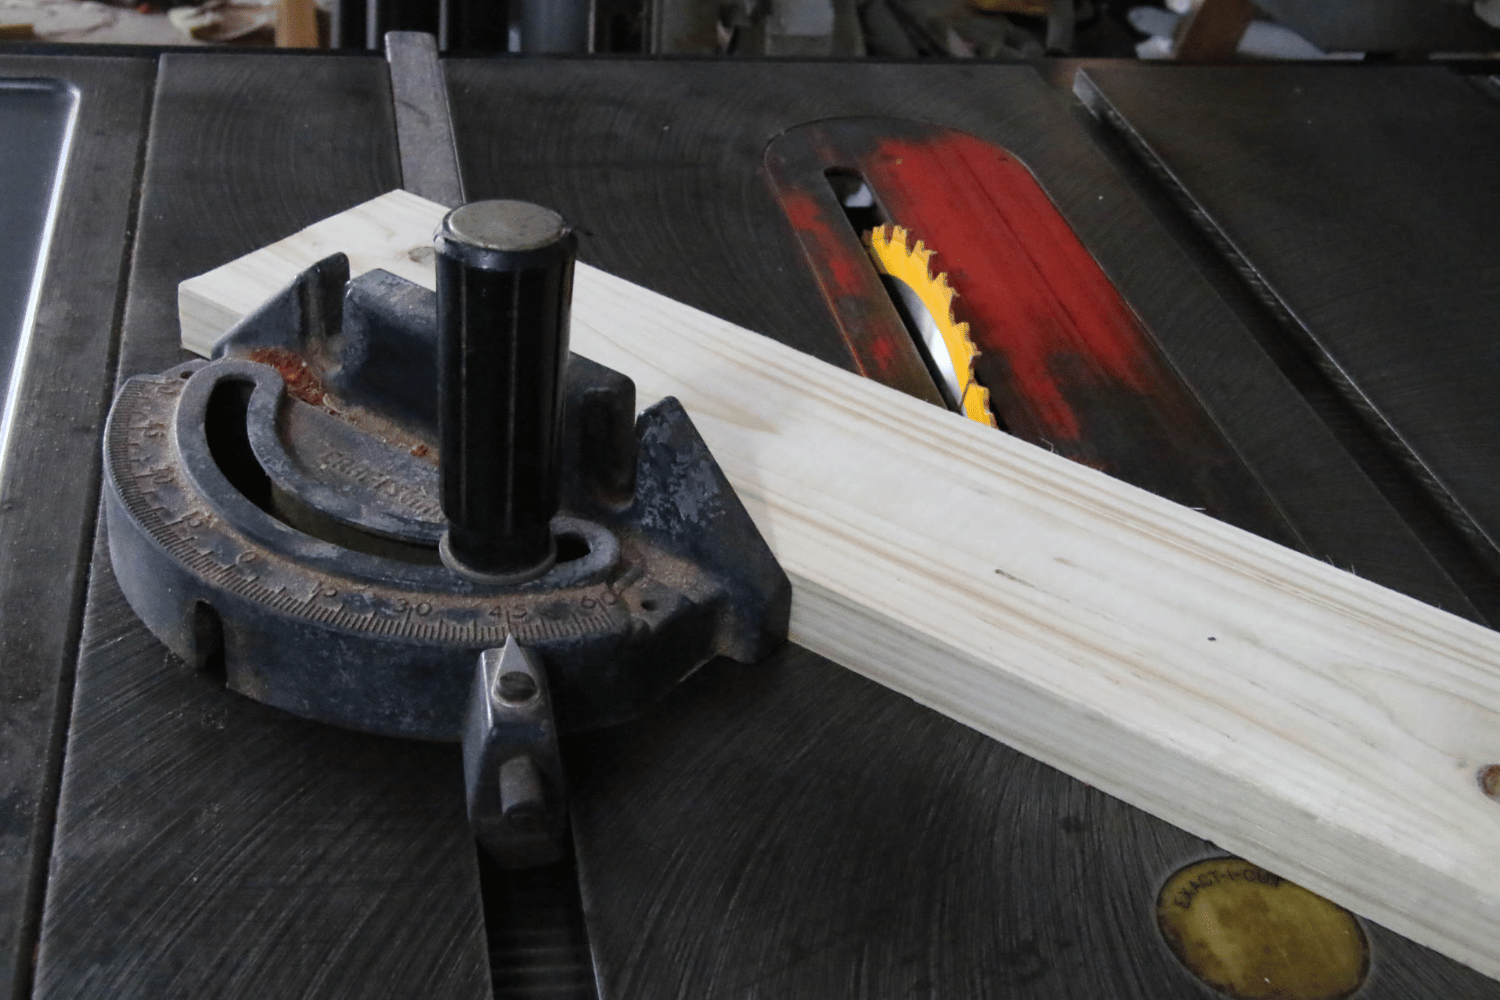
Table saw accessories can make a significant difference in both the safety and accuracy of your cuts. Miter gauges, rip fences, featherboards, and outfeed tables are all valuable additions to your table saw setup, providing additional support and guidance for a variety of cutting tasks. Familiarizing yourself with these accessories and incorporating them into your workflow can help you achieve more accurate and precise cuts while minimizing the risk of injury.
Each table saw accessory serves a specific purpose and can significantly enhance the overall performance of your table saw. By understanding and utilizing these accessories, you can optimize your table saw setup and make the most of your woodworking projects.
Miter Gauges
Miter gauges are essential accessories for making accurate crosscuts and miter cuts with your table saw. They are equipped with a miter bar guide rail, an adjustable head, and a fence, allowing you to easily position and align the workpiece for cutting. Miter gauges also feature positive stops, miter detents, and a protractor head with stainless-steel knobs for precise angle adjustments.
By mastering the use of a miter gauge, you can improve the accuracy and consistency of your cuts, especially when making miter joints where any discrepancies can result in gaps.
Rip Fences
Rip fences are vital accessories for making straight and accurate rip cuts with your table saw. They are attached to fence rails connected to the front and rear edge of the table, allowing for easy adjustment to any width of cut within the saw’s range. A locking mechanism ensures the rip fence remains secure during use, providing a reliable guide for the workpiece as it passes through the blade.
By mastering the use of a rip fence, you can achieve consistently accurate cuts and maintain stability throughout your woodworking projects.
Featherboards
Featherboards are safety devices that provide added support and stability when working with stationary power saws, such as table saws or bandsaws. They exert pressure against the workpiece, keeping it flat against the machine table or fence. Typically constructed of plastic or wood, featherboards feature thin fingers that are cut into an angled end, providing lateral and/or downward pressure.
The use of featherboards can help maintain a consistent position of the workpiece against the fence or table, reducing the risk of kickback and improving the accuracy of the cut.
Outfeed Tables
Outfeed tables are supportive surfaces placed behind the table saw, extending the size of your table saw and providing a convenient and secure passage for large boards and sheets of plywood as they exit the saw. By configuring the outfeed table to the same height as the table saw and ensuring it does not interfere with the fence, you can improve the stability and accuracy of your cuts while reducing the risk of kickback.
Additionally, a well-designed outfeed table can help keep your workspace clean and organized, making it an invaluable addition to your table saw setup.
Mastering Basic Cuts
Mastering basic cuts with your table saw is an essential skill for any woodworker. Rip cuts, crosscuts, and miter cuts are the foundation of many woodworking projects and can be achieved with precision and accuracy when using the right techniques and accessories. By learning how to execute these fundamental cuts, you can enhance the quality of your work and gain the confidence to tackle more complex and intricate projects.
As you progress in your woodworking journey, mastering basic cuts will open the door to more advanced techniques, such as creating dado and rabbet joints, making bevel cuts, and cutting sheet goods. With a solid understanding of these foundational cuts, you can continue to expand your skillset and take on new challenges, becoming a true table saw expert.
Rip Cuts
Rip cuts are made along the grain of the wood, and proper technique is crucial for achieving clean, accurate results. Configuring the blade to the appropriate height and adjusting the table saw’s rip fence to the desired width are essential first steps in preparing for a rip cut.
When pushing the workpiece through the saw blade, maintain a slow and steady rate, keeping it firmly pressed against the fence. Applying consistent forward, downward, and inward pressure will help minimize the risk of kickback and provide a smooth, precise cut.
Crosscuts
Crosscuts are made across the grain of the wood and require a different approach than rip cuts. To make a crosscut with a table saw, set the miter gauge square to the blade, insert it into the miter gauge slot, and use a crosscut sled for added support. It is essential never to use the rip fence when crosscutting, as this can lead to kickback and inaccurate cuts.
By using the proper technique and accessories, you can achieve clean and precise crosscuts with ease.
Miter Cuts
Miter cuts are angled cuts typically used for joining two pieces of wood at a specific angle, such as in a picture frame or crown molding. To make a miter cut, adjust the miter gauge to the desired angle and align the workpiece accordingly. Push the wood through the blade using the miter gauge as a guide, ensuring the workpiece remains firmly against the fence throughout the cut.
By mastering miter cuts, you can create precise and accurate joints for a variety of woodworking projects.
Advanced Techniques

Now that you have mastered basic cuts and are comfortable using your table saw, it’s time to explore more advanced techniques. Dado and rabbet joints, bevel cuts, and cutting sheet goods are all examples of advanced techniques that can elevate your woodworking projects to the next level. By expanding your skillset and learning these techniques, you can take on more complex and intricate projects with confidence, showcasing your expertise as a table saw master.
As you continue to hone your table saw skills and delve into advanced techniques, remember the importance of safety and proper blade selection. Incorporating a variety of accessories, such as miter gauges, rip fences, and featherboards, can help improve the accuracy and precision of your cuts, further enhancing your woodworking prowess. By combining these advanced techniques with a solid foundation in basic cuts, you can tackle any woodworking project with ease and precision.
Dado and Rabbet Joints
Dado and rabbet joints are popular woodworking joints that can be created using a table saw equipped with a dado blade. These types of joints are ideal for creating strong and stable connections, such as in cabinetry and shelving.
To create dado and rabbet joints, install the dado blade according to the manufacturer’s instructions and adjust the blade height and fence position as needed. Multiple passes may be required to achieve the desired width and depth of the joint.
By mastering dado and rabbet joints, you can create strong and stable connections in your woodworking projects.
Bevel Cuts
Bevel cuts are angled cuts made along the edge of a workpiece, often used for creating decorative edges, trim work, or compound angles. To make a bevel cut, adjust the blade angle to the desired degree and ensure the workpiece is securely positioned against the fence or miter gauge.
Push the wood through the blade, maintaining a steady rate, and keeping the workpiece firmly pressed against the fence or miter gauge throughout the cut. With practice, you can achieve precise and accurate bevel cuts, adding a professional touch to your woodworking projects.
Cutting Sheet Goods
Cutting sheet goods, such as plywood or particleboard, can be challenging due to their size and weight. To cut sheet goods with a table saw, use a straight edge guide and a push stick for safety. Position the sheet so that the blade exits on the good face and provides adequate support for both the workpiece and the waste piece.
Although cutting full sheets of plywood on a table saw may not be recommended due to the difficulty of keeping the sheet firmly against the fence, dividing the sheet into smaller pieces and using a table saw for repeatable cuts can yield accurate results.
Dust Collection and Cleanliness
Dust collection and cleanliness are essential aspects of table saw use that should not be overlooked. Proper dust management not only protects your health by reducing exposure to hazardous dust and debris, but also prevents damage to the saw and its components. By incorporating a dust collection system and regularly cleaning and maintaining your table saw, you can ensure its optimal performance and longevity.
There are various dust collection options available for most table saws, including shop vacuums and dust collection systems. Shop vacuums are a popular choice for their powerful motors and large canisters, while dust collection systems provide more comprehensive filtration and extraction capabilities.
Regular cleaning and maintenance of your table saw and dust collection system will help maintain a safe and efficient workspace, allowing you to focus on creating beautiful and precise cuts.
Shop Vacuums
Shop vacuums are versatile and powerful tools for dust collection in your workshop. They are equipped with a powerful motor, robust hose, and large canister for storing dust and debris. Shop vacuums can efficiently remove both liquid and dust particles, making them an essential accessory for maintaining a clean and safe workspace.
When selecting a shop vacuum, consider its durability and mobility to ensure it meets your needs and can withstand the demands of a woodworking environment.
Dust Collection Systems
Dust collection systems are designed to improve air quality in your workshop by collecting and removing harmful dust and debris generated during cutting processes. These systems typically include a blower, dust filter, filter cleaning system, dust receptacle, and dust removal system.
Dust collection systems not only protect your health, but also help to reduce the amount of time spent cleaning up dust and debris in your workspace. Regular inspection and maintenance of your dust collection system will ensure it continues to operate efficiently and effectively.
Regular Cleaning and Maintenance
Performing regular cleaning and maintenance on your table saw is crucial for ensuring its optimal performance and longevity. Daily tasks, such as wiping down the sawdust and inspecting the blade for damage or wear, can help prevent issues that could lead to accidents or damage to the saw.
Monthly cleaning and maintenance, including the removal of sawdust, pitch, and resin buildup inside the cabinet, will also contribute to the overall performance and safety of your table saw. By incorporating regular cleaning and maintenance into your routine, you can keep your table saw in excellent condition and continue to produce precise and accurate cuts.
Final Thoughts
Mastering how to use a table saw is an invaluable skill that can elevate your woodworking projects and unleash the full potential of this versatile tool. From selecting the right table saw and blade to implementing essential safety measures and advanced techniques, the journey to becoming a table saw expert is both rewarding and enriching. By understanding and utilizing the various accessories, mastering basic cuts, and maintaining a clean and safe workspace, you can tackle any woodworking project with confidence and precision. Now it’s time to put your newfound knowledge into action and start creating beautiful, precise cuts that showcase your expertise as a table saw master.