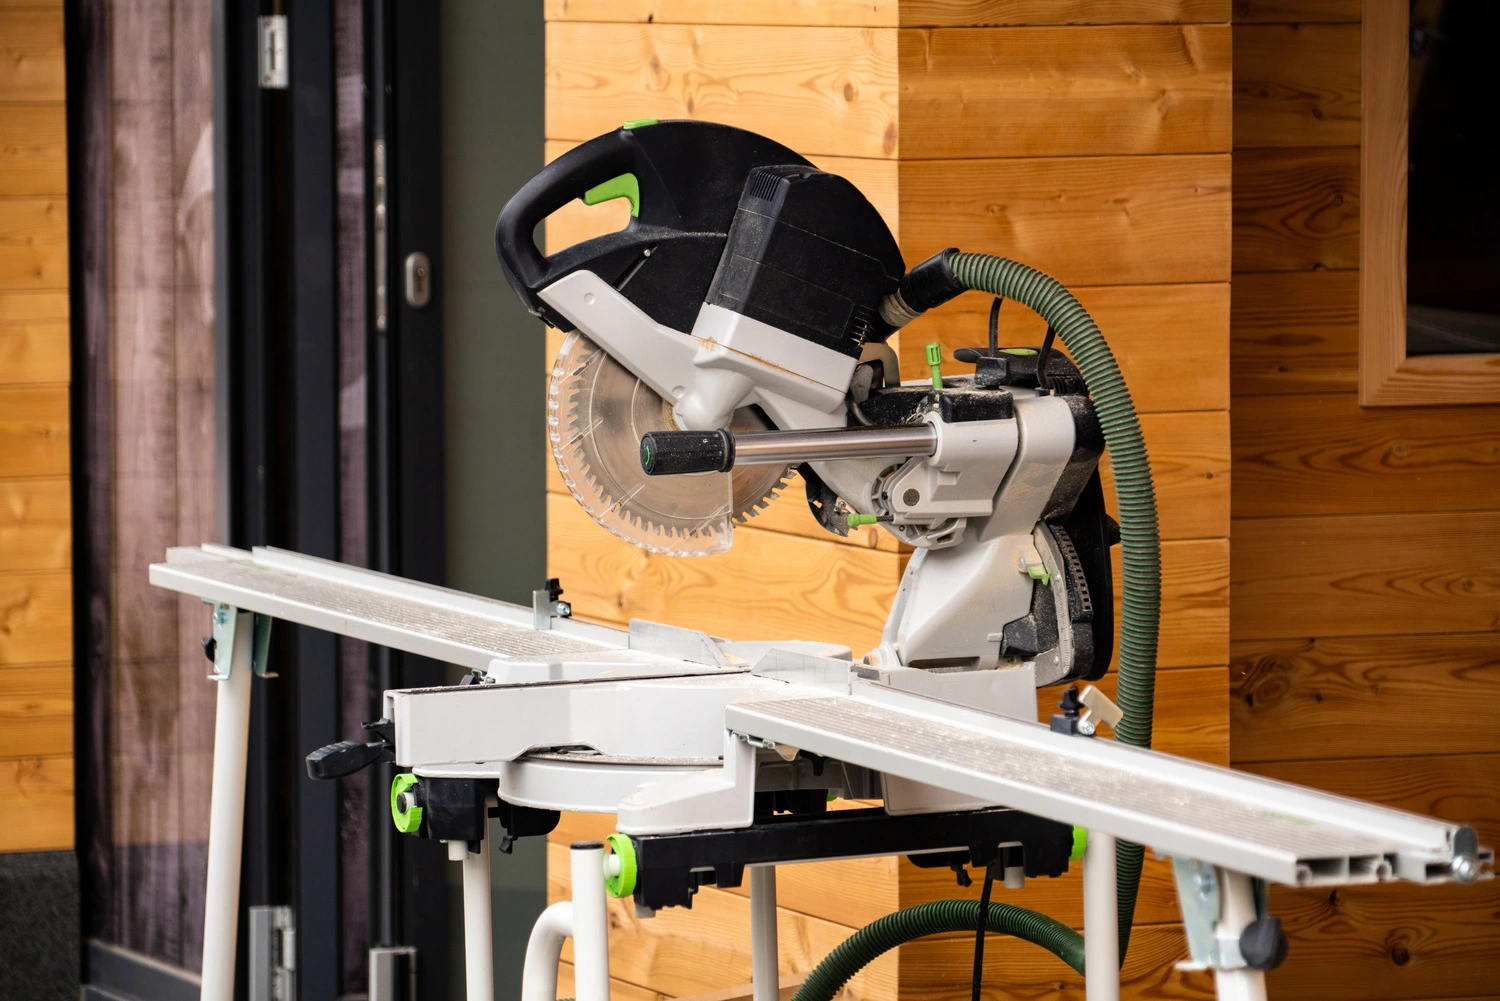
12 Awesome DIY Projects You Can Do With a Miter Saw
Ever thought about what you could craft with a miter saw? You’re in the right place! We’ve compiled 12 fantastic DIY projects that’ll not only hone your skills but also add a personal touch to your home or garden.
Whether it’s a stylish picture frame or a handy workbench, you’ll find it here. Ready to roll up your sleeves and start creating? Let’s dive in!
Key Takeaways
- Building picture frames and boxes: A miter saw is essential for cutting precise 45-degree angles and creating clean and professional-looking frames and boxes.
- Finishing techniques: Whether it’s staining, painting, or leaving the wood natural, mastering frame and box finishing techniques can enhance the overall appearance of the project.
- Consideration of materials and options: When working on home decor projects, such as fireplace mantels or plant stands, it’s important to choose the right materials, such as wood, stone, or metal, and consider options like glass, mats, or additional shelves.
- Personalization and creativity: DIY projects with a miter saw offer opportunities for personalization and creativity, whether it’s through painting, engraving, or adding unique embellishments to furniture pieces like toy chests or coffee tables.

Building a Classic Picture Frame
With your miter saw in hand, you can easily build a classic picture frame that’ll add a unique touch to your home decor. It’s not just about cutting the perfect 45-degree angles, it’s also about mastering frame finishing techniques. Your choices are vast: staining, painting, or leaving the wood natural to showcase its grain.
You’ll also need to consider the glass and the mat to create a professional look.
Next, think about artwork display options. Do you want a stand, a hanging wire, or perhaps a leaning display? Each option will require different hardware and techniques.
Crafting a Wooden Box With Sliding Lid
You’re about to learn how to craft a wooden box with a sliding lid using your miter saw, and it’s easier than you might think. Start by cutting your wood to the correct dimensions, then use your saw to make precise miter cuts.
Next, assemble the box using a strong adhesive and some clamps. While it’s drying, you can move onto the lid. Cut a piece of wood that fits perfectly on top of your box.
Now comes the fun part: box finishing techniques. Sand the box and lid until they’re smooth, then add a finish for a beautiful sheen.
Lid fitting tricks are essential here. Create a groove in the box’s sides for the lid to slide into. With patience and precision, you’ll have a unique, functional wooden box.

Constructing a Floating Corner Shelf
Next, let’s dive into how you can construct a floating corner shelf using your miter saw. This project not only enhances your corner shelf aesthetics but also gives you practical storage space. Here are some shelf installation tips to guide you:
- Measure your desired shelf space accurately and cut the wood using your miter saw. Precision is key here.
- Sand the edges for a smooth, clean finish.
- Apply a finish of your choice to the wood. This enhances the wood’s natural grain and adds a protective layer.
- Install using sturdy brackets and ensure it’s level.
Remember, the right tools make all the difference. Your miter saw is an essential piece of this DIY puzzle, providing accuracy and efficiency.
Creating a Custom Fireplace Mantel
Now, let’s move on to creating a custom fireplace mantel, a project that can truly transform your living space.
You’ll need to start with a good plan for your mantel design, considering the right measurements and materials.
Then, we’ll tackle the specific techniques with the miter saw, ensuring you get those clean, precise cuts for a professional finish.
Mantel Design Planning
Before diving into the actual construction, it’s essential that you spend ample time on the design planning phase of creating your custom fireplace mantel. This involves taking precise mantel measurements and considering design aesthetics that will complement your space.
Here are some steps to guide you:
- Measure the space: The width, height, and depth of your mantel should be proportional to your room.
- Choose a design: Consider styles that match your home’s decor.
- Select the material: Wood, stone, and metal are popular choices.
- Plan the finish: This could range from paint to varnish, depending on your aesthetic preference.
With careful planning, your DIY fireplace mantel won’t only be a functional piece but also a stunning focal point in your room.
Miter Saw Techniques
You’ve got your design in place, and you’re ready to use your miter saw to start creating your custom fireplace mantel. Let’s dive into the miter saw techniques necessary for this DIY project.
Your miter saw excels at angled cutting precision, a critical skill required for the intricate cuts that will give your mantel its unique character. Start with the bevel cut basics, adjusting the saw blade’s angle for perfect bevels. Ensure that the blade is sharp and clean for optimal cutting.
Slide the wood smoothly and hold it firmly against the fence while cutting. Remember to maintain a safe distance from the blade. With practice, you’ll master these techniques, and your miter saw will become an invaluable tool in your DIY arsenal.
Assembling a Portable Workbench
Now let’s move on to assembling a portable workbench, a useful addition to your DIY toolkit.
We’ll start by discussing how to choose the right materials for durability and ease of use.
Then, we’ll walk you through the assembly process step-by-step, keeping in mind necessary safety precautions to ensure you build your workbench not only efficiently but also safely.
Choosing Right Materials
When assembling a portable workbench, it’s crucial to pick the right materials for your project. You must consider material sustainability and perform a cost-effectiveness analysis to ensure you’re making a wise investment.
Here are some factors to consider:
- Material Durability: Pick materials that can withstand wear and tear. MDF or plywood are great choices for the workbench top.
- Cost Effectiveness: Your selected materials should provide value for money. Think about their lifespan and the quality of work they’ll enable.
- Material Sustainability: Opt for materials that are eco-friendly. Reclaimed or recycled wood is a good option.
- Flexibility: Choose materials that allow for adjustments or extensions in the future.
Workbench Assembly Steps
So, you’re ready to assemble your portable workbench, and it’s important to follow the assembly steps carefully to ensure a sturdy and durable result.
Begin by laying out all the parts and hardware. Attach the legs, ensuring they’re secure. Next, mount the work surface to the legs. Check all your connections are tight, as stability is key.
Now, consider workbench lighting options. Good lighting is essential for precision work. Try installing an adjustable LED lamp for flexibility.
Lastly, tackle tool storage solutions. Mount magnetic strips for metal tools and consider installing a pegboard for larger items. Built-in drawers can store smaller items.
With careful assembly and thoughtful design, your portable workbench will be a DIY dream come true.
Safety Precautions
Before you start assembling your portable workbench, it’s crucial that you’re aware of some safety precautions to prevent any accidents. Here’s a list of some of the imperative measures you need to follow:
- Proper clothing: Avoid loose-fitting attire. It could get caught in the saw. Use gloves to protect your hands and safety goggles to shield your eyes from dust and debris.
- Blade maintenance: Always ensure that your saw blade is sharp and clean. A dull or dirty blade can cause kickback, leading to accidents.
- Stability: Make sure your workbench is stable before you start. Wobbly surfaces can lead to errors or mishaps.
- Power off: Always switch off and unplug your miter saw when not in use or when changing the blade.

Making a Stylish Bookshelf
With a miter saw in your hands and a vision in your mind, you’ll be able to turn a simple pile of wood into a stylish bookshelf. Your design aesthetics should guide you, from the height and width of the shelves to the overall style.
Ensure to incorporate bookshelf lighting, as it’s not only functional, but it also elevates the look of your bookshelf. Drill holes at strategic points for the lights, then use your miter saw to cut the wood pieces to perfection.
Remember, your miter saw is essential for accurate angled cuts, giving your bookshelf a professional finish. Once assembled, sand the bookshelf for a smooth surface, then stain or paint for a polished look.
This DIY project will surely showcase your mastery and creativity.
Building a Decorative Birdhouse
You’ll find that crafting a decorative birdhouse using a miter saw can be a fun and rewarding project. With careful planning and attention to detail, you can create a cozy home for your avian inhabitants.
Here is a simple guide for you:
- Sketch your design and determine the size of your birdhouse. Remember, it should be big enough to accommodate your feathered friends, yet small enough for easy maintenance.
- Use your miter saw to cut the pieces as per your design. Accuracy is crucial here to ensure a snug fit.
- Assemble the pieces. Ensure the roof is detachable for easy cleaning.
- Birdhouse painting time. Choose non-toxic paint to make your birdhouse attractive yet safe.
With these steps, you’re on your way to mastery in DIY projects!
Designing a Plant Stand for Your Patio
Now, let’s pivot to a different project, and you’re going to design a plant stand for your patio using a miter saw.
Consider your patio aesthetics first. What style and height will suit your space best? Once you’ve decided, start by cutting four legs and a square top. Ensure all pieces have identical lengths for stability.
Your miter saw will make precise cuts, guaranteeing your plant stand is level. You’ll want to add shelves to accommodate a plant variety. Cut additional planks, ensuring they fit snugly between the legs. Secure all pieces together with screws.
Lastly, sand and finish the stand to protect against weather damage. Voila, you’ve created a functional, stylish addition to your patio decor.
Constructing a Wooden Toy Chest
Building a wooden toy chest is a fantastic project where your miter saw can really shine. You’ll be creating something practical, durable, and potentially even a family heirloom. Here’s how:
- Start by measuring and cutting your wood. Your miter saw will ensure precision cuts for a perfect fit.
- Next, assemble the box. Don’t forget to leave a gap for the chest lock installation. This will keep the toys secure.
- Sand down any rough edges. This will make the toy chest safe for little hands.,
- Finally, add your touch with toy chest personalization. Paint it, stencil it, or engrave it – the choice is yours.
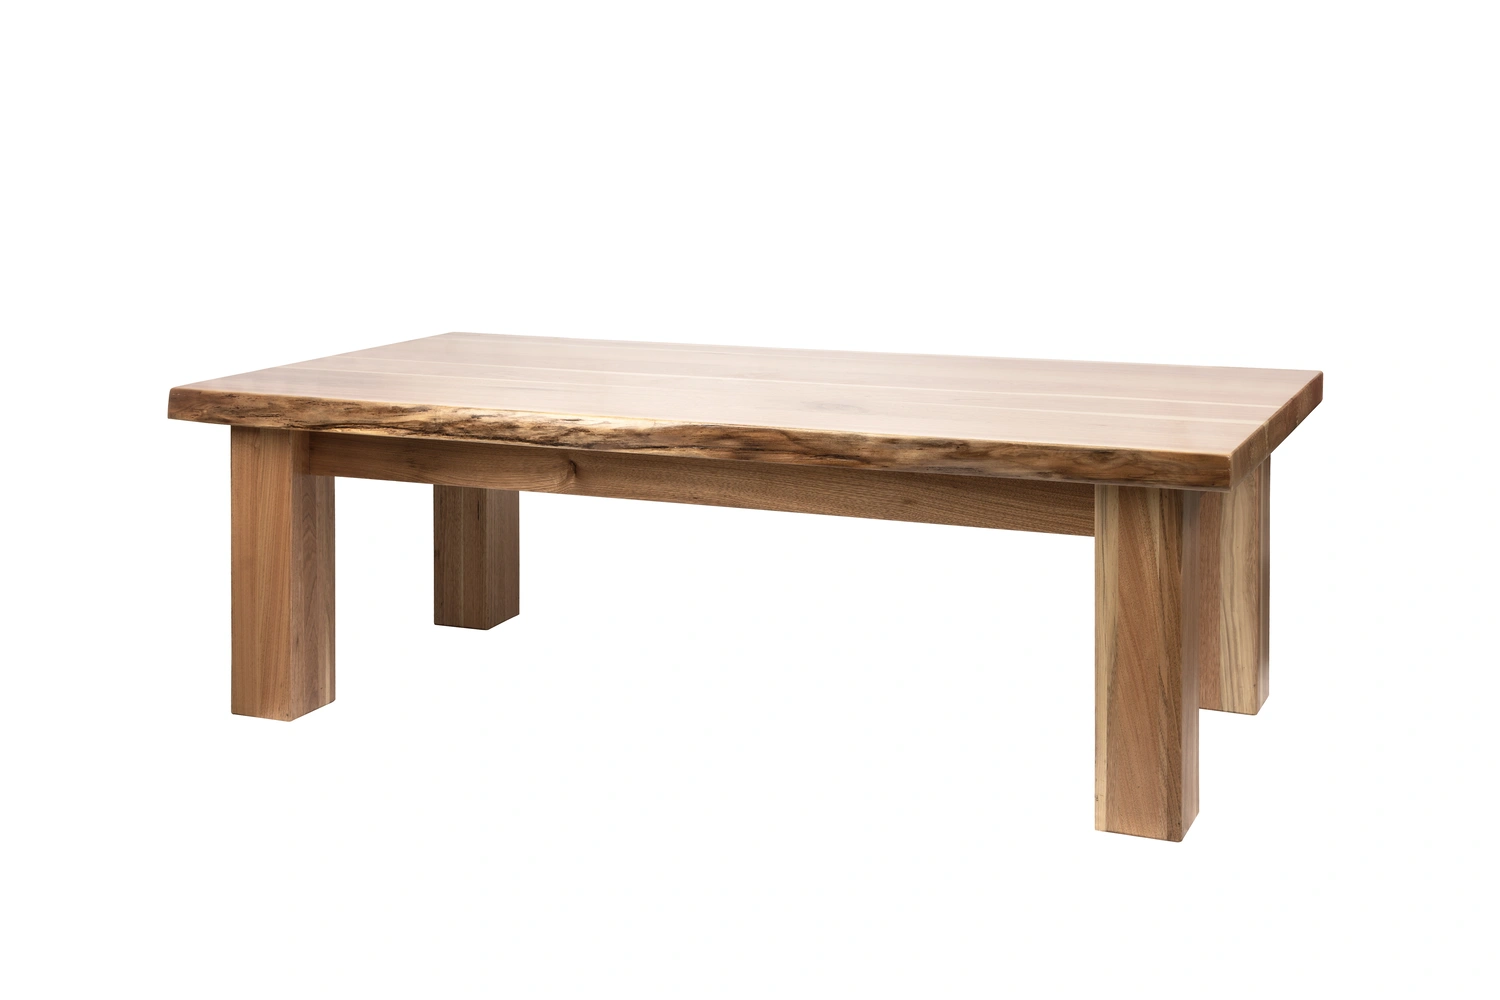
Crafting a Custom Coffee Table
Harnessing the power of creativity, you’re going to craft a custom coffee table that’s both functional and reflective of your unique style.
Using your miter saw, carefully cut and assemble the wooden pieces to create the frame. Don’t forget, coffee table maintenance is crucial to prolong its lifespan; regularly dusting and treating the wood will keep it looking fresh.
Now, onto the unique table embellishments. This is where your style comes to life. You could engrave designs into the table’s surface or attach metal accents for a rustic look. Remember, there’s no right or wrong here, only what resonates with you.
Once you’re done with the embellishments, finish off with a sealant to protect your masterpiece. You’ve now created a table that’s more than furniture—it’s a reflection of you.
Building a Decorative Garden Bench
Armed with your miter saw, you’re about to embark on creating a decorative garden bench that’ll be the envy of your neighbors. This project not only enhances garden aesthetics but also offers a practical place to sit and enjoy your surroundings.
To achieve this, here are the steps you’ll need to follow:
- Choose your wood carefully: Opt for a durable material that can withstand the elements.
- Craft the bench sections: Use your miter saw to create precise cuts for a professional finish.
- Assemble the bench: Join the pieces together, taking care to ensure stability.
- Apply a finish: This is key for bench maintenance, protecting your creation from weather damage.
With your skill and the right tools, you’ll create a masterpiece.
Making a Modern Coat Rack
While you’re still on a roll with your miter saw, let’s move on to creating a chic, modern coat rack that’s as practical as it’s stylish.
The first step is rack positioning. Find a wall space that’s accessible yet uncluttered. You’ll want to mount your rack at a height that’s convenient for all users.
Next, consider coat hanger styles. Choose a design that complements your home decor – perhaps sleek, brushed metal hooks for a minimalist vibe or ornate wooden pegs for a rustic effect.
Use your miter saw to cut the rack base to your desired length, then attach your hangers with care and precision. You’re crafting not just a storage solution, but a functional piece of art.
Frequently Asked Questions
Can a Miter Saw Be Used to Cut Metal for DIY Projects?
Absolutely, you can use a miter saw to cut metal for DIY projects. Just ensure metal types compatibility and apply appropriate cutting techniques. Don’t forget, always use a blade designed for metal cutting.
How Do I Maintain and Clean My Miter Saw to Ensure Its Longevity?
To maintain your miter saw’s longevity, regularly replace the blade and use effective dust collection methods. Wipe it down after use, lubricate moving parts, and always keep the blade sharp and rust-free.
What Safety Precautions Should I Take When Using a Miter Saw for DIY Projects?
When using a miter saw, always wear Personal Protective Equipment like goggles and gloves. Ensure you’ve had adequate Miter Saw Training. Don’t rush, always double-check settings, and keep your workspace clean and organized.
How Do I Choose the Right Blade for My Miter Saw Based on the Material I Am Cutting?
Choosing the right blade for your miter saw depends on the material you’re cutting. Consult a blade selection guide and opt for material specific blades. This ensures precise, efficient cuts every time.
Can I Use a Miter Saw to Carve Intricate Designs Into Wood?
While you can’t carve intricate designs directly with a miter saw, it’s crucial for initial cuts. Proper blade selection and design techniques are key. You’ll need other tools for detailed carving.