13 Proven Hammer Drill Techniques You Need to Know
A significant 70% of those in the building industry believe that being good at drilling into concrete is key for a project’s success. However, many still need to learn the best ways to do this.
When you’re surrounded by dust and rubble, you know that your hammer drill is what helps you move forward in your work. It’s important to pick the right drill bits, set the correct speed for drilling, and use the right amount of force. But what if you could get even better at this?
Imagine improving how you hold the drill, learning new skills, and finding ways to work faster and keep your tools in good shape for longer. Instead of just using a lot of force, you can learn the right techniques and knowledge for the job. If you follow my guidance through these 13 expert techniques, you’ll improve greatly. You’ll be able to handle the hardest concrete blocks with ease.
Let’s break it down:
- Choose the correct drill bit: Pick a bit that’s made for concrete – like a carbide-tipped masonry bit.
- Start with a low speed: Begin drilling slowly to prevent the bit from overheating and to create a precise hole.
- Apply steady pressure: Push the drill with a consistent force for the best results.
- Use a hammer drill setting: This setting is specifically designed to tackle concrete.
- Keep the bit cool: Spraying a little water on the drill bit can help it stay cool and last longer.
- Drilling at the right angle: Hold the drill at a 90-degree angle to the concrete for a straight hole.
- Don’t force it: If the drill stops making progress, pull it out, clear the dust, and try again.
- Create a guide hole: Start with a smaller drill bit to create a guide hole, then switch to the larger size.
- Manage dust: Use a dust extraction attachment or vacuum to keep the air and your work area clean.
- Maintain your tools: Clean and check your drill bits regularly to ensure they’re sharp and effective.
- Alternate drilling and cooling: Drill for a short time, then pause to allow the bit to cool.
- Use the right extension cord: Ensure your extension cord can handle the drill’s power needs to avoid overheating.
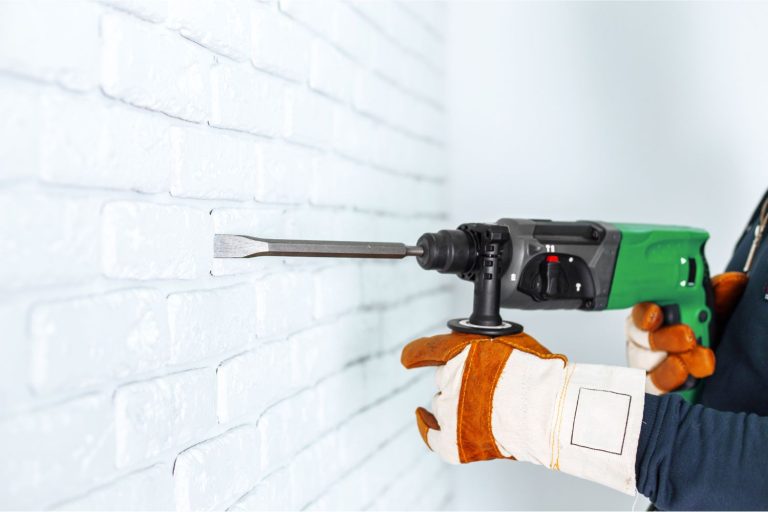
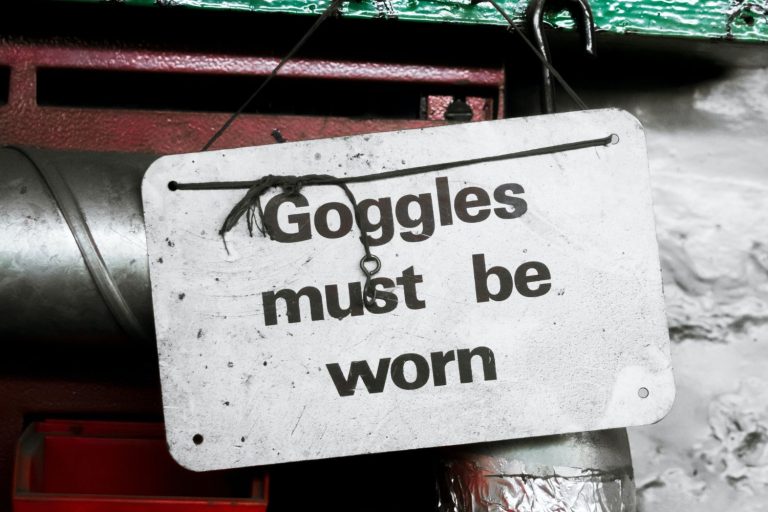
- Practice safety: Always wear protective gear, such as goggles and gloves.
By using these techniques, you’ll see that drilling into concrete doesn’t have to be a tough battle. With the right approach and tools, you can work smarter and achieve better results in your construction projects.
Understanding Hammer Drills
To drill into concrete effectively with a hammer drill, it’s important to know how it works and how to use it properly. A hammer drill works by spinning the drill bit and hitting the concrete at the same time, which breaks up the concrete as the bit moves through it. Make sure you use a strong, carbide-tipped bit made for drilling into masonry. It should fit tightly in the drill to avoid slipping.
Hold the drill firmly and straight against the surface to make sure it works well. Press down with a steady hand, but let the drill do the hard work—you don’t need to push too hard. Pushing too hard can make the bit too hot and less effective. Every so often, pull the bit out to remove any dust or debris. This keeps the bit sharp and stops it from getting stuck.
For example, when drilling holes to install a wall-mounted TV bracket into a concrete wall, use a masonry bit recommended by the drill manufacturer for the specific size you need. This will help ensure a clean, precise hole for secure mounting.
Choosing Drill Bits
When choosing a drill bit for concrete blocks, it’s important to think about how hard the concrete is. This will help you pick the right type of drill bit. Make sure to choose a drill bit that’s the correct size for the anchor or screw you want to use. This is because the size of the hole you drill needs to match the size of the anchor or screw to ensure a tight fit.
The shape of the drill bit’s tip is also key. A well-angled tip can drill more effectively, which means it can make the job easier and the drill bit will last longer.
For example, if you’re working with relatively soft concrete blocks, a standard masonry bit made of high-speed steel might be enough. But for harder concrete, you’d want to use a bit with a carbide or diamond tip to cut through the material more easily. If you’re installing a 1/4-inch anchor, you should use a 1/4-inch drill bit to create a hole that’s just the right size.
Remember, when you’re drilling into concrete, a bit with a 135-degree tip angle is often recommended because it’s designed to penetrate tough materials efficiently. When you start drilling, do so at a slow speed to keep the bit from overheating, which can also help extend its life.
Selecting the Right Material
Choosing the right drill bit for concrete is important for both efficiency and tool lifespan. For tough concrete, use a carbide-tipped drill bit. These bits are strong and stay sharp because the carbide tip can handle the roughness of concrete.
It’s also a good idea to pick a bit with a spiral shape. This helps get rid of the concrete dust as you drill and cuts down on heat and wear. This means your bit won’t break as easily and your drill won’t have to work as hard.
When drilling into concrete, using a high-quality bit is as important as using the right technique. For example, a Bosch HCFC2084 1/2-Inch by 10-Inch by 12-Inch SDS-plus X5L Drill Bit is a good choice because it’s designed for durability and efficient drilling.
Bit Size Considerations
When drilling into concrete, it’s important to pick the right size drill bit. It should be the same size as the hole you need for your anchor or screw. Often, it’s better to choose a bit that’s a tiny bit bigger to make sure the anchor fits well, even if the hole gets a bit wider as you drill. If you’re putting in something that’s 1/2 inch wide, your drill bit should be just a little wider than that.
The drill bit should also be long enough. It needs to go deeper into the concrete than the hole you want by at least 1/4 inch. This helps you put the anchor in all the way without it hitting the bottom of the hole.
For deep holes, the part of the bit called the flute, which is the groove that lets the dust out, should be long. This helps clear out the concrete dust as you drill, which stops the bit from getting stuck or too hot. That way, your drill bit will work better and last longer.
For example, if you’re working with 4-inch deep concrete, use a bit with enough flute length to keep the dust moving out of the hole. A bit with a 6-inch flute length would be a good choice, as it gives you room to clear out the dust and helps prevent the drill from jamming.
Remember to drill carefully and take your time. This makes sure your bit doesn’t wear out too fast and you get a clean, precise hole for your project.
Understanding Tip Geometry
When you’re picking out a drill bit to tackle concrete, the shape of the tip is super important because it affects how easily the bit can drill through tough stuff. You should go for a bit that has a tip made of carbide or diamond since these are really strong and can cut through masonry well. It’s best to use a bit with a tip angle of 135 degrees for concrete. This helps the bit drill into the concrete smoothly and start off the hole neatly without sliding around.
Bits made for concrete usually have a flatter end which helps to break up the concrete better because of its gritty texture.
The design of the grooves, or flutes, on the bit is also key. They need to clear out the concrete dust quickly to keep the bit sharp. The twist of the flutes, known as the helix angle, should be just right to cut through the concrete effectively and get rid of the debris at a good pace.
Understanding this stuff can really make a difference in how well you can drill into concrete. For example, using a Bosch HCFC2084 1/2-Inch by 10-Inch SDS-plus X5L Drill Bit can give you a great experience because it’s designed with all these factors in mind.
Adjusting Drilling Speed
To drill through concrete blocks effectively, it’s important to use your hammer drill at the right speed. Starting slow helps you drill accurately without slipping. As you drill deeper, you can go faster to keep the drill bit working well. Keep an eye on the drilling; if you see a lot of dust or if the drill isn’t cutting as well, change the speed. For tough concrete, go slower to prevent damaging the drill bit. For softer materials, you can speed up. The key is to notice how the concrete reacts and adjust the drill speed to match. This will help you drill correctly and keep your drill bit in good shape.
If you’re drilling and the bit gets stuck or you’re making a lot of dust, it’s a sign to change your speed. It’s important because the right speed means less wear on your drill bit and avoids overheating that can break the bit. For example, if you’re using a Bosch HC2051 5/16-Inch by 6-Inch SDS-plus Bulldog Rotary Hammer Bit, start at a low RPM. Then, as you drill into the concrete, you can gradually increase the speed. This approach helps the bit last longer and ensures you drill the hole accurately.
Applying Drill Pressure
When using a hammer drill to get through concrete, it’s really important to use the right amount of pressure. You need to push hard enough so the drill bit can break up the concrete, but if you push too hard, you might wear out the bit too fast or even break it.
Begin with a gentle push and slowly add more pressure until the drill cuts through the concrete smoothly without making the motor work too hard.
Keep an eye on how the drill is doing and listen to the sound it makes. If the sound changes, it might be time to change how hard you’re pushing. If you don’t push hard enough, the drill won’t do much, but if you push too hard, you could mess up both the drill bit and the concrete you’re working on.
The key is to find the sweet spot where the drill works really well.
For example, imagine you’re putting up shelves and you need to drill holes in a concrete wall for the supports. You’d start by pressing lightly, then increase the pressure until the drill starts to move through the concrete easily, without forcing it. That’s how you know you’re using the drill correctly.
If you’re not sure which drill bit to use, a carbide-tipped bit is often recommended for concrete to help avoid wear and tear.
Perfecting Drill Angle
To drill into concrete effectively, you need to hold your hammer drill straight up and down, making a 90-degree angle with the surface. This is important because it helps the drill work better and stops the drill bit from slipping off the surface. If you don’t drill straight, you mightn’t only mess up the hole you’re trying to make, but you could also wear out your drill bit faster.
To make sure you’re drilling at the right angle, you can use a tool called a drill guide, or you can check the angle with a tool called a spirit level before you start drilling. Once you begin, keep the pressure and angle steady. Changing the angle while you’re drilling could ruin the hole and might even break the concrete you’re working on. Keep practicing this method, and you’ll get really good at drilling into concrete.
When you’re setting up, consider using a drill guide like the Wolfcraft Drill Guide Attachment. It’s a handy tool that helps you keep the drill at the perfect angle. Always check your work as you go, and with a bit of focus, your drilling will be spot on.
Gauging Hole Depth
When you’re drilling into concrete, it’s important to measure the hole depth accurately. This makes sure the structure stays safe and the anchor fits right. Start by checking the technical details for the anchor you’re using, which will tell you how deep to drill, considering space for any extra material pushed out when you put the anchor in.
To keep the depth the same for every hole, mark your drill bit with tape or use a drill bit stop. Since concrete is hard and can trap debris in the hole, you should include extra space for that. After drilling, always use a depth gauge to check that you’ve drilled the right depth.
Here are some tips to make it easier:
- Use clear language: Mark your drill bit to match the anchor’s instructions.
- Avoid clichés: Instead of saying ‘drill to the desired depth,’ specify the exact depth needed.
- Explain the importance: Accurate depth helps the anchor hold properly.
- Make it flow: First, get the anchor’s depth requirements, then prepare your drill bit, and finally, confirm with a depth gauge.
- Active voice: You must check the depth after drilling.
- Give examples: If the specs say 4 inches deep, put a piece of tape 4 inches from the drill bit tip.
- Correct errors: Ensure you’ve written ‘depth gauge’ instead of ‘depth gaguge.’
- Be conversational: Imagine explaining the process to a friend.
- Add rich details: Mention that drill stops are an alternative to tape for consistent hole depth.
Cleaning Drilled Holes
When you drill into concrete, it’s important to remove all the leftover dust and bits to make sure whatever you’re attaching stays put. To do this, you need to clean out the hole really well. If the sides of the hole aren’t clean, your anchor mightn’t hold as tightly as it should.
For example, after drilling, you can use a can of compressed air to blow out the debris. This is a simple way to get rid of the dust. You could also use a nylon brush to scrub the sides of the hole, which helps the anchor grip better. And if you’re putting in something that really needs to stay put, like a heavy shelf, you might want to use a vacuum cleaner with a nozzle attachment to suck up all the tiny particles.
These steps help make sure your anchor has a strong hold in the concrete, which is really important for safety.
Remove Debris Effectively
To make sure the holes you drill into concrete blocks are clean and secure, it’s important to get rid of all the leftover bits of concrete. This is because any leftover debris can weaken the bond if you’re planning to use adhesives or put in anchors. Here’s a simple method to do it properly:
First, grab a can of compressed air and spray inside the hole. This will blow out most of the dust and small bits. It’s a quick way to start the cleaning process.
Then, take a nylon brush – they’re pretty easy to find at any hardware store – and push it into the hole. Twist it around a few times. This helps to scrape off any bits that are stuck to the sides of the hole which the air didn’t get.
After you’ve loosened up this extra dirt, use the compressed air again to get rid of it. Now you should have a clean hole that’s ready for whatever you need to do next.
It’s worth taking the time to do these steps right to make sure your work is solid. This isn’t just about making the hole look clean; it’s about making sure it’s going to hold up over time.
Hole Purging Techniques
To create a reliable fix in drilled holes, it’s essential to clean them properly. This cleaning step is more than just tidiness; it’s vital because it ensures that your anchor or screw fits securely. Here’s what you need to do:
- Use Compressed Air: Blow out any small particles with a burst of air. This step is crucial because some bits of debris are too tiny for brushing to remove.
- Brush with a Wire Tool: Take a wire brush that fits the hole size and scrub around the inside. This action helps to get rid of any particles stuck to the hole’s sides.
- Vacuum Out the Dirt: After you’ve brushed the hole, vacuum up the debris with a special attachment. This leaves the hole clean and ready for a strong bond.
When you’re cleaning out drilled holes, imagine you’re preparing a bed for planting seeds. You’d remove all the rocks and weeds (the debris) so that the seeds (your anchors) have the best chance to grow (hold firmly).
For example, if you’re using a particular brand of anchor, they might recommend a specific wire brush or vacuum nozzle to ensure the best fit. Always check for these recommendations to get the job done right.
Ensuring Clean Hole Walls
Keeping your drilled holes free of debris is important for the strength of the installation. Leftover particles can weaken the hold of anchors, resulting in a less secure fixture. For a clean hole, use a nylon brush made for this purpose. Twist the brush inside the hole and move it in and out to remove dirt.
Then, blow out the dirt with compressed air. Put the air nozzle deep inside the hole to get rid of all the dust. Keep brushing and blowing out dust until you can see that the hole is clean. This ensures that anchors or chemicals you put in the hole will hold strongly.
Remember to use a brush and air method that’s proven effective. For example, a high-quality brush and a reliable air compressor are good choices. This attention to detail will help make sure your fixtures are mounted securely.
Hammer Drill Maintenance
To keep your hammer drill in top shape and working effectively on concrete, it’s important to take care of it regularly. Here’s what you need to do:
- Check and swap out the carbon brushes when they get worn out. This is important because it keeps the motor running smoothly and ensures good electrical contact.
- Keep all the parts that move well-oiled with the grease the maker of your drill recommends. This stops them from wearing out too quickly.
- Clean out any dust or bits from the air vents and the chuck. This helps stop the drill from getting too hot and makes sure the drill bits are held tightly and in the right position.
By doing these things, you’re making sure your hammer drill will last longer and work better.
For example, if you’re using a Makita hammer drill, you could use their specific grease for lubrication.
Wearing Protective Gear
Taking care of your hammer drill is key for it to work well, but it’s just as crucial to wear the right safety gear to protect yourself. Make sure to wear safety glasses that meet ANSI standards to protect your eyes from any pieces that could fly up.
Wearing gloves that fit well and can absorb vibrations can help prevent damage to your hands and arms, like HAVS (Hand-Arm Vibration Syndrome).
It’s also essential to wear ear protection, like foam plugs or earmuffs with a high NRR (Noise Reduction Rating), to keep your hearing safe.
When you’re working with materials that have silica, like concrete, you should wear a dust mask or respirator to avoid breathing in small, harmful particles.
And don’t forget about your feet – steel-toed boots can protect them from heavy objects that might fall.
Spending money on good-quality safety gear is worth it because your safety should always come first.
Advanced Drilling Techniques
Before you start, make sure you have the right safety gear. Learning better ways to drill into concrete can make your work faster and better.
- Peck Drilling: Keep pulling the drill out to remove dust and stop the drill bit from getting too hot.
- Variable Speed Drilling: Adjust the drill speed to the concrete’s hardness. Begin slowly to make the initial hole, then go faster as you drill further.
- Controlled Depth: Use a stopper or put tape on the drill bit to make sure all holes are the same depth.
These steps are crucial, not just tips. Peck drilling stops the drill bit from getting stuck and keeps it in good shape. Adjusting the drill speed makes the job go smoother and helps your tools last longer. Controlling the depth of the holes makes sure your work is even and strong, which is very important for holding things together properly. Use these methods to get better at drilling.
When you’re drilling, consider using a specific drill bit for concrete, like the Bosch MultiConstruction bit, to improve performance. Also, a drill with a side handle, such as the DeWalt DWD520K, can give you better control and reduce fatigue during peck drilling.
Remember to keep your work area clean and your equipment maintained for the best results.
Tackling Drilling Challenges
When you’re drilling into concrete block and it starts to feel tough, it’s important to pick the right drill bit. If you don’t, you mightn’t drill as well as you could, and you could wear out your tools faster. Make sure your drill doesn’t slip and keeps steady pressure to drill a clean hole. Also, keeping the dust down is important for seeing what you’re doing and keeping your equipment clean.
Here’s some advice to make drilling easier:
First, choose a masonry bit that matches the size and depth you need. For example, a carbide-tipped bit is great for concrete.
To prevent your drill from slipping, you can start with a smaller pilot hole or use a drill with an adjustable clutch.
To control dust, try using a drill with a built-in dust collector or attach a vacuum to catch the dust as you work.
Selecting the Right Bit
Choosing the right drill bit is key for effective drilling into concrete and keeping your hammer drill in good condition. The type of material, the design of the bit, and the shape of the tip are all important things to think about. Here’s what you need to know before drilling into concrete:
- Use a Carbide-Tipped Bit: Pick a bit with a carbide tip. It’s really hard and can handle heat well, which means it can drill through concrete without wearing out too quickly.
- Spiral Flute Design Works Best: A bit with a spiral design helps get rid of the concrete dust faster. This keeps the bit from getting stuck and makes your job easier.
- Four-Cutter Head for Precision: If you want to make neat, round holes, go for a bit with a four-cutter head. It’s more stable and accurate.
Mitigating Bit Slippage
To make sure your hammer drill works well, it’s important to prevent the drill bit from slipping, especially when drilling into concrete blocks. Choose a drill bit with a tough tip, like carbide or diamond, that’s made for drilling into stone or concrete. Make sure it fits snugly in the drill’s chuck and is tightened well.
If your drill lets you change the speed, start slow to make a good pilot hole and then speed up. Keep the pressure steady and use the hammer function to help the drill bit cut into the concrete more effectively. This also helps keep the drill stable. Avoid pushing the drill from side to side, as this can make the bit slip and wear out faster.
Take the bit out every so often to get rid of any dust or bits of concrete. If you still have trouble with the bit slipping, use a center punch to make a small dent where you want to drill. This gives the bit a place to grip, making it easier to start the hole.
For better results, use a hammer drill like the Bosch RH328VC, which has a powerful motor and a variable speed trigger, making it easier to start drilling without slipping.
Managing Dust Emission
When you’re working with concrete and a drill, it’s really important to keep the dust under control so you can see what you’re doing and stop the dust from messing up your equipment. Having a good dust management system also helps your drill last longer and keeps your lungs healthy.
Here’s how to do it well:
- Get a drill that has a dust control feature built-in, or hook up a dust collector to your drill. This will suck up the dust as you create it.
- Keep the dust from getting into the air in the first place. You can do this by spraying a little water where you’re drilling or using special products that keep dust down.
- Make sure your drill’s airways are clear and the filters are clean. This will help your drill not get too hot and will keep the air moving like it should. Check the instructions that came with your drill to find out how often you should do this.
By following these steps, you’ll work more accurately and keep things professional.
For example, if you’re using a hammer drill, you might want to look into a dust extraction attachment specifically designed for it. This could be something like the Bosch HDC200 Universal Dust Collection Attachment. Always remember to check compatibility with your specific drill model. And if you’re using water to suppress dust, make sure it’s a fine mist to avoid making a mess – a spray bottle could be a simple tool for this.
Keep these tips in mind, and you’ll make your job easier and safer.
Extending Drill Lifespan
To make sure your hammer drill lasts a long time, regularly take care of it and use it correctly. Make sure you oil the chuck and gears now and then with the grease the maker suggests. Keep an eye on the carbon brushes and swap them out before they get too small; this stops the motor from getting damaged.
When drilling into concrete, always use sharp bits. If they’re dull, you have to push harder, which makes too much heat and can wear out the drill’s motor and bearings. When you have a lot of drilling to do, take breaks to let the drill cool off. Don’t force the drill through very hard material; it could overheat and not last as long.
Keep your hammer drill in a place that’s not wet and doesn’t have dust or things that can cause rust, to prevent damage inside and electrical issues.
Here are a few tips:
- Before you start, check that the drill bit is sharp. If you’re not sure which one to use, a high-quality SDS bit is often a good choice for concrete.
- Listen to your drill. If it sounds like it’s struggling, stop and check what’s wrong.
- Follow the drill’s guide for what materials it can handle to avoid pushing it too hard.
- After use, clean the drill and store it in a case or on a shelf where it’s safe from moisture and dirt.
Mastering Drilling Techniques
To get really good at drilling into concrete, you need to know the right way to use a hammer drill. This will help you work faster and more accurately, and it will also keep the concrete from getting damaged.
- Stand Firm: When you drill, make sure your feet are planted firmly. This helps you control the drill and stops the drill bit from slipping off course.
- Straight Drilling: Keep the drill straight up and down, at a 90-degree angle to the concrete. This helps the drill bit stay sharp and makes it easier to drill into the concrete.
- Drill with Breaks: Don’t just hold down the trigger non-stop. Turn the drill on and off in short bursts. This clears out the concrete dust and keeps the drill from getting too hot.
These aren’t just tips; they’re really important if you want to do a great job drilling concrete. Being precise is key. So, practice these steps to make sure your work isn’t only quick but also looks like it was done by a pro.
Let me give you a specific example. Imagine you’re putting up shelves and need to drill holes for anchors in a concrete wall. Here’s what you should do:
- Wear safety gear like goggles and gloves.
- Mark where you want to drill.
- Stand with your feet shoulder-width apart for stability.
- Hold the drill like you’re shaking hands with it and point it straight at the mark.
- Start drilling with a gentle push, then stop after a few seconds to let the dust come out.
- Keep doing this until you’ve drilled deep enough for the anchor.
Frequently Asked Questions
Can Hammer Drills Be Used for Applications Other Than Drilling Into Concrete Blocks, Such as Wood or Metal?
Absolutely, a hammer drill can be adapted to work on materials like wood or metal. Just turn off the hammering action and change to the correct drill bit for the material you’re working on. Using the right technique is crucial to get the best results when you’re not drilling into concrete. For example, when dealing with wood, you’d want to use a wood drill bit and proceed with care to avoid splintering. For metal, a high-speed steel (HSS) bit is ideal, and it’s important to drill slowly to prevent overheating. Hammer drills are versatile tools, and with the right adjustments, they’re great for various projects, from building furniture to creating metalwork.
How Does Ambient Temperature Affect the Performance of Hammer Drills While Working With Concrete Blocks?
When using a hammer drill on concrete blocks, it’s important to pay attention to the surrounding air temperature. If it’s very cold, the parts inside the drill can become rigid and less efficient. On the other hand, if it’s very hot, the drill might overheat. To keep your hammer drill working well, especially if you’re using it for a long time, you should regularly check its temperature. For example, in cold weather, you might need to warm up the drill before starting your work. In hot conditions, taking regular breaks and keeping the drill shaded can prevent overheating. Using a hammer drill that has an overheating protection feature can also help manage temperature issues. Remember, a drill that’s at the right temperature will work better and last longer.
What Are the Safety Precautions to Take When Drilling Overhead or in Tight Spaces With a Hammer Drill?
When you’re drilling above your head or squeezing into small spaces, it’s important to wear safety goggles and a hard hat to protect yourself from falling debris. Tuck in any loose clothing so it doesn’t get caught in the drill. Stand firmly to keep the drill steady. Before you start, make sure there are no electrical wires or pipes where you’re drilling to avoid accidents. For example, use a stud finder to locate joists and avoid hitting something you shouldn’t. Always use a hammer drill with a side handle for better grip, like the Bosch Bulldog Xtreme, which is designed for tough jobs and tight spots. Remember, taking these steps helps prevent injury and damage to your surroundings.
Can Hammer Drills Be Effectively Used for Removing Concrete Rather Than Just Drilling Into It?
Certainly, hammer drills are capable of chipping away at concrete when equipped with a chisel attachment. This makes them useful for smaller demolition tasks. However, for more substantial work, you would need tools designed for heavy-duty demolition, like jackhammers.
For example, if you need to remove a small section of concrete to repair a crack or to install something, a hammer drill could be just the tool you need. Remember to wear safety gear and follow the manufacturer’s instructions for the best results. If you’re facing a bigger project, such as breaking up a concrete slab or a driveway, you’d be better off with a powerful tool like a Bosch Brute Turbo Electric Jackhammer, which is built specifically for that purpose.
Using a hammer drill for concrete removal can be quite straightforward. First, set the tool to hammer mode, attach a chisel bit, and then apply it to the concrete at the correct angle. Always keep in mind that a hammer drill is more suitable for precise, targeted work. It’s not the best choice for large-scale demolition, but it’s a handy and more affordable option for do-it-yourself projects or quick fixes.