The Art of Crafting Picture Frames With a Miter Saw
In the realm of woodworking, the miter saw is your key to unlocking the delicate beauty of custom picture frames. You understand that precision and skill are paramount in transforming a simple piece of wood into a masterpiece that does more than just encase memories.
Measuring the frame size with accuracy, you’ll set the miter angle with a discerning eye, ensuring that each cut is as sharp as your artistic vision. As you slice through the wood, you’ll feel the satisfaction of pieces fitting together seamlessly, a testament to your dedication to the craft.
You’ll select wood not just for its appearance but for the story it tells alongside the photographs it will hold. This guide is your companion on a journey to master the art of crafting picture frames with the finesse only a miter saw can provide.
Key Takeaways
- Measuring and calculating frame dimensions accurately is essential for a polished finish.
- Precision in setting the miter angle is crucial in achieving seamless corner joints.
- Secure positioning of the molding and steady pressure are important for making precise cuts.
- Fine-tuning craftsmanship through sanding and trimming is necessary for flawless joints.
Starting With Wood Selection
The Right Wood for the Right Look
First, fellow DIYers, it’s time to talk timber. The wood you choose is more than just a frame; it’s the supportive embrace for your artwork, the final touch that ties everything together. Let’s dig into selecting the perfect wood that honors your handiwork and complements that lovely piece of art you’re framing.
Hardwoods: The Sturdy Choice
First things first, let’s talk durability. You’ll want a wood that’s tough enough to withstand a little handling, right? Hardwoods are your go-to here. They’re like the trusty work boots of the wood world – they’ve got your back. I’m talking about the likes of oak, maple, or walnut. Not only do they’ve the muscle, but their fine grain means they’ll take those intricate cuts without throwing a fit (read: splintering).
Match the Mood
Now, take a gander at that artwork you’ve got. What’s its vibe? A sultry Baroque painting is going to need a different kind of frame than, say, a bold modernist print. You wouldn’t dress a Renaissance masterpiece in neon, right? It’s all about respecting the era and style – let your frame be a time machine that enhances, not clashes.
Harmonizing Color and Texture
Let’s chat aesthetics. Your wood choice should be like a good backup singer – it enhances the lead without stealing the spotlight. You want a color and texture that’s in harmony with the artwork. It’s a duet, after all. And if you’re thinking of staining or finishing your wood, do yourself a favor and test it out on a scrap piece first. That way, you won’t be surprised when the curtain lifts on the final hue.
Letting Natural Beauty Shine
I’ll let you in on a little secret: wood has got character. So why cover up those natural good looks with heavy paint? Stick to finishes that let the wood’s personality peek through. After all, we’re aiming for a frame that’s both a guardian for your art and a feast for the eyes, aren’t we?
In the grand symphony that’s your framed artwork, the wood you select plays a crucial role. It’s not just about the precision of your cuts; it’s the material that holds the story together. So choose wisely, my fellow crafters, and may your frames be as strong and striking as the masterpieces they hold!
Measuring the Frame Size
Crafting the Perfect Fit
Starting with the Artwork
Fellow creators, let’s kick off the journey to a flawless picture frame by zeroing in on the heart of the project: your treasured artwork or photo. First things first, grab those exact dimensions of the piece you’re looking to showcase. It’s not just about height and width; it’s the gateway to a frame that complements without overshadowing.
Incorporating Matting
Thinking of adding a mat? Wise choice—it’s like giving your artwork a little throne to sit on. But remember, this means you’ll need to add the width of the mat to your initial measurements. And here’s a pro tip: allow just a smidge of extra space. We’re talking a whisper of wiggle room—enough for the artwork to breathe but not enough to slide around.
Calculating Outer Dimensions
Now that you’ve got your artwork and matting sussed out, it’s time to talk frame. You’ll want to calculate the outer dimensions of your frame materials. Keep in mind, we’re focusing on the inside edge, where the soon-to-be resident of the frame—the glass—will nestle in. And let’s not forget the width of the moldings; they’re not just for show, they count towards the final measurement.
Measure Twice, Cut Once
Let’s not dance around it—precision is your new best friend. Even a millimeter can throw off your frame game. So, whip out that trusty tape measure or ruler (no dollar store knock-offs, please) and get to work. Take those numbers, and then take them again. It’s the cornerstone of professional framing, and hey, we’re all about that pro finish.
Setting the Miter Angle
Crafting the Perfect Corner
Ah, the miter saw – a trusty companion in the quest for the perfect picture frame. It’s all about precision, my fellow DIY enthusiasts. That angle? It’s not just a number; it’s the secret to a frame that whispers elegance rather than screams mishap. Let’s talk about getting that miter angle just right.
The Joy of Alignment
When you set that saw to the magical number of 45 degrees, you’re not just cutting wood; you’re sculpting the foundation of a frame that’ll make your walls proud. This angle is the bread and butter of frame making, ensuring that every corner meets its counterpart with the finesse of a well-practiced handshake.
The Satisfaction of a Job Well Done
There’s something deeply gratifying about watching those corners come together without a hint of a gap. It’s not just wood joining wood; it’s the culmination of your skill and attention to detail. And when you’ve nailed that angle, oh, the pride that swells in your chest! It’s the pride of a miter cut done right, a testament to your growing prowess with a saw.
Adjusting with Confidence
Now, let’s get down to brass tacks. Adjusting the miter saw is where you transform from a mere hobbyist into a master craftsman. Approach the saw with a steady hand and an eye for detail. Turn that dial to exactly 45 degrees—no more, no less. And here’s a tip: don’t rush it. Take your sweet time, double-check your settings, and when you’re ready, make the cut that’ll set your frame apart from the rest.
Preparing for Praise
Let’s not be bashful; we’re in this not just for the joy of creating, but also for that nod of approval from friends and family. Anticipate the oohs and aahs, the ‘did you really make this?’ because, yes, you did, and it looks like it’s straight out of a gallery.
Setting your miter saw to the perfect 45-degree angle is more than a step in the process; it’s an art form. And like any art, it takes patience and practice. But once you’ve mastered it, each frame you craft won’t just hold a picture; it’ll frame your growing legacy as a DIYer. So, go ahead, make that cut with confidence, and let’s turn those pieces of wood into a story to be admired on your wall.
Cutting the Frame Pieces
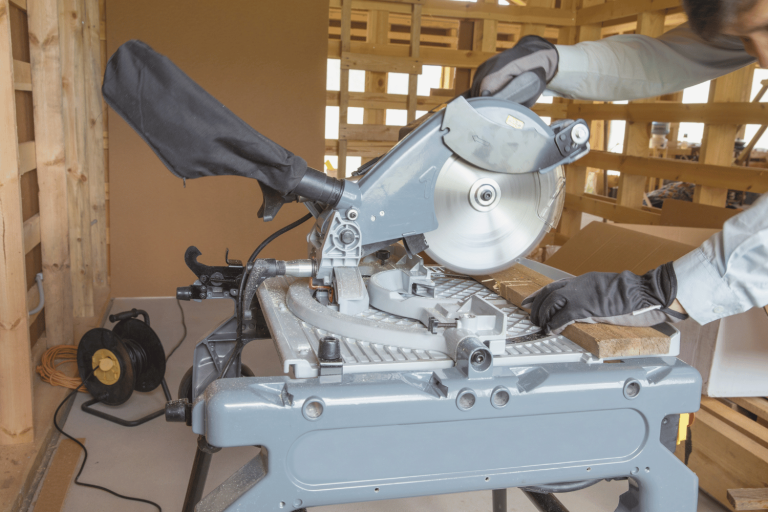
Setting Up for Success: Miter Saw Magic
Ah, the miter saw – your trusty partner in the dance of frame-making. To kick things off, let’s get that saw angled just right. Precision is your new best friend here, folks.
Measure Twice, Cut Once
We’ve all heard it before, but it bears repeating: measure twice, cut once. Grab your tape and a pencil to mark the exact lengths on your material. Each side of the frame is begging for accuracy, and who are we to let them down? Make those marks count!
Securing the Molding
Now, position your molding snug against the saw’s fence. We don’t want any wiggle room here – a secure molding means a clean cut. And trust me, a wobbly piece can turn a masterpiece into a ‘maybe next time’ real quick.
The Art of the Cut
Ready to make the cut? Apply that steady pressure as you lower the saw. Remember, it’s not a race. Let the blade do the work and marvel as it slices through the wood like a hot knife through butter. Make your first cut, admire your handiwork, and then let’s move on to the adjoining piece.
Complementary Angles
Rotate your molding for the next cut, ensuring those angles are going to be best buddies. We’re talking Batman and Robin levels of complementary here.
The Foundation of a Frame Masterpiece
When you’ve confirmed that everything is as precise as a Swiss watch, you’ll know you’ve laid the groundwork for a frame that would make any wall proud. Remember, the mastery you demonstrate here is what leads to that coveted professional look.
Checking and Adjusting Fit
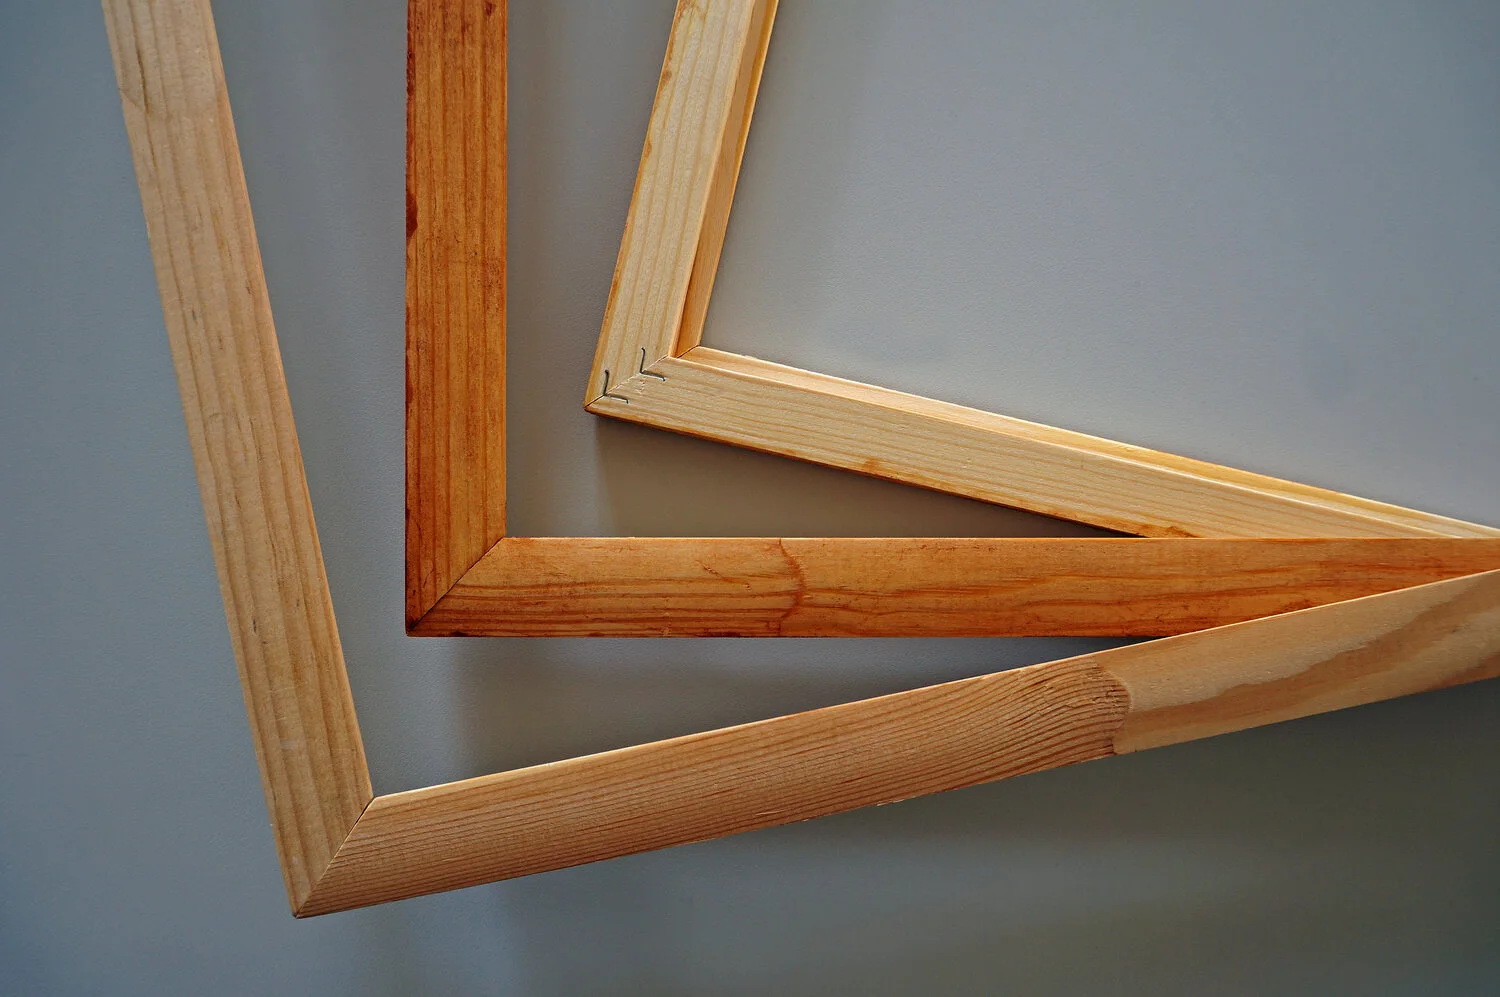
Achieving the Perfect Corner
There’s something truly magical about the moment when your frame pieces come together seamlessly. As you align each corner, it’s not just about connecting pieces of wood; it’s about piecing together a work of art that will stand the test of time.
Test the Fit
Before you get ahead of yourself, let’s see how those corners stack up. Gently bring the pieces together and observe how they sit. Notice the satisfaction bubble up inside when the corners meet just right. It’s almost as if they were made for each other, isn’t it?
Fine-Tuning Your Craft
Sometimes, despite your best efforts, a corner might not be as snug as you’d like. That’s where your skills shine. A little sanding here, a slight trim there, and you’re on your way to perfection. It’s all in the wrist, and with each small adjustment, you’re honing your craft.
Feeling Proud
As each joint becomes flawless, you can’t help but feel a surge of pride. This isn’t just any frame; it’s a testament to your dedication and attention to detail. As you stand back and admire the work, it’s clear that you’re not just making something functional – you’re creating a piece to be proud of.
Looking Forward
With the joints fitting impeccably, you can almost envision the finished product. It’s going to be a stunner, no doubt about it. Your hard work is about to pay off in a big way, and soon, you’ll have a tangible representation of your commitment and skill.
Frequently Asked Questions
How Can I Ensure My Miter Saw Blade Remains Sharp and Accurate for Precise Frame Crafting?
To keep your miter saw blade sharp and accurate, regularly clean it, avoid overuse, and sharpen or replace the blade as needed to maintain the precision required for your high-quality crafting projects.
What Safety Precautions Should I Take When Using a Miter Saw to Craft Picture Frames?
Always wear safety goggles and ear protection, keep your fingers away from the blade, and secure the material firmly before cutting. Don’t bypass the saw’s guards, and always disconnect power when changing blades.
Can I Use a Miter Saw to Cut Materials Other Than Wood, Such as Metal or Plastic, for Picture Framing?
Yes, you can cut materials like metal or plastic with a miter saw, but you’ll need the appropriate blade. Ensure it’s designed for the specific material you’re working with to avoid damage.
How Do I Maintain the Miter Saw to Ensure Longevity and Consistent Performance for Frame Making?
To maintain your miter saw, regularly clean the blade, ensure bolts are tight, lubricate moving parts, and check for wear. Proper care keeps it performing well for your frame-making projects.
Are There Any Advanced Techniques for Creating Decorative Edges or Profiles on Picture Frames Using a Miter Saw?
You’ll need specialized blades and jigs for advanced decorative edging. Experiment with bevel cuts and invest in higher-quality blades that cater to intricate profiles for a professional finish on your picture frames. You can also grab a router and make things a lot easier.
Final Thoughts
Now that you’ve measured, cut, and checked your frame pieces, you’re ready to see your artwork shine. Remember, choosing the right wood can make your frame stand out or blend seamlessly with your art.
So take pride in your craftsmanship; your miter saw has unlocked a new realm of creativity. Hang your masterpiece with confidence, knowing every angle reflects your dedication to detail.
Keep honing your skills, and soon, you’ll frame your world to perfection.