How to Polish a Car Like a Pro for a Showroom Shine
Picture this: you’re standing beside your beloved four-wheeled companion, admiring its sleek lines and the way it glistens in the sunlight. It’s not just a car; it’s a statement of who you are. But as time cruises on, that once-mirror-like finish begins to fade, tarnished by the daily onslaught of dust, road debris, and the elements. Your car deserves to shine, and it’s time to restore its former glory. That’s where the magic of polishing your car comes into play.
Now, you might be thinking, “Car polishers, car buffers, waxing – isn’t this stuff best left to the pros?” Not at all. In fact, mastering the art of automotive detailing can be an immensely satisfying journey, and you’re about to embark on it.
In this guide, we’ll not only demystify the process of car polishing but also empower you with the knowledge and skills to transform your ride into a gleaming work of art. Whether you’re a novice navigating the world of car care or a seasoned enthusiast looking to take your skills up a gear, we’ve got your back.
Buckle up as we delve into the world of high-gloss finishes, intricate techniques, and the sheer joy of making your car shine like it’s fresh off the showroom floor. It’s time to revitalize your ride and discover the secrets of how to polish your car to perfection. Let’s roll!
Key Takeaways
- Understanding the different car paint finishes: clear coat, single-stage, and matte.
- Choosing the right products and tools for polishing, such as polishing compound, polisher with a polishing pad, and microfiber cloth or applicator.
- Maintaining a matte finish requires extra care, with gentle cleaning solutions and avoiding abrasive products or brushes.
- Identifying your car’s paint finish is important for selecting the appropriate polish and technique, as well as addressing common paint problems like fading and peeling.
Understanding Types of Car Paint – Which Do You Have?
When it comes to understanding your car’s paint, it’s important to know the different types of finishes that exist.
Clear coat, single-stage, and matte are the three main categories you’ll encounter.
Identifying your car’s finish is key in determining the best approach for maintenance and addressing common paint problems such as swirl marks, scratches, and oxidation.
Types of Car Paint Finishes
To determine the type of car paint finish you have, you can start by examining its texture and glossiness. There are generally two types of paint finishes: clear coat and single-stage. Clear coat finishes have a smooth and glossy texture, while single-stage finishes have a more textured and less glossy appearance. Clear coat finishes are more common in modern cars as they provide better protection against UV rays and scratches.
When it comes to polishing your car, it is important to choose the right products and tools. A polishing compound can be used to remove light scratches and swirl marks, while a polisher with a polishing pad can help achieve a smooth and shiny finish. Make sure to use a microfiber cloth or applicator to apply the polish and wax to avoid any scratches.
Regular car washes using non-abrasive cleaners and the application of a good quality car wax can help maintain the shine and protection of your car’s paint finish.
Clear Coat, Single-Stage, Matte
If you want a more unique and understated look for your vehicle, consider opting for a matte finish rather than a clear coat or single-stage finish. Matte finishes have gained popularity in recent years due to their sleek and non-reflective appearance.
However, it’s important to note that matte finishes require extra care to maintain their appearance. Matte finishes lack the clear coat layer found in traditional finishes, making them more susceptible to scratches and swirl marks.
To keep your matte finish looking its best, it’s crucial to regularly wash your car using a gentle cleaning solution and a soft microfiber cloth. Avoid using abrasive products or brushes that could damage the paint surface.
If your matte finish does develop any paint imperfections, such as swirl marks or light scratches, it’s best to consult a professional who can safely polish the car using a specialized polishing machine.
Identifying Your Car’s Finish
Take a close look at your vehicle’s paint to identify the finish. This step is crucial in determining the appropriate polish for your car.
There are different types of finishes, such as clear coat, single-stage, or matte. Clear coat finishes have a shiny and glossy appearance, while single-stage finishes have a deep and rich color. Matte finishes, on the other hand, have a flat and non-reflective look.
Once you have identified your car’s finish, you can proceed with the polishing process. Whether you choose to hand polish or use a pad and polish, it is important to follow the proper techniques and use the right products to achieve the best results.
Common Paint Problems
Common paint problems, such as fading or peeling, can diminish the appearance of your vehicle. To maintain your car’s paint and prevent these issues, regular polishing is essential.
First, ensure your car is clean and dry. Rinse off any dirt or debris, then wash the car by hand using a mild soap.
Once the car is clean, carefully inspect the paint for imperfections. If you notice any scratches or swirl marks, you can address them by polishing by hand. Choose a suitable polish and apply it to a clean, soft cloth. Spread the polish evenly over the affected area, using gentle, circular motions. This will help to remove imperfections and restore the paint’s shine.
Remember to protect the paint by applying a wax or polish after polishing, as this will provide a layer of protection against environmental elements.
Swirl Marks, Scratches, Oxidation
To address swirl marks, scratches, and oxidation on your vehicle’s paint, it’s important to properly prepare the surface before applying any products.
Start by washing your car with a gentle soap and water to remove any dirt or debris.
Next, use a clay bar to remove any embedded contaminants that may be causing the swirl marks and scratches.
Once the surface is clean, it’s time to polish. Choose a high-quality finishing polish that is specifically designed for cars’ paint.
Apply a small amount of polish to a clean polishing pad and work in small sections, using circular motions. This will help to remove the scratches and swirl marks while also enhancing the shine of your car’s original paint.
Remember to regularly clean the polishing pad to prevent any residue from interfering with the polishing process.
Assessing Paint Condition
When evaluating your vehicle’s paint condition, start by inspecting it under bright lighting to identify any swirl marks, scratches, or oxidation.
Begin by washing and rinsing the car thoroughly to remove any dirt or debris that could interfere with your assessment. Once clean, examine the paint surface closely, looking for imperfections such as fine scratches or dull areas caused by oxidation. If you notice any of these issues, it may be time for some paint correction.
Depending on the severity of the damage, you can choose to polish your car by hand or use a machine. Apply polish using a microfiber cloth or polishing pad, working in small sections to ensure even coverage. Remember to use a paint sealant or wax to protect the newly polished surface.
For best results, it is recommended to wax your car every few months and use a clay bar to remove any embedded contaminants. However, if you prefer a simpler maintenance routine, you can limit polishing to once a year.

Gathering Your Polishing Arsenal
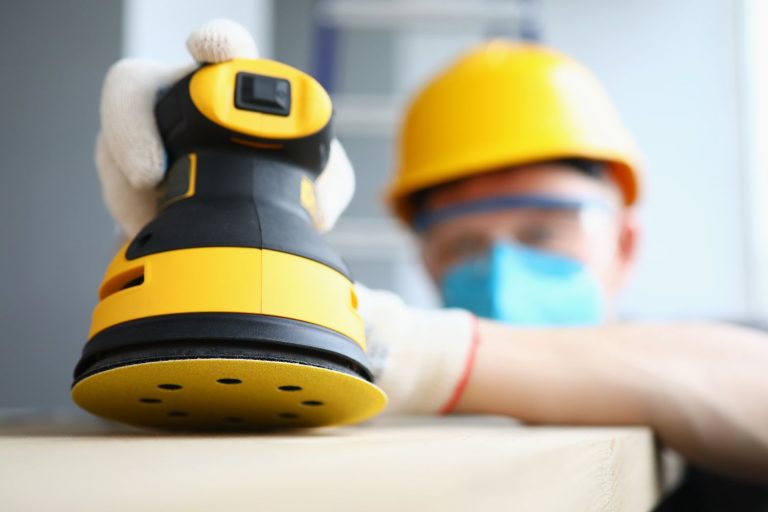
In order to successfully polish your car, you will need to gather a few essential tools and materials. These include quality car polish and compounds, polishing pads and applicators, and microfiber towels and cloths.
It is important to prioritize safety first and take necessary precautions while working with these materials to avoid any accidents or damage to your vehicle.
Essential Tools and Materials
Grab the microfiber cloth and the car polish to get started on making your car shine.
When you’re polishing your car, you’ll need a few essential tools and materials to achieve that polished paint look.
Firstly, make sure you have a high-quality car polish that is suitable for your vehicle’s paint. Avoid using abrasive polishes as they can damage the paint.
Next, gather a set of microfiber cloths or foam applicators for applying the polish evenly. Remember to work on one section at a time to ensure thorough coverage.
If you have access to a machine polisher, it can help to achieve a more efficient and professional finish.
Quality Car Polish and Compounds
Make sure you have a high-quality polish suitable for your vehicle’s paint to achieve that polished look. When it comes to polishing your car, using the right products is crucial for getting the job done effectively.
A good car polish contains abrasives that help remove light scratches, swirl marks, and oxidation from the surface of your car. Look for a polish that is specifically designed for your car’s paint type and color. Additionally, consider using a foam pad or microfiber cloth to apply the polish. These tools ensure even distribution and prevent any damage to your car’s paint.
Remember to work in a shaded area to avoid the polish drying out too quickly. For the best results, park the car in a cool spot and apply the polish in small sections, working your way around the entire car.
Polishing Pads and Applicators
Now that you have a good understanding of quality car polish and compounds, let’s talk about polishing pads and applicators. When it comes to polishing a car, having the right tools can make all the difference in getting the job done efficiently and effectively.
One essential tool is the polishing pad, which is typically attached to a polishing wheel. The pad is responsible for applying the polish onto the surface of your car. It’s important to choose the right pad for your specific needs, as different pads have different levels of aggressiveness.
To ensure a smooth and even application, make sure to spread the polish onto the pad evenly. Start at the edge of the pad and work your way towards the center to prevent any excess polish from flying off.
Taking the time to polish your car properly will leave your paint looking flawless. Stay tuned for more pro tips on the best products and techniques to use for a professional finish.
Microfiber Towels and Cloths
Using microfiber towels and cloths is essential for achieving a streak-free and lint-free finish on your vehicle’s surface. Microfiber towels are specifically designed to pick up and trap dirt and debris, making them perfect for removing contaminants from the paint. These towels are also gentle on the surface, preventing any scratches or swirl marks. Whether you’re using a machine polisher or polishing by hand, microfiber towels are a must-have. They can easily absorb excess polish and buff the surface to a high shine.
When it comes to polishing a car, it’s important to use the right tools and techniques to ensure optimal results. Remember, cutting corners when polishing can lead to subpar results, so invest in high-quality microfiber towels and cloths to achieve that professional finish.
Preparing Your Workspace
Before you start, clear away any clutter from your workspace to create a clean and organized area. Having a well-prepared workspace is crucial when it comes to polishing a car effectively.
Begin by removing any loose items such as tools, debris, or personal belongings from the area. This will prevent any potential accidents or damage to your car during the polishing process.
Next, ensure that you have all the necessary equipment and supplies readily available. This includes the polishing machine, polishing pads, microfiber towels, and the polishing compound. Organize these items in a way that allows easy access and minimizes the risk of misplacing or damaging them.
Preparing Your Vehicle – Starting with a Clean Car
When it comes to preparing your vehicle for polishing, there are several important steps that you need to follow.
First and foremost, you must wash your car properly to remove any dirt and contaminants that could potentially scratch the paint.
Once the car is clean, it’s crucial to dry it without scratching the surface, using techniques such as using a microfiber towel or air drying.
Additionally, decontaminating the paint is essential to remove any embedded contaminants that washing may have missed, and a clay bar treatment can be an effective method for achieving this.
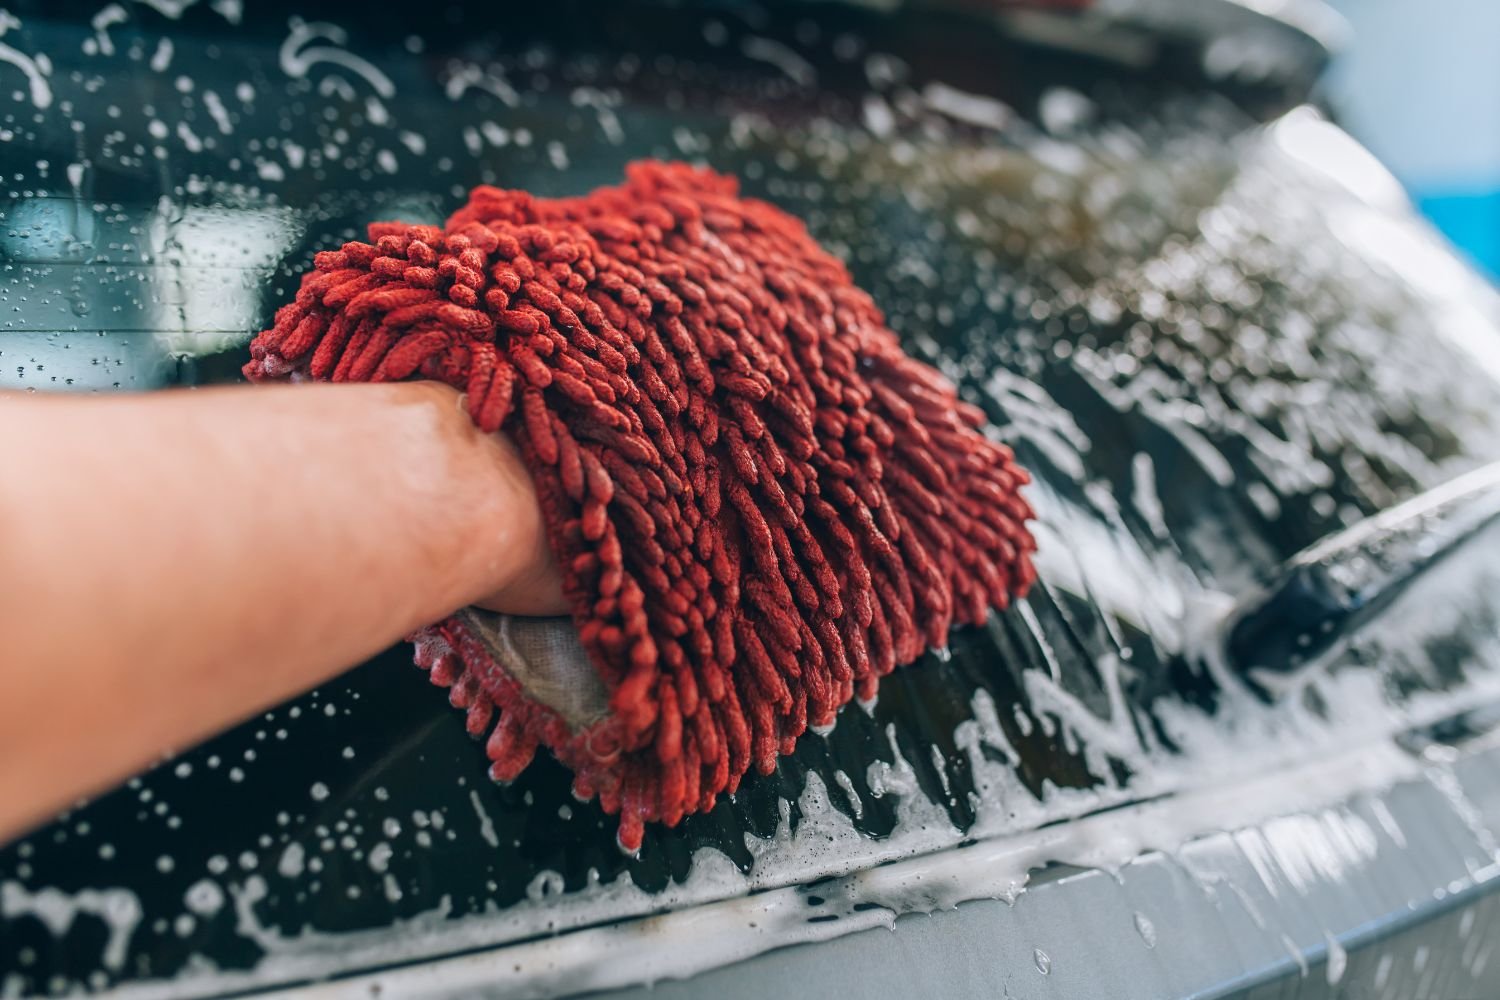
Washing Your Car Properly
To avoid scratching the paint, it’s important to use a clean, microfiber cloth when washing your car. Begin by rinsing the vehicle with water to remove loose dirt and debris.
Dilute a car wash soap in a bucket of water, and using a sponge or mitt, gently wash the car in straight motions, starting from the top and working your way down. Rinse the car thoroughly to remove all soap residue.
Dry the car using a microfiber towel, making sure to reach all areas, including the crevices. Avoid using regular towels or sponges as they can leave scratches.
It’s also important to wash your car in a shaded area to prevent the soap from drying too quickly and leaving streaks.
Following these steps will help you achieve a clean and scratch-free car.
Removing Dirt and Contaminants
Using a clay bar is an effective way to remove dirt and contaminants from your vehicle’s surface. Regular soap and water might not be enough to get rid of stubborn dirt particles that have bonded to the paintwork. A clay bar is a specially formulated resin compound that can safely remove these contaminants, leaving your car’s surface smooth and clean.
To use a clay bar, first, wash and dry your car thoroughly. Then, take a small piece of the clay bar and knead it until it becomes pliable. Spray a lubricant, such as a detailing spray, onto the area you want to clean. Gently glide the clay bar back and forth over the surface, applying light pressure. You will feel the clay bar picking up the contaminants as it moves.
After each pass, fold the clay bar to expose a clean side. Continue this process until you have cleaned the entire surface of your vehicle. Finally, wipe down the area with a microfiber towel to remove any residue.
Using a clay bar will not only remove dirt and contaminants, but it will also prepare your car’s surface for polishing and waxing, giving you a showroom-like finish.

Drying Without Scratching
The best way to prevent scratches while drying your vehicle is by using a microfiber towel. These towels are specifically designed to be gentle on your car’s surface and minimize the risk of scratches. Unlike regular towels or sponges, microfiber towels have fine fibers that trap dirt and debris, preventing them from scratching the paint.
When drying your car, start from the top and work your way down, using light pressure and a blotting motion. Avoid dragging the towel across the surface, as this can potentially cause scratches. Additionally, make sure to regularly inspect your towel for any dirt or particles that may have accumulated.
Decontaminating the Paint
Inspect your vehicle’s paint for any contaminants that may be present. Before you can start polishing your car, it’s important to ensure that the paint surface is free from any dirt, grime, or other impurities.
Contaminants such as tree sap, bird droppings, and road tar can adhere to the paint and cause damage if not properly removed. Begin by washing your car thoroughly using a pH-neutral car shampoo and a microfiber wash mitt. After drying the surface, visually inspect the paint for any remaining contaminants.
If you notice any rough or gritty areas, it’s a sign that there are still contaminants present. In such cases, you can use a clay bar or a synthetic clay towel to gently remove the impurities and restore a smooth finish to your vehicle’s paint.
Clay Bar Treatment
To effectively remove contaminants from your vehicle’s paint, grab a clay bar and gently glide it over the surface. The clay bar treatment is a crucial step in the car polishing process as it helps to remove stubborn dirt, road grime, and other contaminants that regular washing cannot eliminate.
The clay bar works by grabbing onto these contaminants and pulling them away from the paint surface, leaving it smooth and ready for polishing. It is important to use a lubricant, such as a quick detailer or clay bar lubricant, to prevent any scratches or marring during the process. Simply spray the lubricant onto the surface and gently glide the clay bar back and forth, using light pressure.
Remember to knead and fold the clay bar regularly to expose a clean surface. Once you have treated the entire vehicle, rinse off any remaining residue and proceed with the next step of the polishing process. The clay bar treatment will leave your car’s paint feeling incredibly smooth and ready for the next stage of the polishing process.
Iron Fallout Removal
Check for any iron fallout on your vehicle’s paint by using a specialized iron remover product. Iron fallout refers to tiny metal particles that can embed themselves into your car’s paint, causing damage and reducing its shine.
These particles can come from a variety of sources, such as brake dust or rail dust from trains.
To remove iron fallout, first wash your car thoroughly to remove any loose dirt or debris. Then, apply the iron remover product to the affected areas and let it sit for a few minutes. You will notice the product changing color as it reacts with the iron particles.
Masking and Taping Off
Now that you’ve successfully removed the iron fallout from your car’s surface, it’s time to move on to the next step – masking and taping off. This crucial process ensures that the areas you don’t want to polish are protected from any potential damage.
Start by gathering high-quality automotive masking tape and plastic sheeting. Carefully cover the areas you want to protect, ensuring a tight seal to prevent any polish or compounds from seeping through. Pay special attention to areas around badges, emblems, and crevices.
By taking the time to properly mask and tape off these areas, you can confidently proceed with the polishing process, knowing that you’ve taken the necessary precautions to avoid any unwanted mishaps.
This attention to detail will not only yield a professional-looking finish but also demonstrate your commitment to maintaining the pristine appearance of your car.
Protecting Trim and Rubber
Make sure you’re using high-quality automotive masking tape and plastic sheeting to tightly cover and protect the trim and rubber areas you don’t want to damage.
When polishing your car, it’s crucial to safeguard delicate surfaces like trim and rubber from potential harm. Automotive masking tape is specifically designed to adhere to surfaces while preventing any paint or polish from seeping through. Ensure that the tape is applied securely, leaving no gaps or loose edges.
Additionally, use plastic sheeting to cover larger areas and provide an extra layer of protection. By taking these precautions, you can polish your car without worrying about accidentally ruining the trim or rubber.
Choosing the Right Car Polish Can Help Achieve the Best Results
When choosing the right car polish, it’s crucial to understand the different types available.
There are abrasive polishes that can remove scratches and swirl marks, as well as non-abrasive polishes that are more gentle on the paint.
It’s important to match the polish to the specific paint problems you are trying to address.
Conducting paint testing, test spots, and patch testing can help determine the best polish for your needs.
Understanding Types of Car Polish
There are different types of car polish that you should be aware of. Understanding these types can help you choose the right one for your car’s specific needs.
The first type is abrasive polish, which contains microscopic particles that help remove scratches and imperfections from the paint surface. This type of polish is ideal for cars with deep scratches or swirl marks.
Next, there is non-abrasive polish, which is designed to enhance the shine and clarity of the paint without removing any material. This type of polish is perfect for maintaining the glossy finish of your car.
Lastly, there is all-in-one polish, which combines the benefits of both abrasive and non-abrasive polish. It is a versatile option that can address different levels of imperfections.
Knowing the different types of car polish can help you achieve the best results for your car’s appearance.
Abrasive vs. Non-Abrasive
Now that you understand the different types of car polish, let’s dive into the subtopic of abrasive versus non-abrasive polish.
When it comes to polishing your car, you have two options: abrasive or non-abrasive polish. Abrasive polish contains tiny particles that help remove scratches, swirls, and oxidation from your car’s paint. It is ideal for tackling more significant imperfections.
On the other hand, non-abrasive polish is designed for maintaining the shine and smoothness of your car’s paint. It is perfect for regular maintenance and minor blemishes.
Choosing between abrasive and non-abrasive polish depends on the condition of your car’s paint and the level of correction needed. Remember, using abrasive polish too frequently or unnecessarily can damage your car’s paint, so it’s important to choose the right polish for the job.
Matching Polish to Paint Problems
To choose the right polish for your car’s paint problems, consider the level of imperfections you are dealing with and the condition of the paint.
If your car has minor scratches or swirl marks, a light abrasive polish will be suitable. These polishes contain tiny particles that help remove imperfections without causing further damage to the paint.
On the other hand, if your car has deeper scratches or oxidation, a more aggressive abrasive polish may be necessary. These polishes have larger particles that can effectively tackle tougher paint problems.
It’s important to remember that using the wrong polish can lead to more harm than good. Always start with the least aggressive polish and gradually work your way up if needed. Be sure to follow the manufacturer’s instructions and take your time to achieve the best results.
Importance of Paint Testing
Make sure you prioritize paint testing to ensure the best results for your vehicle’s finish.
When it comes to polishing your car, paint testing is an essential step that should not be overlooked. This process involves applying a small amount of polish on an inconspicuous area of your car’s paintwork to check for compatibility and to assess the desired results.
By conducting paint testing, you can determine the right polish to use for your specific paint problems, such as swirl marks, light scratches, or oxidation. It also allows you to evaluate the effectiveness and safety of the polish on your car’s paintwork.
Test Spots and Patch Testing
Ensure you apply a small amount of polish on an inconspicuous area to test for compatibility and desired results. This step is crucial in ensuring that the polish you are using will not cause any damage or unwanted effects on your car’s paint.
By testing a small spot first, you can determine if the polish is safe to use and if it produces the desired shine and finish. Start by cleaning the test spot thoroughly, and then apply a small amount of polish using a microfiber cloth. Gently rub the polish into the area and evaluate the results.
If the polish works well, you can proceed to polish the rest of the car with confidence. Remember, taking this extra step will help you achieve the best results and protect your car’s paint.
Ensuring Compatibility
When testing for compatibility, it is crucial to ensure that the product you are using will not cause any damage or adverse reactions to your car’s surface. To do this, apply a small amount of the product on an inconspicuous area, such as the inside of the door or underneath the car. Wait for a few minutes and observe if any discoloration, staining, or other negative effects occur. If there are no adverse reactions, you can proceed with confidence and apply the product to the rest of the car’s surface.
This simple compatibility test helps to protect your car and achieve the best results when polishing it. It gives you peace of mind and a sense of belonging to a community of car enthusiasts who care for their vehicles.
Mastering Polishing Techniques
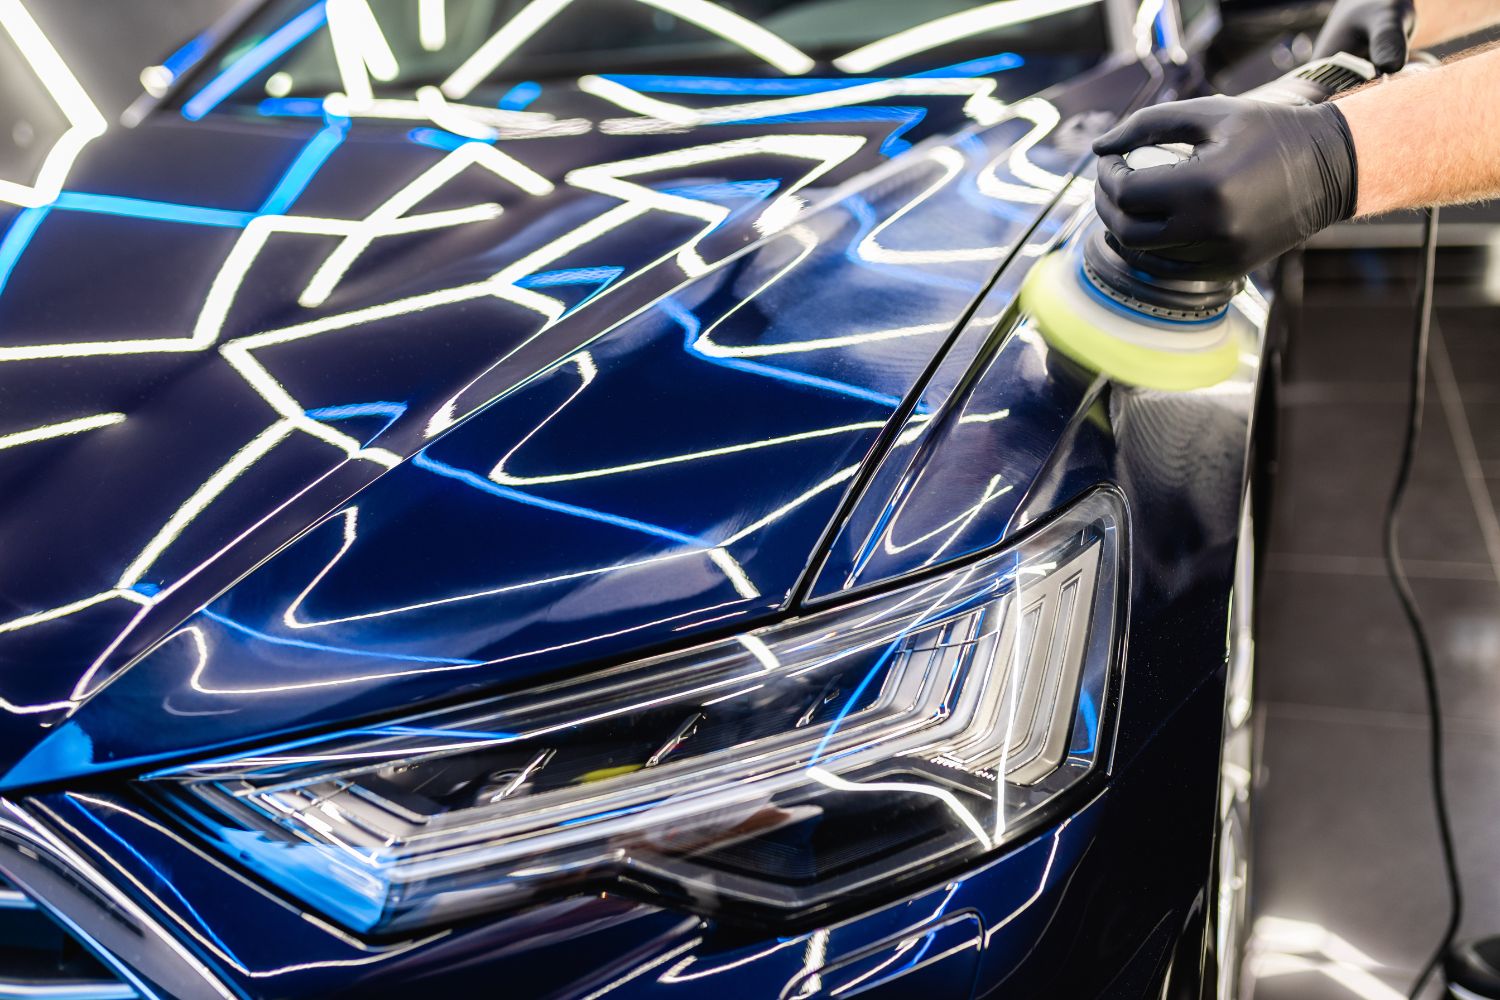
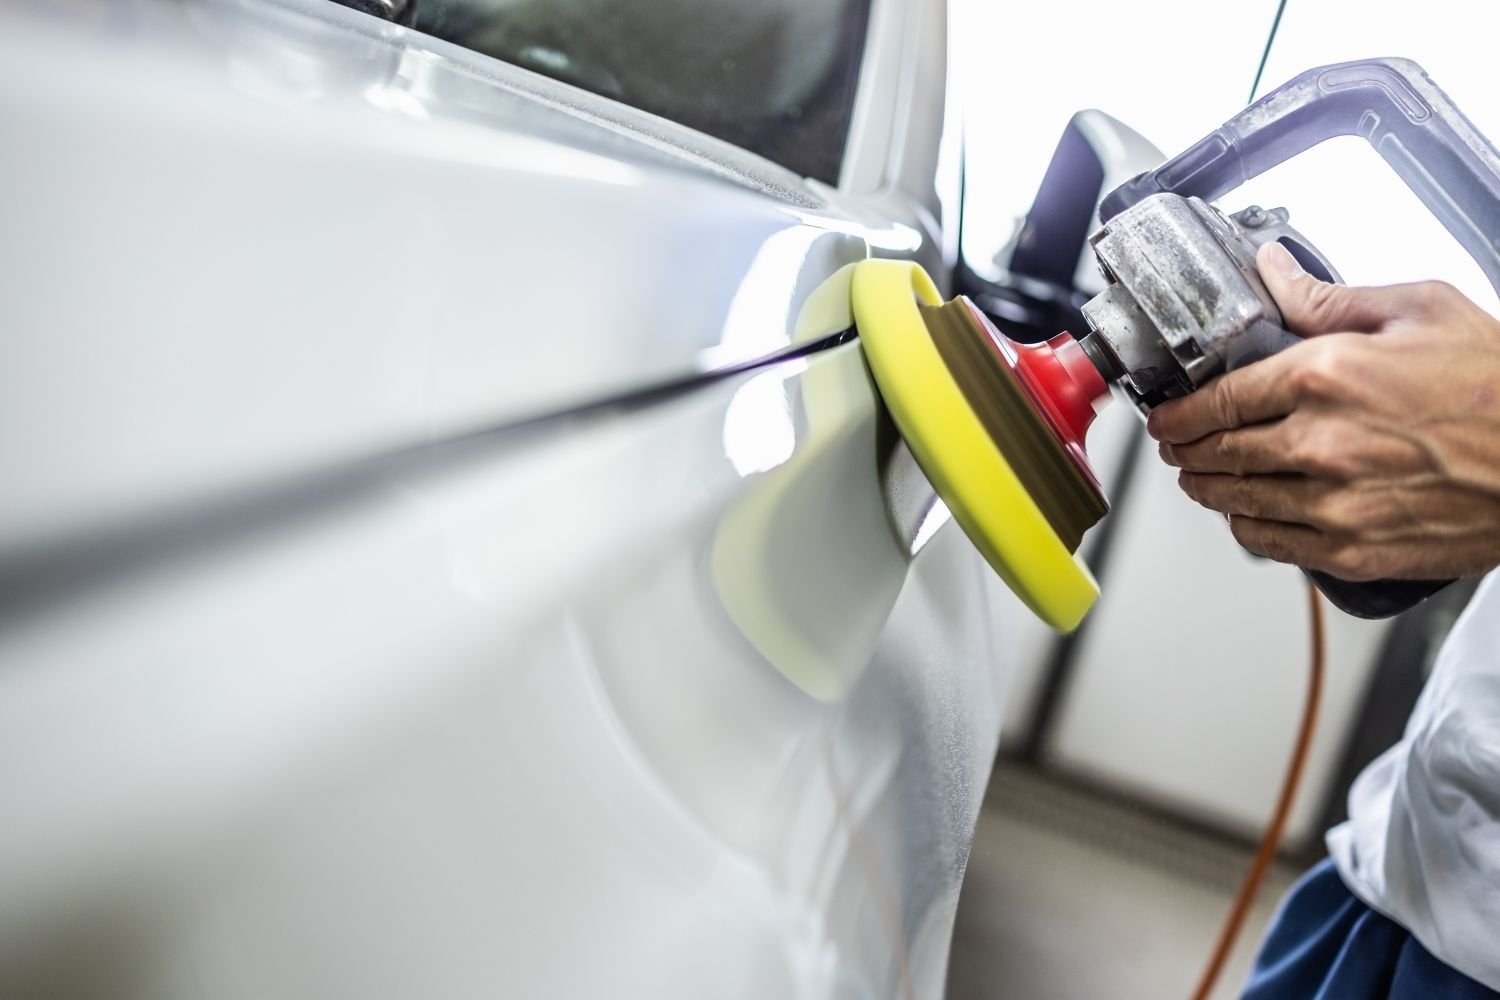
When it comes to mastering polishing techniques, you’ll need to consider the pros and cons of hand polishing versus machine polishing.
Hand polishing allows for more control and precision, but it can be time-consuming and tiring.
Machine polishing, on the other hand, is faster and more efficient, but it requires the right method and technique to avoid damaging the paint.
Perfecting your polishing motion is crucial, whether you choose to hand polish or use a machine.
Circular movements are commonly used for hand polishing, while dual-action movements are preferred for machine polishing to prevent swirl marks and achieve a flawless finish.
Hand Polishing vs. Machine Polishing
To decide between hand polishing and machine polishing, you’ll need to consider factors like time, skill level, and desired results.
Hand polishing involves using your hands and a polishing compound to restore the shine and remove minor imperfections from your car’s paintwork. It requires patience and precision, as you’ll be working on small sections at a time.
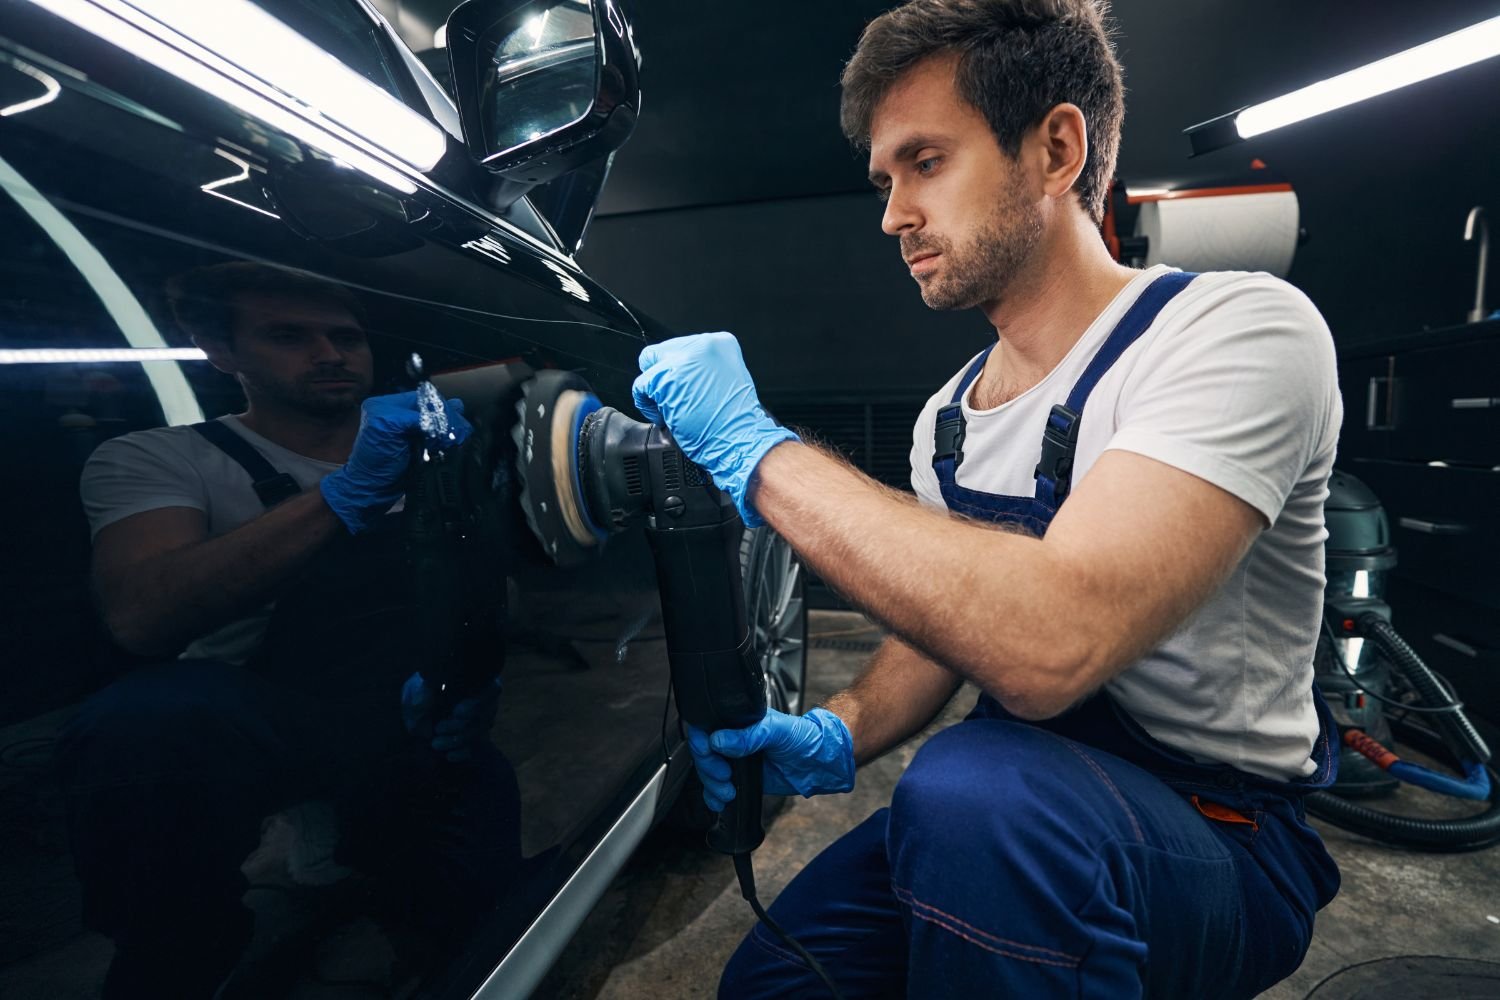
Machine polishing, on the other hand, involves using a power tool equipped with a polishing pad. It is faster and more efficient, especially for larger areas. However, it requires some level of expertise and can be risky if not done correctly.
Ultimately, the decision between hand polishing and machine polishing depends on your comfort level, available time, and desired level of perfection.
Pros and Cons
If you’re looking for a quick and efficient way to restore the shine and remove imperfections, machine polishing may be the best option for you. Machine polishing offers several advantages over hand polishing, but it also has its downsides.
One of the major benefits of machine polishing is its speed and effectiveness. The machine’s rotary or dual-action motion allows it to cover large areas quickly, saving you time and effort. Additionally, machine polishers are designed to remove deeper scratches and swirl marks that may be difficult to eliminate by hand.
However, machine polishing requires a certain level of skill and knowledge to avoid causing damage to the paintwork. It’s essential to choose the right type of machine polisher, pad, and abrasive to achieve the desired results without harming the car’s finish.
Regular maintenance, such as washing and waxing, is still necessary to maintain the polished look.
Choosing the Right Method
One option you may consider is hand polishing, which offers a more precise and controlled approach to removing imperfections from your vehicle’s paintwork.
When it comes to choosing the right method for polishing your car, hand polishing is a popular choice among car enthusiasts. It allows you to have a hands-on experience and gives you greater control over the polishing process. With hand polishing, you can focus on specific areas and apply the perfect amount of pressure to achieve the desired results.
This method is particularly effective in removing light scratches, swirl marks, and oxidation. By using high-quality polishing compounds and microfiber applicators, you can achieve a smooth and glossy finish.
Hand polishing not only enhances the appearance of your car but also provides a sense of accomplishment and belonging as you take care of your vehicle with your own hands.
Perfecting Your Polishing Motion
Using proper technique and a gentle touch, you’ll be able to achieve a flawless finish when hand polishing your vehicle.
To perfect your polishing motion, start by applying a small amount of polish onto a foam or microfiber applicator pad. Begin with horizontal motions, moving the pad back and forth across the surface of the car. Apply slight pressure, but avoid pressing too hard as this can cause swirl marks.
Once you’ve covered the entire area, switch to vertical motions, overlapping each pass to ensure even coverage. Remember to frequently check your progress by inspecting the surface for any remaining imperfections. If needed, repeat the process until you achieve the desired result.
With practice and patience, you’ll become a master of hand polishing, leaving your car looking showroom-worthy.
Circular vs. Dual-Action Movements
Now that you have mastered the perfect polishing motion, let’s delve into the different types of movements you can use to achieve that flawless shine.
When it comes to polishing a car, you have two main options: circular and dual-action movements.
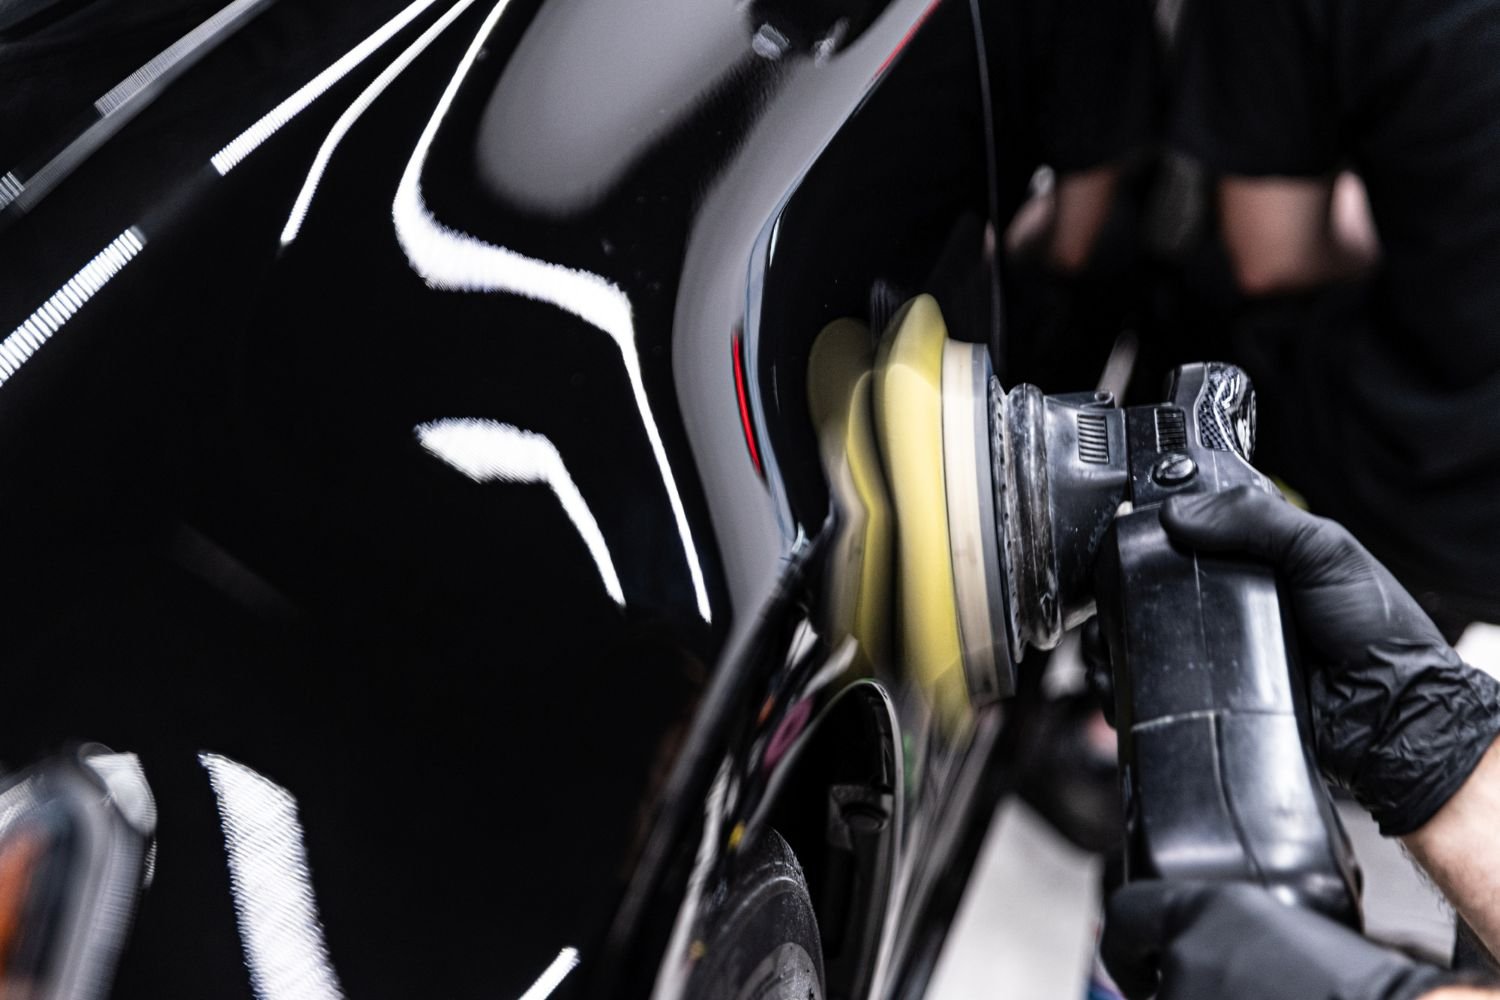
Circular movements involve the use of a rotary polisher, where the pad spins in a circular motion. This method is known for its ability to remove deep scratches and swirl marks effectively. However, it requires careful control and can be more challenging for beginners.
On the other hand, dual-action movements are performed using a dual-action polisher. This machine combines both rotary and orbital movements, resulting in a more random and gentle motion. Dual-action polishers are beginner-friendly and provide a safer option for achieving a polished finish without risking paint damage.
Ultimately, the choice between circular and dual-action movements depends on your skill level and the condition of your car’s paint. Experiment with both techniques to find the one that suits you best and helps you achieve that sense of belonging to the community of car enthusiasts.
Achieving Consistency
When striving for consistency in achieving a flawless shine, it’s important to experiment with different techniques and find the one that best suits your skill level and the condition of your vehicle’s paint.
Consistency is key when it comes to polishing your car because it ensures an even and uniform finish. To achieve this, start by thoroughly washing and drying your vehicle to remove any dirt or debris.
Next, apply a small amount of polish to a foam pad and work in small sections, using overlapping motions. Make sure to maintain a steady pressure and speed to avoid uneven results.
After polishing, wipe away any excess product with a clean microfiber cloth. By honing your technique and finding the right approach for your car, you can achieve consistent, professional-looking results that will make you feel like a part of the car enthusiast community.
Controlling Pressure and Speed
To ensure a uniform and flawless finish, you’ll want to focus on maintaining steady pressure and speed while working on your vehicle’s paint.
Controlling the pressure and speed during the polishing process is crucial for achieving the desired results. When it comes to pressure, applying too much force can result in swirl marks or even damage the paint surface. On the other hand, using too little pressure may not effectively remove imperfections. Aim for a moderate amount of pressure that allows the polishing pad to make proper contact with the paint but doesn’t exert excessive force.
Additionally, maintaining a consistent speed is essential. Moving too fast can cause uneven polishing, while moving too slow may result in excessive heat buildup. Find a speed that allows you to work efficiently while ensuring thorough polishing coverage.
Tips for Optimal Results
Maintaining consistent pressure and speed is key for achieving optimal results when working on your vehicle’s paint. To ensure a flawless finish, follow these tips.
First, use a dual-action polisher for maximum control and safety. Apply even pressure on the surface, keeping the polisher level at all times. Move the polisher in overlapping passes, working in small sections.
Remember to start with a low speed and gradually increase as needed. Avoid applying too much pressure, as it can cause swirl marks or burn the paint. Keep the polisher moving at a steady pace to prevent uneven polishing.
Regularly check your progress to ensure you’re achieving the desired level of shine. By following these guidelines, you’ll achieve professional-looking results that will make you proud of your car’s appearance.
Avoiding Overheating
Now that you have learned some tips for achieving optimal results when polishing your car, let’s talk about an important aspect to consider: avoiding overheating.
When polishing your car, the friction between the polishing pad and the car’s surface can generate heat. Excessive heat can damage the paint and lead to unsightly blemishes.
To prevent overheating, it is crucial to work in small sections and avoid applying too much pressure. Allow the polishing pad to rotate freely and let the speed of the machine do the work.
Additionally, take breaks between sections to let the surface cool down. By following these precautions, you can ensure that your car’s paint remains in pristine condition and avoid the frustration of having to fix overheated areas.
The Step-by-Step Polishing Process – Pro Tips to Polish your Car
Before diving into the step-by-step polishing process, it’s important to conduct a pre-polish inspection. This involves evaluating any existing imperfections such as swirl marks, scratches, or oxidation. Once you have a clear understanding of the paint’s condition, you can set realistic goals for the polishing process and determine the appropriate car polish to use.
Remember to consider the quantity of polish needed and the application techniques that will yield the best results.
Pre-Polish Inspection
You’ll want to give the car a thorough inspection before starting the polishing process. This step is crucial to ensure that you achieve the best results.
Begin by examining the exterior of the car for any visible damages such as scratches, dents, or rust. Take note of these imperfections as they may require special attention or repairs before proceeding.
Next, inspect the paintwork for any contaminants such as dirt, debris, or tar. These must be removed prior to polishing to prevent them from causing further damage to the paint. Additionally, check the condition of the clear coat to determine if it is intact or if any areas require touch-ups.
Lastly, inspect the wheels, tires, and trim for any signs of wear or damage. By conducting a thorough inspection, you can address any issues and ensure a smooth and successful polishing process.
Evaluating Paint Condition
Inspect the paintwork to determine if there are any imperfections that need to be addressed. Begin by thoroughly examining the surface for scratches, swirl marks, oxidation, or any other blemishes. Take note of the severity and location of these imperfections.
Use a bright LED light to inspect the paint more closely, as it can reveal hidden flaws. Look for any deep scratches that may require touch-up paint or professional repair. Additionally, check for any paint chipping or peeling, as these areas may need to be addressed before proceeding with the polishing process.
Pay attention to the overall condition of the paint, including its glossiness and color vibrancy. By thoroughly evaluating the paint condition, you can determine the necessary steps to achieve a flawless finish and restore your car’s beauty.
Setting Realistic Goals
Now that you’ve evaluated the paint condition of your car, it’s time to set realistic goals for the polishing process. Setting achievable goals will help you stay motivated and ensure that you’re not disappointed with the final result.
Firstly, consider the level of imperfections on your car’s paint. If you have deep scratches or severe swirl marks, it may be unrealistic to expect a completely flawless finish. However, with the right products and techniques, you can significantly improve the appearance of your car’s paint.
Secondly, assess the time and resources you have available. Polishing a car can be time-consuming, so make sure you have enough time set aside to complete the process properly. Additionally, consider the tools and products you’ll need and ensure that you have access to them.
Applying Car Polish
To achieve a smooth and glossy finish, it’s important to apply the car polish in small, circular motions.
Begin by pouring a small amount of car polish onto a clean microfiber cloth.
Using moderate pressure, start rubbing the polish onto the car’s surface in circular motions, working on one section at a time. Make sure to cover the entire surface evenly.
This technique helps to distribute the polish evenly and ensures that no areas are missed. As you continue, periodically check for any areas that may need additional attention.
Once you have completed polishing the entire car, allow the polish to dry completely.
Then, using a clean microfiber cloth, gently buff the surface in the same circular motion.
This will help to remove any excess polish and reveal a high-gloss shine.
Quantity and Application Techniques
Applying a small amount of car polish onto a clean microfiber cloth is essential for achieving a smooth and glossy finish.
To begin, ensure that the cloth is free from any dirt or debris, as these particles can cause scratches on the car’s surface.
Next, take a small dollop of car polish and spread it evenly on the cloth. Using gentle, circular motions, apply the polish onto the car’s surface, working in small sections at a time. This technique allows the polish to penetrate the paintwork, removing any imperfections and enhancing the shine.
Remember to apply just enough pressure to effectively distribute the polish, but avoid pressing too hard, as this can damage the paint.
Ensuring Even Coverage
To ensure even coverage, make sure you spread the product evenly across the cloth before applying it to the surface. This step is crucial in achieving a smooth and consistent polish on your car.
Start by pouring a small amount of the polish onto the cloth, then use your fingers to spread it out evenly. Be sure to cover the entire cloth, making sure there are no clumps or excess product in one area.
Once the polish is evenly distributed, you can begin applying it to the car’s surface using gentle, circular motions. This technique will help to evenly distribute the polish and ensure that every part of your car receives the same level of shine.
Polishing Techniques for Specific Paint Problems
If you’re dealing with specific paint problems, there are polishing techniques that can help you achieve a smoother finish.
One common issue is swirl marks, which are fine scratches that can be caused by improper washing or drying techniques. To remove swirl marks, you can use a dual-action polisher with a foam pad and a fine abrasive polish. Apply the polish to the pad and work it into the affected areas using overlapping passes.
Another problem is oxidation, which occurs when the paint is exposed to the elements and starts to fade or dull. To restore the shine, you can use a compound polish with a cutting pad. Apply the polish and work it in using slow, overlapping passes until the oxidation is removed.
Addressing Swirl Marks and Holograms
Now that you’ve learned about different polishing techniques for specific paint problems, let’s focus on addressing swirl marks and holograms.
Swirl marks are fine scratches that can make your car’s paint appear dull and hazy. Holograms, on the other hand, are visible lines or patterns that result from improper polishing techniques.
To address these issues, you’ll need to use a dual-action or rotary polisher, along with a specialized polishing compound. Begin by applying the compound to the affected area and working it in using the polisher. Be sure to use gentle, overlapping motions to evenly distribute the compound.
Once you’ve completed the polishing process, inspect the paint for any remaining swirl marks or holograms. If necessary, repeat the process until the desired results are achieved.
Removing Scratches with Precision
When removing scratches with precision, you’ll need to use a microfiber cloth and a scratch removal compound.
Start by thoroughly cleaning the scratched area with a mild soap and water solution. Once clean and dry, apply a small amount of the scratch removal compound onto the microfiber cloth.
Gently rub the compound onto the scratch in a circular motion, applying consistent pressure. Continue this process until the scratch is no longer visible. Remember to always work in small sections and avoid applying too much pressure, as this can cause further damage to your car’s paint.
After removing the scratch, wipe away any excess compound with a clean microfiber cloth. Finally, apply a protective wax or sealant to ensure a long-lasting shine and protection against future scratches.
Tackling Deep Oxidation
To effectively tackle deep oxidation, start by using a cutting compound and a foam pad. Deep oxidation occurs when the car’s paint is severely damaged by the sun’s UV rays, pollutants, and other environmental factors. It can make your car’s paint look dull, faded, and aged.
The cutting compound is a highly abrasive substance that helps to remove the oxidized layer from the paint. Apply a small amount of the cutting compound onto the foam pad and work it into the affected areas using circular motions. This will help to break down the oxidation and restore the paint’s shine.
Afterward, use a clean microfiber cloth to wipe away any residue. Remember to work in small sections and apply moderate pressure to achieve the best results.
Monitoring Progress and Adjustments
You’ll want to periodically check your progress and make any necessary adjustments as you work on tackling deep oxidation. This will ensure that you’re on track and achieving the desired results.
To monitor your progress, inspect the surface of the car after each polishing session. Look for any remaining signs of oxidation, such as dullness or discoloration. If you notice any areas that still need improvement, make adjustments to your polishing technique. Consider increasing the pressure or changing the speed of your polishing tool to address these problem areas.
Additionally, evaluate the effectiveness of the products you’re using. If they’re not providing the desired results, consider trying different polishing compounds or pads.
Knowing When to Stop
Make sure you pay attention to any remaining signs of oxidation, such as dullness or discoloration, so you know when it’s time to stop.
When polishing your car, it’s crucial to recognize the point where further polishing may cause damage. As you work on each section, carefully inspect the surface for any areas that still show signs of oxidation. Look out for any dull spots or discoloration that hasn’t improved with polishing. These are indicators that the oxidation has penetrated too deeply and cannot be fully removed.
It’s important to stop polishing at this point to avoid causing further damage to the paint. By paying close attention to these remaining signs of oxidation, you can achieve a polished finish without risking harm to your car’s surface.
Handling Unexpected Challenges
When facing unexpected challenges, it’s important to stay calm and think creatively for a solution.
Polishing a car can sometimes present unforeseen difficulties, but with the right approach, you can overcome them.
One common challenge is removing stubborn stains or scratches from the car’s surface. To tackle this, try using a specialized car polish compound and a clean microfiber cloth. Apply the compound in a circular motion, focusing on the affected area. If the stain or scratch persists, you might need to repeat the process or seek professional help.
Another challenge you may encounter is achieving an even and glossy finish. In such cases, consider using a dual-action polisher for better control and results.
Finishing Touches
Now that you’ve completed the polishing process, it’s time to focus on the finishing touches to ensure your car looks its best.
Begin by thoroughly wiping down the surface and inspecting it for any remaining polish residue.
Next, remove any excess residue to avoid streaking or smudging.
Once you have a clean surface, carefully check for any imperfections that may have been missed during the polishing process.
Wipe Down and Inspection
Take a close look at the car’s surface and inspect it for any dirt or debris before wiping it down. This step is crucial to ensure a smooth and flawless finish.
Start by using a microfiber cloth or a soft sponge to gently wipe away any loose dirt or dust particles. Pay special attention to areas like the hood, roof, and sides, as these tend to accumulate more dirt.
Be thorough in your inspection, checking for any stubborn stains or bird droppings that may require extra attention. By taking the time to properly inspect and clean your car’s surface, you’ll be setting yourself up for a successful polishing process.
Removing Excess Polish Residue
After wiping down the surface, gently buff away any remaining residue with a soft cloth. This step is crucial to achieving a flawless finish on your car. Excess polish residue can leave unsightly streaks and diminish the overall shine of your vehicle.
To remove this residue, take your soft cloth and lightly rub it over the surface in circular motions. Apply slight pressure to ensure the residue is effectively lifted off. Be sure to check all areas of your car, including crevices and tight spaces, as residue can easily accumulate in these areas.
Checking for Imperfections
Before inspecting for imperfections, make sure to have a bright light source and a magnifying glass handy for a thorough examination.
Once you have these tools, you can begin the process of checking for imperfections on your car’s surface. Imperfections can include swirl marks, scratches, and other blemishes that may diminish the overall appearance of your vehicle.
Start by examining each panel of your car under the bright light source, moving the magnifying glass over the surface to get a closer look. Look for any signs of damage or inconsistencies in the paint, such as uneven texture or color variations.
Take note of any imperfections you find, as these will need to be addressed before proceeding with the polishing process.
Seal the Shine
Now that you have checked for imperfections and ensured that your car’s surface is smooth, it’s time to seal the shine. This step is crucial in maintaining the polished look of your car and protecting it from the elements.
To seal the shine, you will need a high-quality car wax or sealant. Apply a small amount of the product onto an applicator pad and spread it evenly over the surface of your car, working in small sections. Use circular motions to ensure complete coverage.
Allow the wax or sealant to dry according to the manufacturer’s instructions. Once it is dry, use a clean microfiber cloth to buff off any residue, revealing a glossy finish.
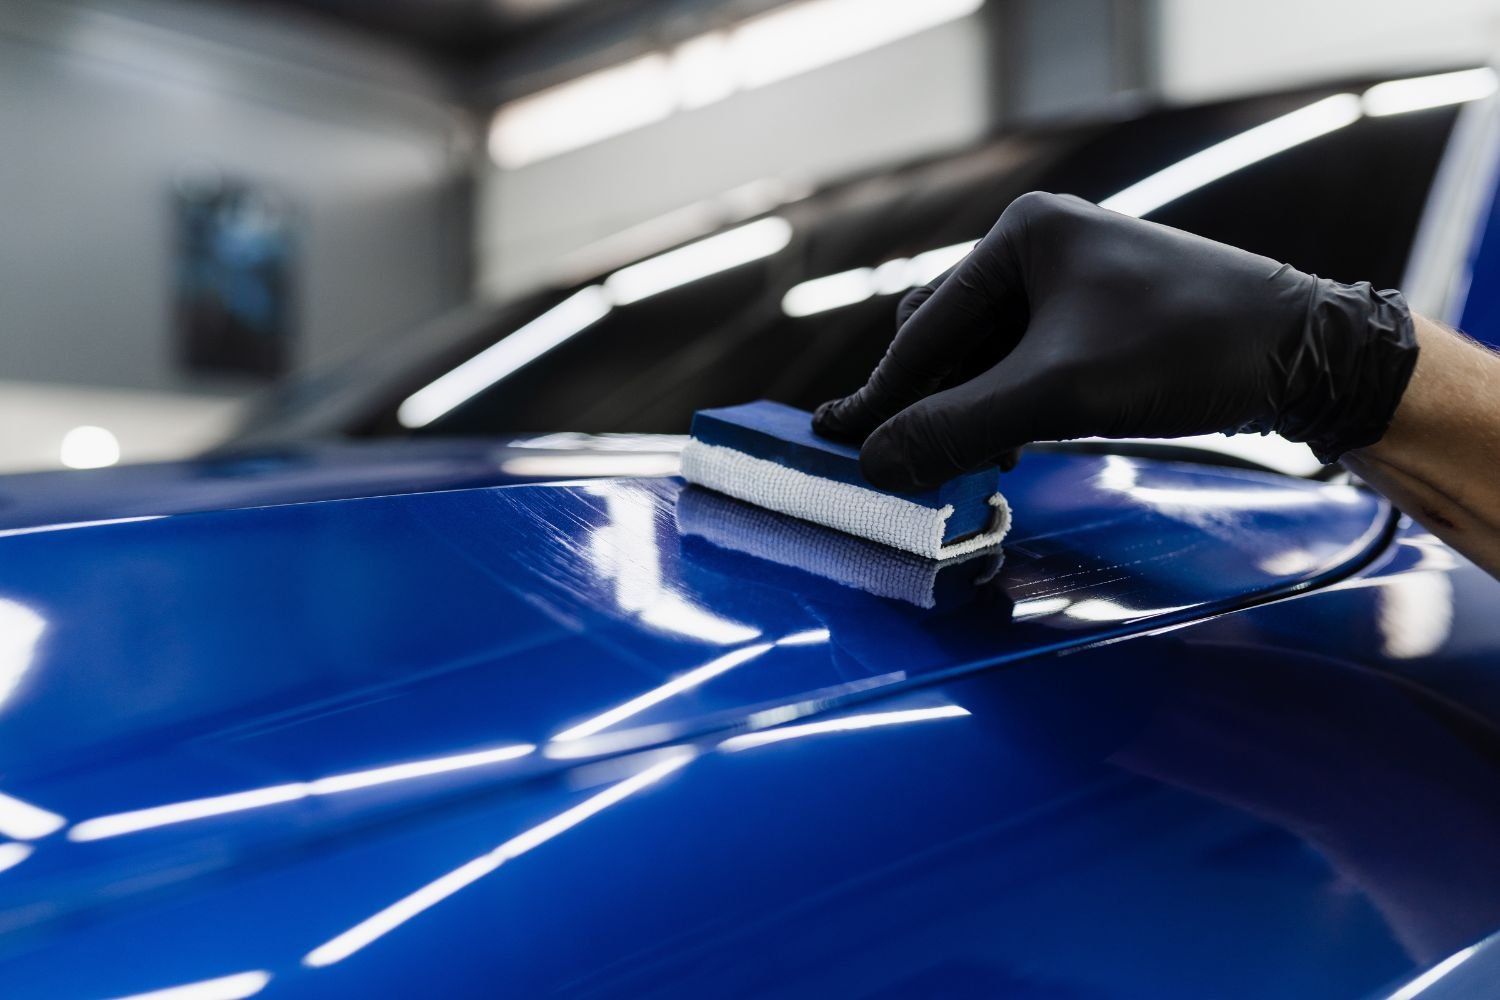
Applying Quality Car Wax or Sealant
To protect and enhance the shine of your vehicle, simply apply a small amount of high-quality car wax or sealant onto an applicator pad and spread it evenly over the surface using circular motions. This process helps to create a protective layer that shields your car’s paint from harmful elements like UV rays, dirt, and pollutants.
The circular motions ensure even coverage and prevent streaking or uneven application. When applying the wax or sealant, it’s important to work in small sections, allowing you to focus on one area at a time and ensuring thorough coverage. Additionally, be sure to follow the manufacturer’s instructions regarding drying time and removal techniques.
Buffing for a Glorious Finish
For a glorious finish, remember to use a clean, soft cloth when buffing the wax or sealant into the surface of your vehicle. This step is crucial to achieve that professional-looking shine.
Take the cloth and fold it into a manageable size, ensuring it’s free from any dirt or debris that could scratch the paint. Apply a small amount of pressure as you move the cloth in circular motions, working the wax or sealant into the surface. Make sure to cover the entire area evenly, paying close attention to any stubborn spots or imperfections.
Buffing helps to distribute the product evenly, remove any excess, and enhance the shine. Take your time and be thorough, ensuring a flawless finish that will make your car stand out.
Maintaining Your Showroom Shine
To maintain your showroom shine and keep your car looking its best, there are several key practices you should follow.
First, you need to know the top tips for long-lasting brilliance. This includes using a high-quality wax and avoiding abrasive cleaners.
Next, it’s important to understand the best practices for washing and drying your car. This involves using a gentle touch and microfiber towels.
Additionally, maintaining protective layers, setting a polishing schedule, and considering frequency and seasonal changes will help ensure that your car’s shine lasts for years to come.
Top Tips for Long-Lasting Brilliance
Achieving long-lasting brilliance requires regular maintenance and using high-quality products. To keep your car looking its best, follow these top tips.
Start by washing your car with a pH-neutral shampoo and a microfiber wash mitt, focusing on one section at a time. Rinse thoroughly, ensuring all soap residue is removed.
Next, dry the car using a microfiber drying towel to prevent water spots. Afterward, apply a high-quality polish using a foam applicator pad, working in small sections. Allow the polish to dry to a haze and then buff it off with a clean microfiber cloth.
Finally, seal in the shine with a layer of wax or sealant. Regularly repeat these steps to maintain your car’s brilliance and protect the paintwork from environmental contaminants.
Your car will be the envy of the neighborhood, and you will feel a sense of pride and belonging as you cruise down the street in your gleaming ride.
Washing and Drying Best Practices
When washing and drying your vehicle, make sure to use a pH-neutral shampoo and a microfiber wash mitt, focusing on one section at a time. This ensures that your car’s paintwork remains protected and free from swirl marks.
Start by rinsing the vehicle thoroughly to remove any loose dirt and debris. Next, mix the pH-neutral shampoo with water in a bucket, following the manufacturer’s instructions. Dip the microfiber wash mitt into the soapy solution and gently wash one section of the car at a time, starting from the top and working your way down. Rinse the mitt regularly to prevent any dirt from scratching the paint.
After washing, use a clean microfiber towel to dry the vehicle, making sure to remove any water spots. Following these best practices will help maintain your car’s shine and keep it looking its best.
Maintaining Protective Layers
You can easily maintain the protective layers on your vehicle by regularly applying a high-quality wax or sealant. These protective layers act as a shield against harmful elements such as UV rays, dirt, and pollutants that can damage your car’s paint.
When choosing a wax or sealant, opt for one that is specifically designed for automotive use and offers long-lasting protection. Before applying the product, make sure to thoroughly clean and dry your vehicle to ensure maximum adhesion and effectiveness.
Apply the wax or sealant using a soft cloth or applicator pad, following the instructions provided by the manufacturer. It is recommended to apply multiple thin layers for better coverage and durability.
Setting a Polishing Schedule
To maintain a glossy shine on your vehicle’s exterior, it’s important to establish a regular schedule for polishing. By setting a polishing schedule, you can ensure that your car always looks its best.
Start by assessing the condition of your vehicle’s paintwork. If you notice any scratches, swirl marks, or dullness, it’s time to polish. Generally, polishing your car every 3 to 6 months is recommended, depending on your driving habits and environmental factors.
Begin by thoroughly washing and drying your car to remove any dirt or debris. Then, apply a high-quality car polish using a microfiber applicator pad or a polishing machine. Work in small sections, applying even pressure and using circular motions.
Once you’ve finished polishing, wipe away any residue with a clean microfiber cloth. Remember, regular polishing will not only enhance the appearance of your car but also help protect the paintwork from damage.
Frequency and Seasonal Considerations
If you live in an area with harsh winters, it’s important to consider the frequency and timing of your vehicle’s maintenance. Freezing temperatures, road salt, and snow can all take a toll on your car’s exterior.
To protect your vehicle and keep it looking its best, you should consider polishing it more frequently during the winter months. The salt and snow can cause corrosion and damage to your car’s paint, so regular polishing can help prevent this. Additionally, the harsh weather conditions can cause scratches and swirl marks on your car’s surface.
Polishing can help remove these imperfections and restore the shine to your car. By incorporating regular polishing into your maintenance routine, you can keep your car looking great all year round.
Adapting to Your Driving Environment
Living in a city with heavy traffic can be challenging. However, adapting to your driving environment is necessary for a smoother commute.
To navigate through the bustling streets and congested roads, it is crucial to be aware of your surroundings and employ defensive driving techniques. Keep a safe following distance, use your mirrors frequently, and anticipate the actions of other drivers.
Signal your intentions early and make lane changes smoothly. Stay focused and avoid distractions such as using your phone or eating while driving. Observe traffic laws and be mindful of pedestrians and cyclists.
Troubleshooting Common Issues
If you’re looking to troubleshoot common issues with your car’s exterior, there are several key points to focus on.
Dealing with swirl marks is a frustrating problem, but with the right techniques, you can effectively deal with them and restore your car’s shine.
Prevention and correction are essential to maintaining a flawless finish. Learning how to remove scratches like a pro will give your car a showroom-worthy appearance.
Additionally, understanding practical techniques and how to battle oxidation will help you keep your car looking its best for years to come.
Dealing with Swirl Marks
One way to address swirl marks on your car is by using a specialized polishing compound. Swirl marks are fine scratches on the surface of the car’s paint, usually caused by improper washing or drying techniques.
To remove these marks, you will need a dual-action polisher, a foam pad, and a high-quality polishing compound. Start by thoroughly washing and drying your car to remove any dirt or debris.
Next, apply a small amount of the polishing compound onto the foam pad. Using the dual-action polisher, work the compound into the affected areas in a back-and-forth motion. Be sure to apply consistent pressure and keep the polisher moving at a moderate speed.
Afterward, wipe away any excess compound with a clean microfiber cloth. Repeat the process as needed until the swirl marks are no longer visible.
Prevention and Correction
To prevent swirl marks on your vehicle, regularly use a microfiber cloth for gentle and effective cleaning.
Swirl marks are tiny scratches that can occur on the paint surface when dirt and debris are not properly removed.
Microfiber cloths are designed to trap and lift dirt particles, minimizing the risk of scratching the paint.
When using a microfiber cloth, make sure to apply light pressure and use a back-and-forth motion. Avoid circular motions as they can create swirl marks.
Additionally, it is important to regularly wash and dry your microfiber cloth to remove any trapped dirt or debris.
Removing Scratches Like a Pro
Removing scratches can be easily achieved by using a scratch remover product that is specifically designed for automotive paint. These products contain special abrasive compounds that gently remove the scratches from the surface of your car’s paint.
To start, make sure the affected area is clean and dry. Apply a small amount of the scratch remover product onto a clean microfiber cloth or applicator pad. Gently rub the product onto the scratch in a back and forth motion, applying slight pressure.
Continue this process until the scratch is no longer visible. Afterward, wipe off any excess product and inspect the area to ensure the scratch has been effectively removed.
Practical Techniques
Now that you know how to remove scratches like a pro, let’s move on to some practical techniques for polishing your car. These techniques will give your car a professional finish and make it shine like new.
First, start by washing your car thoroughly to remove any dirt or debris. Then, apply a high-quality car polish to a clean, dry microfiber cloth. Using circular motions, apply the polish to your car’s surface, working in small sections at a time.
Once the polish has been applied, use a separate clean microfiber cloth to buff the surface until it’s smooth and shiny. Remember to always follow the manufacturer’s instructions and use the appropriate products for your car’s paint type.
Battling Oxidation
You can combat oxidation on your vehicle’s surface by regularly applying a protective wax coating. Oxidation occurs when the paint on your car’s surface is exposed to oxygen and begins to break down, causing a dull and faded appearance.
By applying a protective wax coating, you create a barrier that shields the paint from harmful elements and prevents oxidation. Look for a high-quality wax product that contains UV inhibitors and polymers, as these ingredients provide long-lasting protection.
Before applying the wax, thoroughly clean and dry your vehicle to remove any dirt or debris that could affect the wax’s adhesion. Use a soft cloth or foam applicator to evenly apply the wax in a circular motion, working in small sections.
Allow the wax to dry, then buff it off with a clean microfiber cloth to reveal a shiny and protected surface. By regularly applying wax, you can maintain the appearance and longevity of your vehicle’s paint, giving you a sense of pride and belonging.
Strategies for Restoration
To bring back the shine and vibrancy to your vehicle’s surface, consider using a compound that effectively restores the paint’s luster and removes any imperfections. Polishing your car is a crucial step in maintaining its appearance and protecting the paint from further damage.
When selecting a polishing compound, look for one that contains fine abrasive particles to gently remove oxidation, scratches, and swirl marks. Ensure that the compound is specifically designed for your vehicle’s paint type to avoid any potential damage.
Before applying the compound, thoroughly clean and dry the car’s surface. Use a polishing pad or applicator to evenly distribute the compound, working in small sections at a time. Apply gentle pressure and follow the manufacturer’s instructions for optimal results.
After polishing, use a clean microfiber cloth to wipe away any residue and reveal a glossy, restored finish. Remember to always follow proper safety precautions and work in a well-ventilated area.
With the right compound and technique, you can achieve a professional-grade restoration and be proud of your vehicle’s renewed shine.
Frequently Asked Questions
What is the difference between waxing and polishing a car?
Waxing and polishing are two different steps in the car detailing process. Polishing is the act of removing imperfections from the car’s paint, such as swirl marks or light scratches. It involves using an abrasive compound to gently smooth out the surface and restore its shine. Waxing, on the other hand, is the process of applying a protective layer of wax to the surface of the car. This layer acts as a barrier between the paint and the elements, helping to prevent damage and maintain the vehicle’s shine.
How often do I need to polish my car?
The frequency of polishing your car depends on various factors, such as the condition of the paint, frequency of use, and your personal preferences. Generally, it is recommended to polish your car once or twice a year to maintain its shine and protect the paint. However, if your car is exposed to harsh elements or shows signs of paint defects, you may need to polish it more frequently.
How can I learn how to polish a car?
Learning how to polish a car can be done through various resources. You can watch tutorial videos online, read car detailing guides, or even attend car detailing workshops or classes. Practice is key when it comes to polishing, so start with a small section of your car and gradually work your way up to the entire vehicle.
Can polishing the car help to remove paint defects?
Yes, polishing the car can help to remove paint defects such as swirl marks, light scratches, and oxidation. The abrasive compound in the polish works to gently smooth out the surface of the paint, effectively removing or reducing the appearance of these imperfections.
How do I polish the paint without damaging the surface?
To polish the paint without damaging the surface, it is important to use the correct technique and tools. Use a clean polishing pad and apply even pressure while working the polish onto the surface. Avoid using excessive pressure or staying in one spot for too long, as this can cause heat buildup and potentially damage the paint. Always follow the instructions provided by the polish manufacturer and use products that are suitable for your car’s paint type.
How can I get the best results when polishing my car?
To get the best results when polishing your car, here are a few tips: 1. Ensure your car is clean and dry before starting the polishing process. 2. Use a quality polish that is suitable for your car’s paint type. 3. Work in small sections and apply the polish using circular or back-and-forth motions. 4. Use a clean microfiber cloth to wipe off any residue after polishing. 5. Apply a coat of wax to protect the freshly polished paint and enhance its shine.
Should I hand polish or use a machine polisher?
Both hand polishing and using a machine polisher have their advantages. Hand polishing allows for more control and can be a good option for smaller areas or hard-to-reach corners. On the other hand, using a machine polisher often yields better results, especially for larger areas or heavily damaged paint. It is important to choose a method that you are comfortable with and suits the condition of your car’s paint.
How often should I wax my car?
It is recommended to wax your car on a regular basis to maintain its shine and protect the paint. How often you wax your car depends on factors such as the type of wax used, the climate you live in, and how frequently you wash your car. As a general guideline, waxing your car every three to four months is a good practice.
Can I use any polishing pad on the market?
No, you should use a polishing pad that is suitable for the type of paint you have on your car. Different paints require different levels of aggressiveness in the polishing process. It is essential to choose a pad that matches the needs of your paint to achieve the desired results and avoid potential damage.
Final Thoughts
So there you have it, you now know how to polish your car like a pro.
By understanding your car’s paint and gathering the right tools, you can achieve a showroom shine.
Preparing your vehicle and choosing the right car polish are crucial steps in the process.
Mastering polishing techniques and following the step-by-step process will ensure a thorough and effective polish.
Don’t forget the finishing touches and always maintain your car’s shine.
With these tips, your car will always look its best.