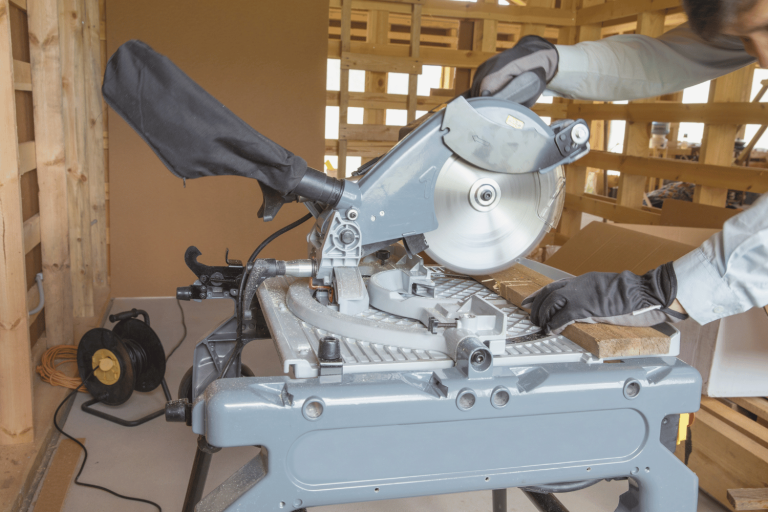
How to Use a Router for Precision Woodworking
Are you ready to take your woodworking skills to the next level? Using a router can help you achieve precision and intricacy in your designs, but it may seem daunting at first. Fear not, as this article will guide you through the basics of using a router for precision woodworking.
First, let’s start with understanding what a wood router is. A wood router is a versatile tool that can create intricate designs and patterns on wood surfaces. There are various types of routers available, each with its own features and benefits. By learning about the different types and their uses, you’ll be able to choose the best one for your project needs.
So let’s dive in and discover how to use a router like a pro!
Key Takeaways
- Routers are versatile tools that can create unique designs and intricate patterns using different router bit shapes.
- Safety and maintenance are important when using a router, including wearing PPE, regular inspection and maintenance, and disconnecting power before changing bits.
- Proper use of a router involves selecting the appropriate router bit, setting the depth, clamping the material, and using guide fences for straight or curved cuts.
- Regular maintenance is necessary for a router to continue operating properly, and following the manufacturer’s instructions is crucial.
Understanding the Type of Router and Parts of a Router
So you’re interested in precision woodworking and want to learn more about wood routers? Well, a router is a versatile tool that can help you create unique designs and intricate patterns on your woodworking projects.
There are different types of wood routers available, including fixed-base and plunge routers, each with its own advantages and disadvantages.
Understanding the key components and features of a wood router, such as the collet and shank, can help you use it effectively for your projects.
Definition and purpose of a wood router
A router is a powerful and versatile woodworking tool that can help you create unique designs and intricate patterns on your projects. It’s a power tool that uses different types of router bits to cut, shape, and carve wood materials with precision. Whether you’re making grooves, decorative edges, or flush trims, a router can help you achieve the desired result.
One of the most popular types of routers is the plunge router which provides greater ease and control when making cuts. To use it effectively, clamp the target material securely in place and clear the immediate area of people or pets before starting. Always wear appropriate personal protective equipment (PPE) such as safety glasses to protect your eyes from flying debris.
Remember to follow safety tips and manufacturer’s instructions for proper use of this powerful tool. In the next section, we’ll explore different types of wood routers (e.g., fixed-base, plunge) in more detail.
Different types of wood routers (e.g., fixed-base, plunge)
If you’re looking to expand your woodworking tool collection, you should consider adding a wood router. There are different types available, such as fixed-base and plunge routers, that cater to your specific needs and preferences.
Here are some things to keep in mind when choosing the type of router that’s right for you:
- Fixed-base routers are great for beginners who want an affordable option. They’re easy to control and can handle most basic routing tasks.
- Plunge routers provide greater ease and precision when making cuts since they allow you to start the cut at any point on the material. They’re also great for creating grooves or mortises.
- Trim routers are smaller but powerful handheld routers that specialize in cutting thin pieces of wood or trimming edges.
- Router tables offer better accuracy and control when routing larger pieces of wood. They also allow you to make more precise cuts without having to hold the router by hand.
When choosing a type of router, consider what kind of projects you’ll be working on most often.
Learning how to use a router is an important part of precision woodworking. With the right type of router, you can create intricate designs, decorative edges, and joints with ease.
In the next section, we’ll take a closer look at key components and features of a wood router so you can get started on your next routing project!
Key components and features of a wood router
When choosing your wood router, it’s essential to know the key components and features that make up this versatile tool. The shank is the part of the cutter that fits into the collet, which is then tightened by a wrench. The jig is an accessory that helps guide your cuts for precision results. It’s also important to follow safety tips when using routers, such as wearing protective gear and disconnecting power before changing bits.
One feature that sets plunge routers apart from fixed-base ones is their ability to adjust the depth of cut while in use. This makes them ideal for creating intricate designs and patterns with templates.
Additionally, some routers may come equipped with built-in dust collection systems for cleaner work areas. With these features in mind, you can choose a router that best suits your woodworking needs and projects.
Moving forward, let’s explore router bits and accessories for even more possibilities in precision woodworking.
Router Bits and Accessories
Now that you’ve got a basic understanding of routers, it’s time to delve into router bits and accessories.
You’ll learn about the different types of router bits and their uses, so you can select the appropriate one for your woodworking task.
Additionally, we’ll give you an overview of some essential router accessories like edge guides and templates that will help you achieve precision and accuracy in your work.
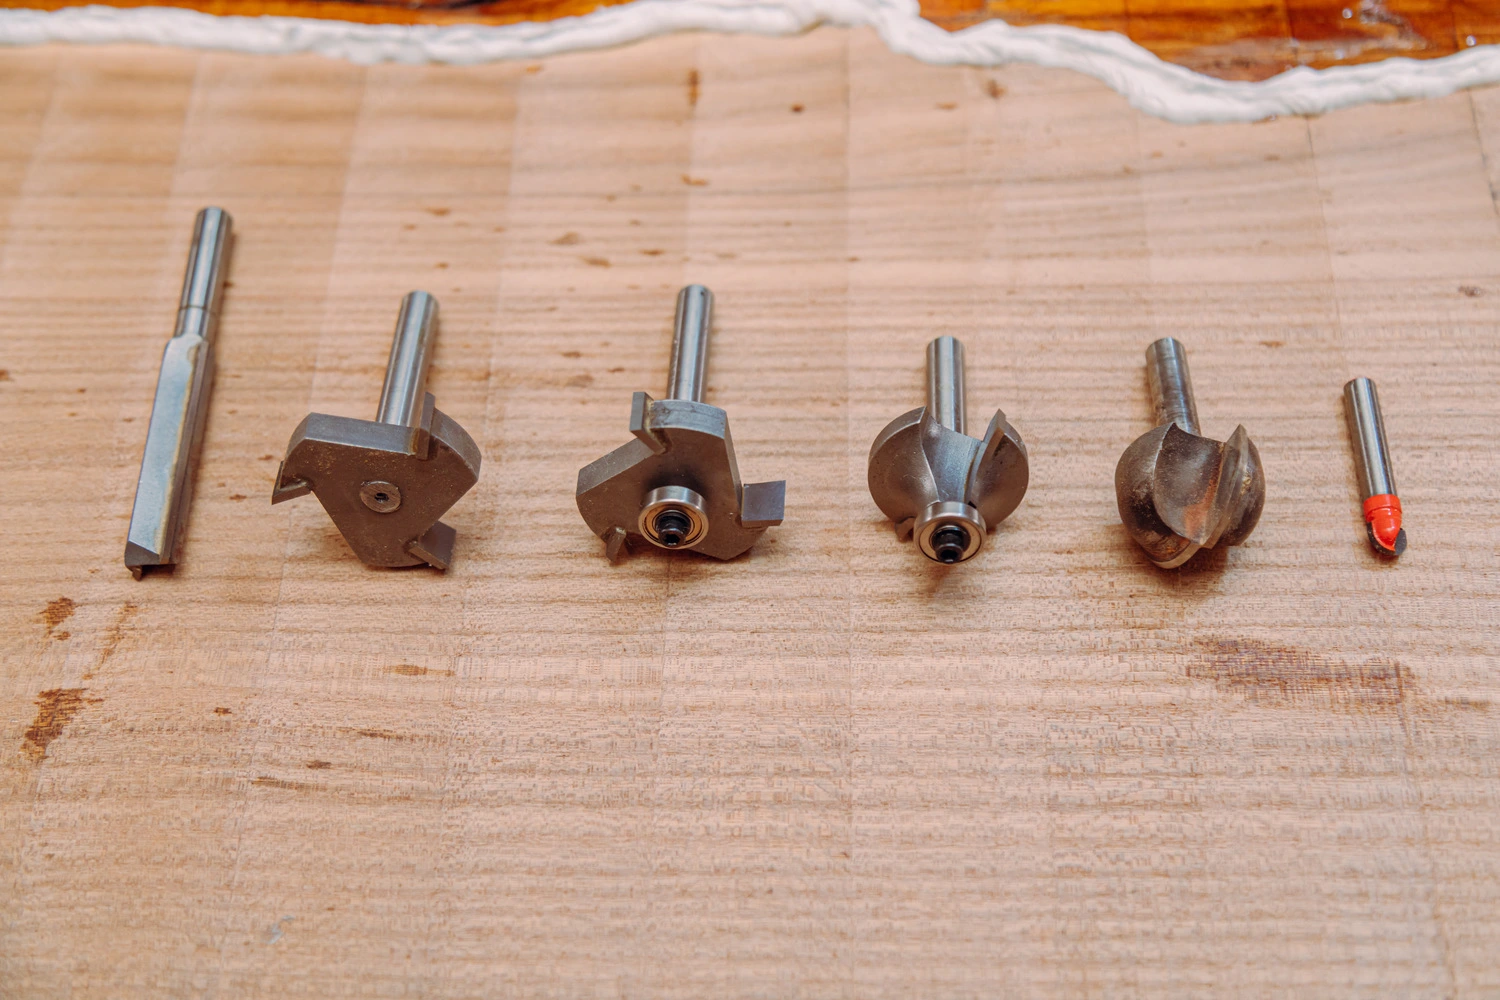
Types of router bits and their uses
Learn about the various types of router bits and their uses for creating unique designs and intricate patterns. Use a decorative edge bit for adding flair to your woodworking projects or a straight bit for making precise cuts.
For grooves in wood, use a groove cutter bit that can be adjusted to create different widths. To add detail to the edges of your piece of wood, use a chamfer bit that can make beveled edges at varying angles.
It’s important to note that when using any type of router bit, always follow router safety tips such as keeping a firm grip on the router and wearing appropriate personal protective equipment. When routing along the perimeter or interior cut, move the router clockwise from left to right.
As you become more comfortable using each type of router bit, you’ll be able to select the appropriate one for different woodworking tasks with ease.
Selecting the appropriate router bit for different woodworking tasks
To achieve unique designs and intricate patterns in your woodworking projects, you’ll want to consider selecting the appropriate router bit for each task based on your desired outcome. The type of bit you use will affect the edge that is cut, and choosing the right one can make all the difference in achieving precision and professionalism.
Here are three things to keep in mind when selecting a router bit:
- Consider the depth of cut you need. A plunge bit is great for starting cuts at any point on the material’s surface without pre-drilling, while a straight-cut or flush-trim bit works best for cutting along the edge of a workpiece.
- Think about technique. Some bits are designed specifically for certain techniques or tasks, such as creating decorative edges or making grooves for joints.
- Don’t forget safety. Always consider what protective gear is necessary when working with different types of bits.
With these factors in mind, you’ll be able to select router bits that work best for your project needs while also prioritizing safety measures.
Next, we’ll take a look at an overview of router accessories (e.g., edge guides, templates) that can further enhance your precision woodworking skills.
Overview of router accessories (e.g., edge guides, templates)
Enhance your woodworking skills and achieve precision with the help of router accessories like edge guides and templates. These tools can guide the router along a straight line, curve, or custom shape, ensuring accurate and consistent cuts every time.
Edge guides attach to the base of the router and can be adjusted to create different distances from the edge of the material. Templates are pre-cut shapes made from materials such as acrylic or wood that can be attached to the workpiece for routing intricate designs.
Using a router table is another way to improve precision in woodworking. A router table provides a large surface area for supporting larger pieces of wood and allows you to easily adjust cutting depth with more accuracy than when using a handheld router.
When using an edge guide or template on a router table, make sure that you have securely clamped down both the workpiece and accessory before beginning routing. With these tips and techniques in mind, you’ll be able to create stunning projects with ease by simply adding some essential accessories to your collection.
Now, let’s move on to setting up the wood router itself.
Setting Up the Wood Router
When setting up your wood router, it’s important to choose the right one for your project. You’ll need to install and adjust the router bits, ensuring they are secure and in the correct position.
Adjusting the depth of cut is also crucial for achieving precision cuts, and you should always take care to securely clamp down your wood and clear the work area before beginning.
Choosing the right router for your woodworking projects
You’ll want to consider which type of router is best suited for your precision woodworking projects based on your skill level and budget. Here are a few things to keep in mind when choosing the right router:
- Fixed-base routers are great for beginners because they’re easy to use and cost less than other types of routers. They’re also perfect for making straight cuts and grooves.
- Plunge routers provide greater ease and control, making them ideal for intricate designs and patterns that require more precision.
- Trim routers are smaller than fixed-base or plunge routers, making them better suited for cutting thin pieces such as laminate or veneer.
- Router tables improve control and accuracy by allowing you to clamp down your material while guiding the router bit through it.
When selecting a router, make sure you choose one with the appropriate bit shape for the job at hand. Shallow passes are recommended when routing edges, especially if you’re using decorative edge bits.
Always follow safety guidelines when operating a router to prevent accidents or injuries.
As you move onto installing and adjusting router bits, remember that choosing the right router is crucial in achieving precise results in your woodworking projects.
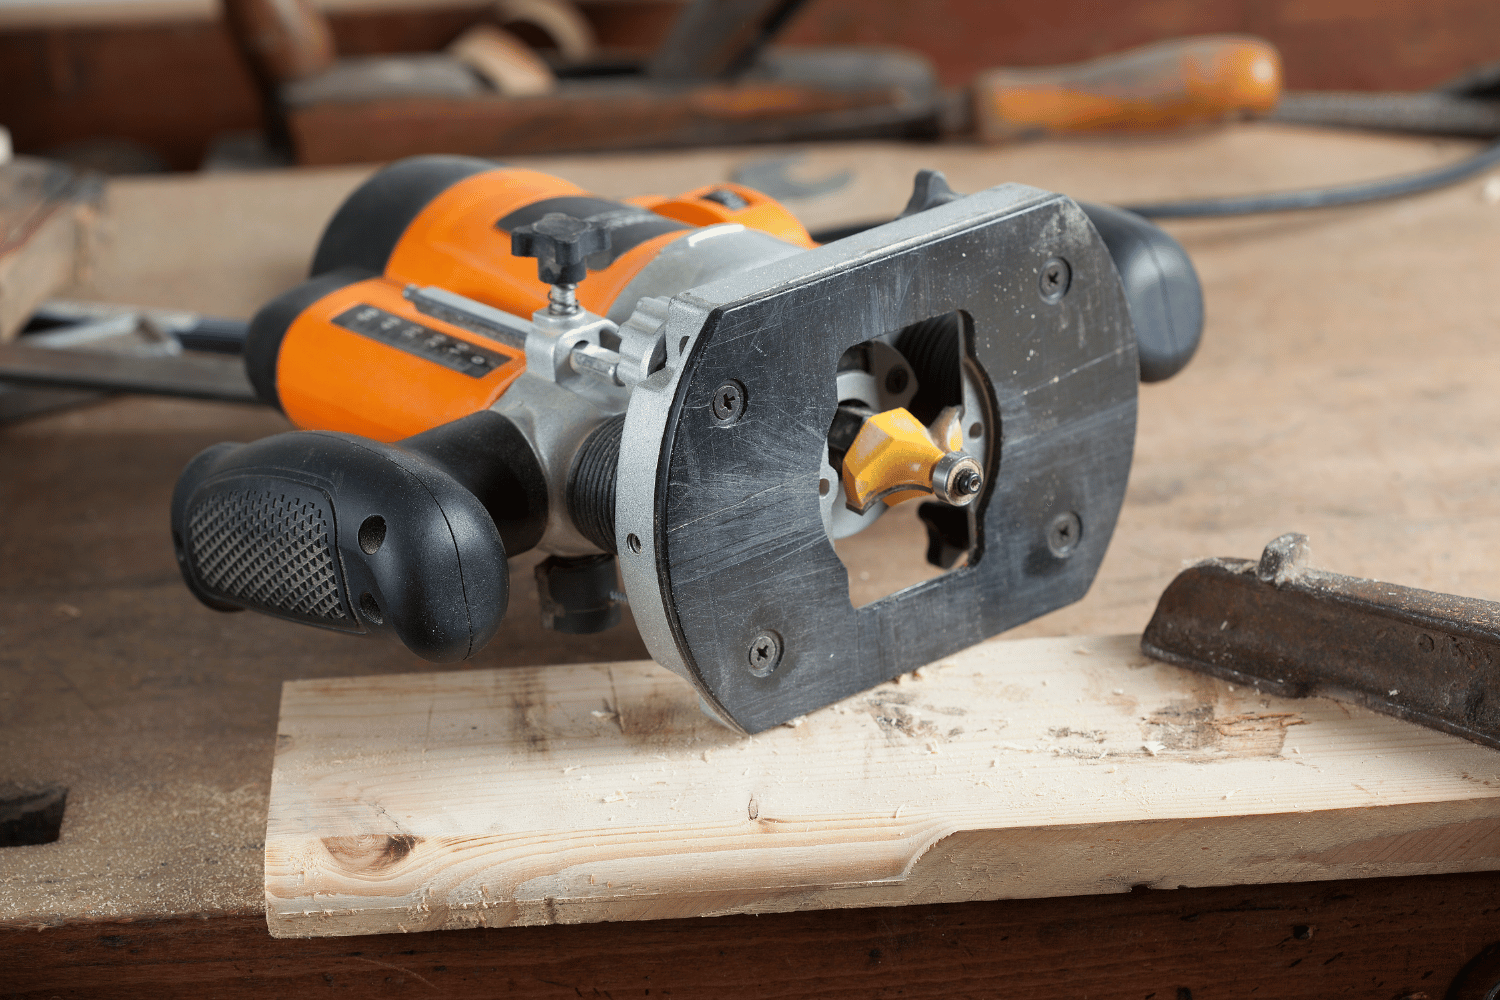
Installing and adjusting router bits
Let’s take a look at how to easily install and adjust the bits on your router for seamless and precise cuts in your projects. First, make sure you’ve got the appropriate router bit for the task at hand.
Once you’ve selected your desired bit, insert it into the collet by loosening the collet nut with a wrench and sliding in the shank of the bit until it bottoms out. Then, tighten the collet nut firmly while holding onto both sides of the router bit.
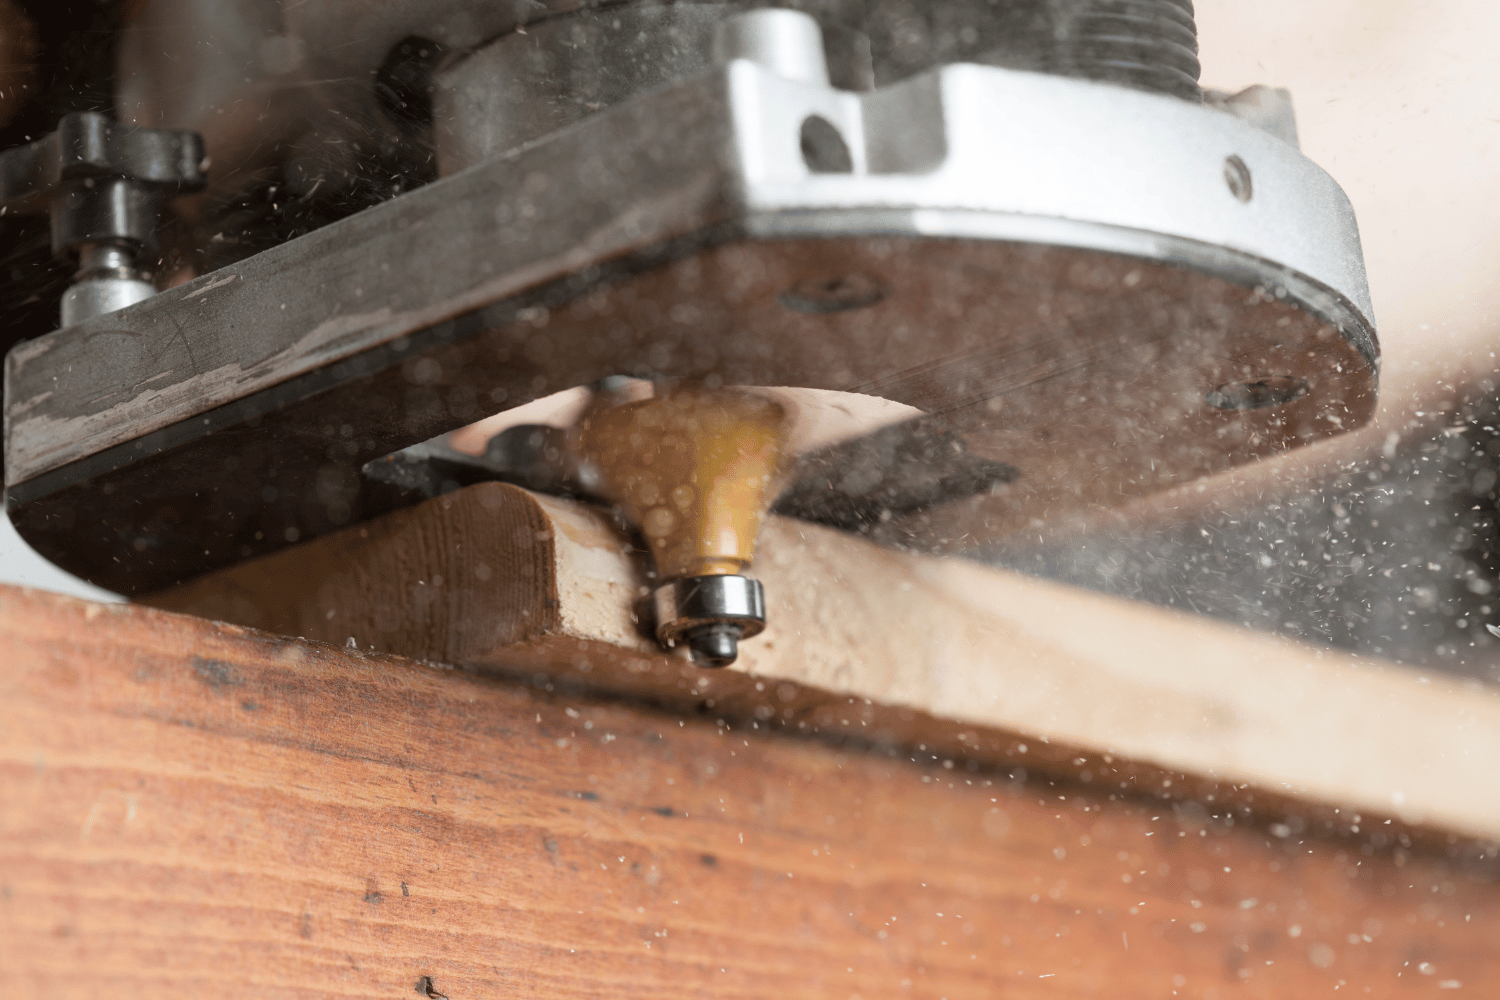
To ensure that you’re making accurate cuts with your new bit, start by setting the depth of cut to around 1/8 inch for your first pass. Run a test piece or scrap wood along the edge where you plan to make your cut using slow and steady pressure.
If needed, readjust any settings before continuing on with multiple passes until you reach your desired depth. Remember to always follow manufacturers’ instructions when setting up and using the router to avoid accidents or damage to equipment.
Now that you’ve successfully installed and tested out your new router bit, let’s move on to adjusting its depth of cut for even more precision in your woodworking projects.
Adjusting the router’s depth of cut
Now that you’ve successfully installed and adjusted your router bit, it’s time to tackle the next step: adjusting the depth of cut. This is essential for precision woodworking because it determines how much material is removed with each pass.
To adjust the depth of cut, start by unplugging your router and loosening the locking mechanism. If you’re using a plunge router, lower the bit until it touches the surface of your wood scrap. Lock it in place and raise it to your desired depth.
For fixed-base routers, use a table saw or straight edge as a guide to set your desired depth before tightening the locking mechanism.
Once you’ve made these adjustments, make sure to clean any debris from your workspace so you can achieve clean cuts without any interference. Securing the wood and work area is important for both safety and accuracy when using a router.
Securing the wood and work area
Securing the wood and work area is crucial for ensuring safe and accurate use of the router. Before you begin, make sure to clamp down your piece of wood securely onto a workbench or table. This will prevent it from moving around as you work and causing any unwanted mistakes or injuries.
Additionally, if you’re working with a smaller piece of wood that can’t be clamped down, make sure to hold it firmly with your non-dominant hand while keeping your fingers away from the path of the router bit.
It’s important to also clear out any debris or dust from both the slot where the router bit sticks out and the edge of the material before beginning. Any loose material can cause vibrations or blockages that can lead to accidents.
Lastly, ensure that your power cord is tucked safely away so it won’t get in your way or become tangled up as you move the router around. By taking these precautions, you’ll be able to work safely and confidently with your router for precision woodworking.
As you move on to basic router techniques, remember that securing your workspace remains just as important throughout every step of this process.
Basic Router Techniques – Learn How to Use a Router
In this section, we’ll cover some basic router techniques that will allow you to create unique and intricate designs. Learn how to shape and profile edges, route dados and grooves, and use decorative patterns for added flair.
You’ll also discover how to utilize a wood router for various joinery techniques.
Get ready to unleash your creativity with these essential router skills!
Edge shaping and profiling
To achieve precise edge shaping and profiling with your router, you’ll want to choose the appropriate bit shape and adjust the depth accordingly before clamping down your workpiece. For decorative edges, consider using a router with two handles for added control. Make sure to use sharp router bits for clean cuts and run the router along the wood in a counterclockwise direction.
Here are some tips for achieving professional results when edge shaping and profiling with a router:
- Use guide fences or jigs for consistent cuts.
- Start with shallow passes and gradually increase the depth to avoid damaging the wood.
- Avoid stopping or changing direction mid-cut to prevent uneven edges.
- Be patient and take breaks as needed to ensure precision.
Now that you’ve mastered edge shaping and profiling, let’s move on to routing dados and grooves.
Routing dados and grooves
When routing dados and grooves using a router, you’ll need to choose the right bit for the job.
A dado is a groove cut into one piece of wood that will receive another piece of wood, creating a joint.
Grooves are similar but run parallel to the grain of the wood and don’t necessarily form joints.
For these cuts, you may want to consider using a plunge router or a trim bit for greater control.
Adjusting the depth of your router bit is crucial in achieving clean cuts without tearout, so be sure to set it properly before beginning.
To make grooves with your router, use either a straight or spiral upcut bit depending on whether you want to cut with or against the grain.
You can also use specialized bits designed specifically for cutting grooves and dadoes.
Clamping down your material securely and using guide fences will help ensure accuracy when routing these types of cuts.
Keep in mind that deeper cuts should be made in multiple passes while adjusting the depth slightly each time for optimal results.
When done correctly, routing dados and grooves can create strong joints that add function and style to your woodworking projects.
As you become proficient at making precise cuts with your router, you can begin experimenting with decorative patterns and designs.
By changing out different router bits such as roundover or chamfer bits, you can easily add unique touches to edges or surfaces of your project pieces without having to resort to hand tools or sandpaper techniques.
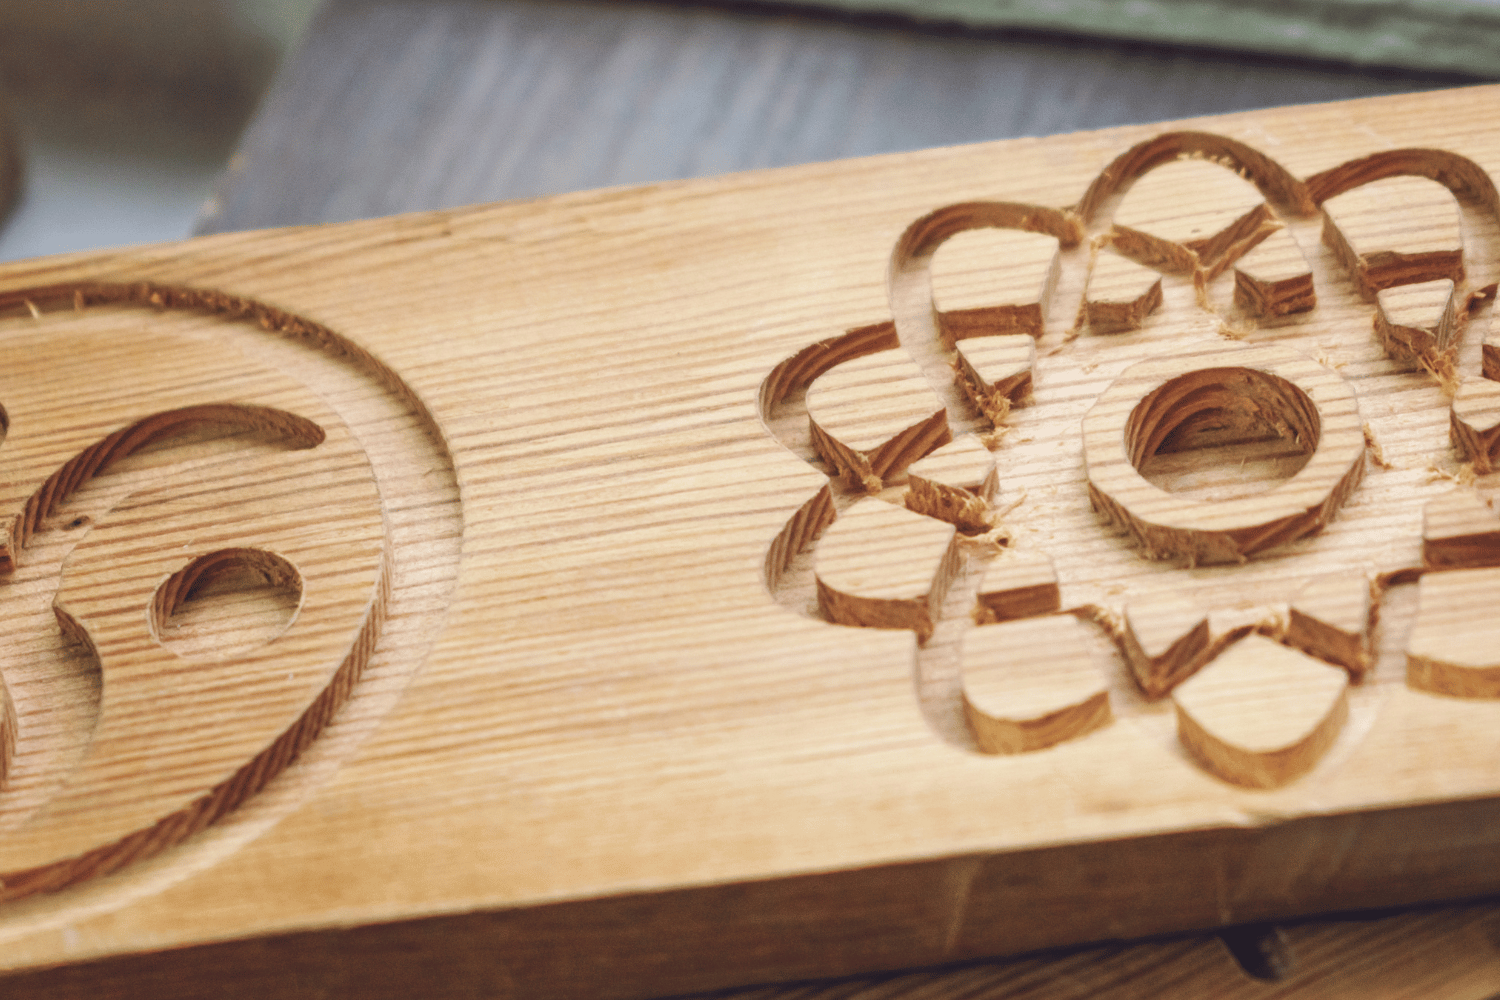
Creating decorative patterns and designs
Now that you know how to route dados and grooves, it’s time to take your precision woodworking skills up a notch by creating decorative patterns and designs with your router. With the right router bits and techniques, you can make intricate designs on furniture, cabinets, or even wooden toys.
To create decorative patterns and designs using a router, you’ll need to use a plunge router for greater control and precision. Start by selecting the appropriate router bit for your project. There are various types of router bits that can be used for different effects such as chamfering edges or creating raised panels. Once you’ve chosen the right one, set the depth of cut according to the thickness of your material and make sure the speed is suitable before beginning.
Here are three tips for creating decorative patterns and designs with your router:
- Use multiple passes: For best results, it’s important to make multiple passes over the same area rather than trying to do it all in one go.
- Experiment with different depths: By adjusting the depth setting on your plunge router, you can create varied levels of design which add more interest.
- Practice on scrap wood first: Before starting on your actual project materials, practice on scrap pieces to get comfortable with making cuts.
By following these tips and experimenting with different techniques using your plunge router and various bits, you’ll soon be able to create stunningly beautiful patterns in woodwork that look both professional-looking yet handmade in appearance.
As exciting as it may be to dive into designing projects using routers right away, understanding joinery techniques using a wood router is essential. Let’s explore this together!
Joinery techniques using a wood router
Get ready to take your woodworking skills to the next level by mastering joinery techniques with a wood router. Joinery is an essential part of precision woodworking, and using a router can make it more accurate and efficient. With the right router bits and techniques, you can create strong and seamless joints that will elevate the quality of your projects.
One of the most useful routers for joinery is a plunge router with two handles. This type of router allows you to plunge the bit into the material at any point, giving you more control over where the cut starts and ends. It also allows you to make cleaner cuts because you can adjust the speed and depth as needed.
With a plunge router, you can create dovetails, mortises, tenons, box joints, and other types of joinery with ease. Using a router for joinery takes practice, but once you master it, it’ll open up new possibilities for your woodworking projects.
Transitioning into advanced router techniques will help expand your knowledge even further.
Advanced Router Techniques
In this subtopic, you’ll learn about advanced router techniques that can take your woodworking to the next level.
You’ll discover the benefits of using a router table for increased control and accuracy in your cuts.
You’ll also explore how to use templates, guides, and jigs to create intricate designs and specialized cuts like dovetails and box joints.
Router table usage and benefits
To achieve precise and intricate cuts, you’ll want to consider incorporating a router table into your woodworking setup. A router table provides a stable surface for your router and allows you to make more accurate cuts with ease.
By clamping down your board onto the table, you can ensure that it won’t move while you work on it, resulting in cleaner cuts and better overall results. Using a router table also makes it easier to perform multiple shallow passes on the edge of a board without having to manually adjust the depth each time.
This technique is particularly useful when working with sharp router bits as it helps prevent burn marks and tear-out. Additionally, some routers come with attachments that allow them to be mounted onto the table, making the process even smoother.
With these benefits in mind, incorporating a router table into using your router can help take your woodworking skills to new heights! In the next section, we’ll explore how routing with templates and guides can further enhance your precision woodworking techniques.
Routing with templates and guides
If you want to take your precision woodworking to the next level, using templates and guides with your router can be a game-changer. Templates are pre-made patterns that guide the router bit into a specific shape or design, while guides are attachments that help keep the router on track for straight cuts. By using these tools, you can create intricate and consistent designs without the need for advanced woodworking skills.
To use templates and guides with your router, first clamp down the template or guide onto your workpiece. Then insert the appropriate router bit into your router and adjust the depth of cut according to the thickness of your material. Turn on your router and push it counterclockwise along the template or guide until you’ve completed your cut. With each pass, adjust the depth of cut until you’ve achieved the desired result.
Remember to always wear proper safety equipment and follow manufacturer’s instructions for best results.
Benefits of using templates and guides:
- Consistent results: Templates ensure precise shapes every time.
- Time-saving: Guides help keep cuts straight so you don’t have to constantly readjust.
- Versatility: Templates come in a variety of shapes and sizes so you can create endless designs.
Now that you know how to use templates and guides with your router, let’s dive into another way to enhance its capabilities with specialized jigs for even more precision work.
Router jigs for specialized tasks
Get ready to take your precision woodworking skills up a notch with the help of router jigs! These specialized tools are designed for specific tasks and can make your work more efficient and unique.
Whether you’re using a plunge router or one with two handles, there’s a jig out there that can help you achieve your desired result. Router jigs are perfect for tasks like creating mortises, cutting circles or arcs, and making perfectly straight cuts.
They provide a level of precision that is hard to achieve by hand and allow you to replicate the same cut multiple times. With the right jig and router bit combination, you’ll be able to create custom joints and decorative edges that will set your woodworking apart from others.
Now let’s move on to advanced joinery techniques (e.g., dovetails, box joints) where we’ll explore even more possibilities with your router!
Advanced joinery techniques (e.g., dovetails, box joints)
Ready to take your joinery skills to the next level? Let’s explore advanced techniques like dovetails and box joints that can be achieved with a router and specialized jigs. With precision woodworking, you can create strong and visually appealing joints that will elevate your projects to the next level.
Here are some tips for achieving these advanced joinery techniques:
Use sharp router bits: To achieve clean and precise cuts, make sure your router bits are sharp. Dull bits can cause tear-out and ruin your project.
Invest in a plunge router: A plunge router allows you to make cuts at the same depth without having to stop and adjust the bit between each cut.
Utilize specialized jigs: Jigs designed for specific joinery tasks, such as dovetail or box joint jigs, can improve accuracy while making it easier to repeat complex cuts.
Practice makes perfect: Advanced joinery techniques require practice to master, so don’t be discouraged if your first attempts aren’t perfect. Keep practicing and refining until you achieve the desired result.
Now that you’ve learned about advanced joinery techniques, let’s move on to maintenance and troubleshooting tips for keeping your router running smoothly.
Maintenance and Troubleshooting
If you want to keep your router running smoothly and avoid unnecessary repairs, it’s crucial that you clean and maintain it regularly. This includes removing dust and debris from the motor and collet, as well as lubricating moving parts.
Another important aspect of router maintenance is changing and sharpening the bits when necessary.
Finally, if you encounter common problems with your router such as overheating or poor performance, there are troubleshooting tips that can help you diagnose and fix the issue.
Cleaning and maintaining the wood router
Regular maintenance is crucial for keeping your router in good condition and ensuring precision woodworking results. This involves inspecting and cleaning the tool after each use and checking for any signs of wear or damage.
When cleaning the router, make sure to unplug it first and remove any remaining bits. Use a soft cloth to wipe down the exterior of the tool, making sure to get into all the nooks and crannies. For tougher grime or grease buildup, you can use a cleaner specifically designed for power tools.
It’s also important to maintain sharp router bits. Dull bits can cause rough or uneven cuts that compromise your project’s quality. To prevent router bit dullness, avoid using excessive force when cutting and be mindful of any debris on your workpiece that may damage the blade.
After each use, you should clean your bits with a wire brush or compressed air to remove any sawdust or resin buildup. Keeping your router in pristine condition will ensure cleaner cuts and better results every time without having to change out parts too often.
In order to do this effectively though, you need to learn how to properly change and sharpen your router bits, which we will cover in the next section.
Changing and sharpening router bits
Now that you know how to clean and maintain your wood router, it’s time to learn about changing and sharpening the router bits. The right bit is crucial for precision cutting, and having sharp bits can make all the difference in achieving clean cuts.
To start, make sure your router is unplugged before changing or adjusting any bits. Then, follow these steps
- Loosen the collet nut with a wrench and remove the old bit.
- Insert the new bit into the collet and tighten the nut securely.
- Adjust the depth of cut if necessary by adjusting the length of the bit that extends from the collet.
- Turn on your router and test out your new bit on scrap wood to ensure proper function.
If you notice dullness or chipping in your bits during use, it may be time to sharpen them using a sharpening stone.
By knowing how to change and sharpen your router bits, you’ll be able to achieve even greater precision in your woodworking projects.
But what happens when issues arise with your router? Don’t worry – we’ve got you covered.
With these tips on changing and sharpening router bits under your belt, let’s take a look at some common problems that may arise with routers and how to troubleshoot them effectively.
Common router problems and troubleshooting tips
When troubleshooting common problems with your router, you’ll want to start by checking the power source and ensuring that all cords and connections are secure.
It’s also important to check the router bits and make sure they’re sharp. Dull bits can cause splintering or uneven cuts, so it’s best to use sharp router bits for clean cuts and unique designs. If a bit is dull, it can be sharpened with a honing stone or replaced altogether.
Another common problem with routers is overheating. This can be prevented by taking breaks during use, especially when using a plunge router for extended periods of time.
Additionally, keeping the router clean and well-maintained will help prevent issues from arising in the first place. Regularly cleaning out sawdust and debris from the motor housing and air vents will ensure proper ventilation and prevent overheating.
By following these tips for troubleshooting common problems with your router, you’ll be able to achieve precision woodworking without any hiccups along the way.
Frequently Asked Questions
Can a router be used on materials other than wood?
Yes, a router can be used on other materials besides wood, such as plastic, metal, and even stone. However, it’s important to use the appropriate bit for the material and adjust the speed and depth accordingly to avoid damaging either the material or the router.
What is the difference between a plunge router and a fixed-base router?
A plunge router allows you to adjust the depth while the motor is on and provides greater control for intricate designs. A fixed-base router is easier to use for beginners and costs less. Choose based on your needs.
How do I know which router bit to use for a specific cut or design?
To choose the right router bit, consider the material and desired cut. Straight bits are great for grooves or dados, while round-over bits create decorative edges. Be sure to adjust depth and speed accordingly.
Can a router be used for joinery techniques such as dovetails or mortise and tenon joints?
Yes, a router can be used for joinery techniques such as dovetails or mortise and tenon joints. By using specialized bits and jigs, you can achieve precise cuts and create strong, durable joints in your woodworking projects.
How should I store and maintain my router when not in use?
To store and maintain your router, clean it thoroughly before putting it away. Store it in a dry place, free from dust or moisture. Regularly check the bits and replace them if they show signs of wear. Keep the manual handy for maintenance instructions.